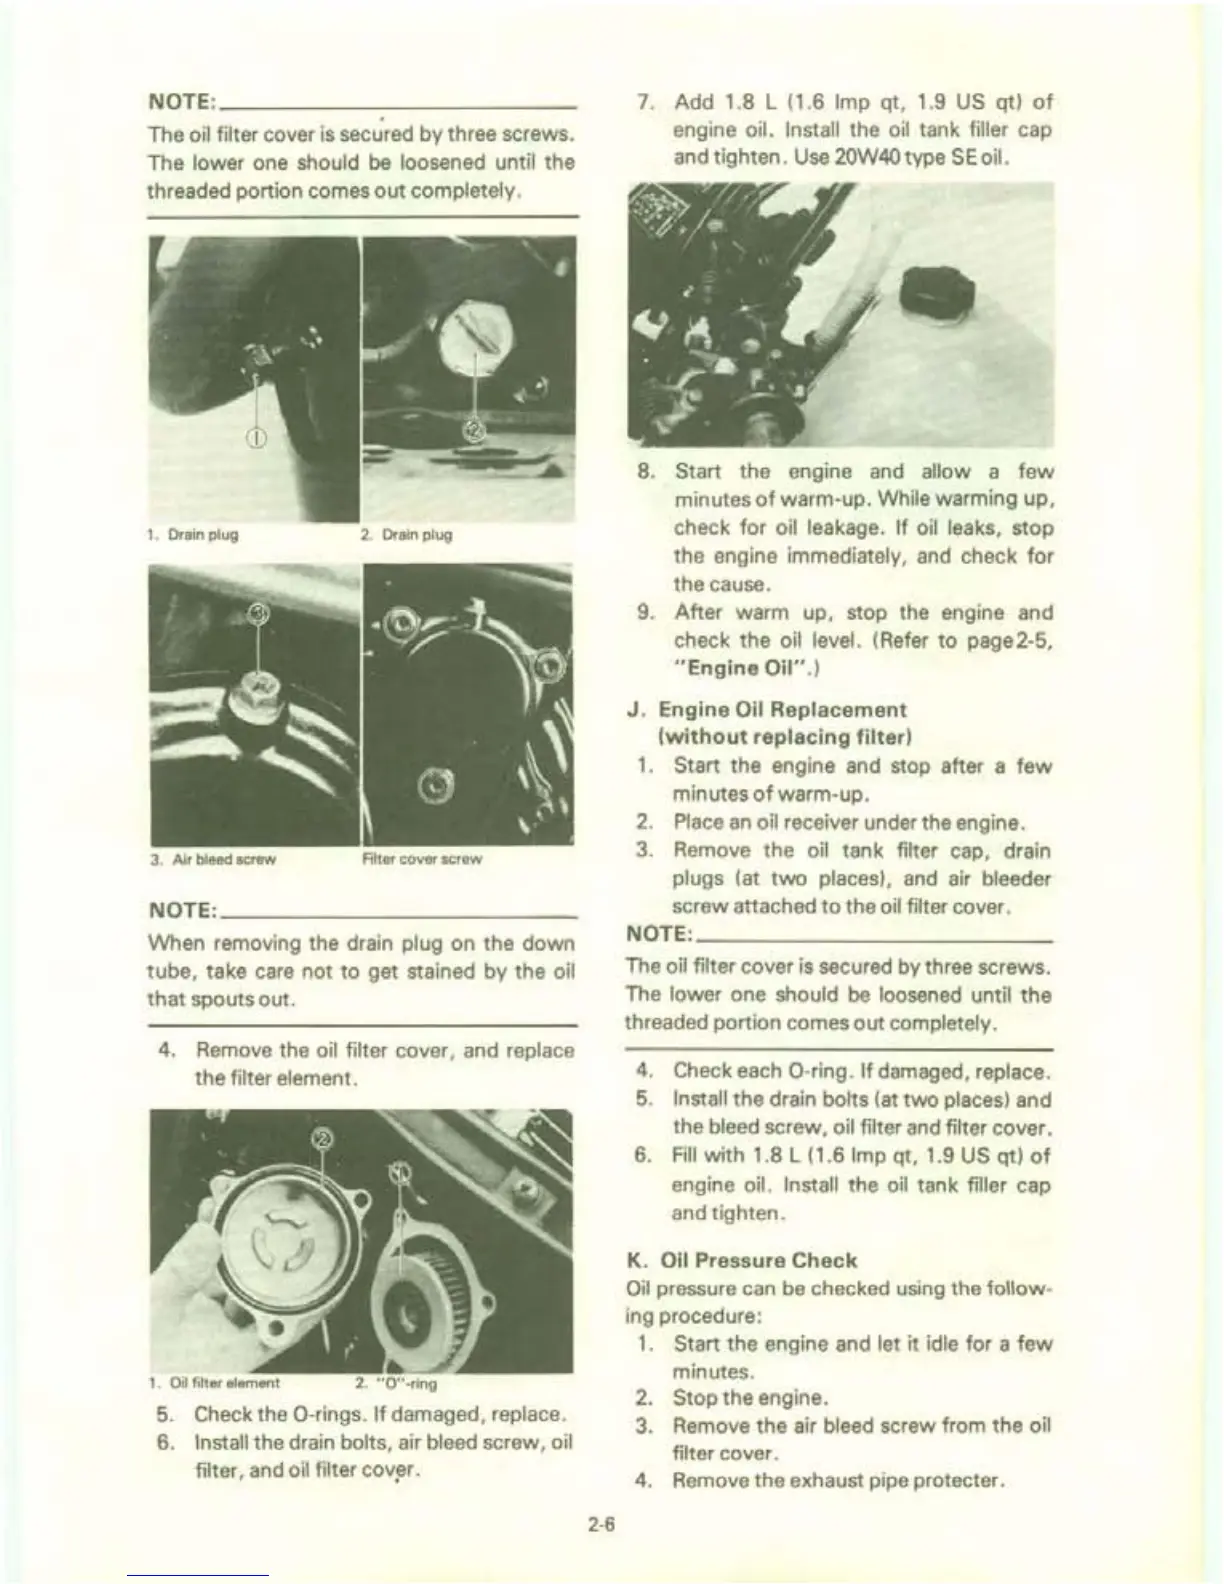
NOTE:
___________
_
The oil filter cover is secured by three screws.
The lower one should
be
loosened until the
threaded portion comes
out
completely.
1. Drain plug
2.
Drain plug
3.
Air bleed screw
RIter cover screw
NOTE:
___________
_
When removing the drain plug on the down
tube, take
care
not to get stained by the oil
that
spouts out.
4. Remove the
oil filter cover, and replace
the filter element.
5.
Check the a-rings. If damaged, replace.
6.
Install the drain bolts, air bleed screw, oil
filter, and oil filter
cov~r.
2-6
7. Add 1.8 L (1.6 Imp qt, 1.9 US qt)
of
engine oil. Install the oil tank filler cap
and tighten.
Use
20W40 type
SE
oil.
8.
Start the engine and allow a
few
minutes
of
warm-up. While warming up,
check for
oil leakage. If oil leaks, stop
the engine immediately, and check
for
the cause.
9.
After warm up, stop the engine and
check the
oil level. (Refer
to
page2-5,
"Engine
Oil".J
J.
Engine Oil
Replacement
(without
replacing
filter)
1.
Start the engine and stop after a
few
minutes
of
warm-up.
2.
Place
an
oil receiver under the engine.
3.
Remove the oil tank filter cap, drain
plugs (at
two
places), and air bleeder
screw attached
to
the oil filter cover.
NOTE:
___________
_
The oil filter cover is secured by three screws.
The lower one should
be
loosened until
the
threaded portion comes out completely.
4.
Check each a-ring. If damaged, replace.
5.
Install the drain bolts (at
two
places) and
the
bleed screw, oil filter
and
filter cover.
6.
Fill
with 1.8 L (1.6 Imp qt, 1.9 US qt)
of
engine oil. Install the oil tank filler cap
and tighten.
K. Oil Pressure
Check
Oil
pressure can
be
checked using the follow-
ing procedure:
1.
Start the engine and let it idle for a
few
minutes.
2.
Stop the engine.
3.
Remove the air bleed screw from the oil
filter cover.
4.
Remove the exhaust pipe protecter.
 Loading...