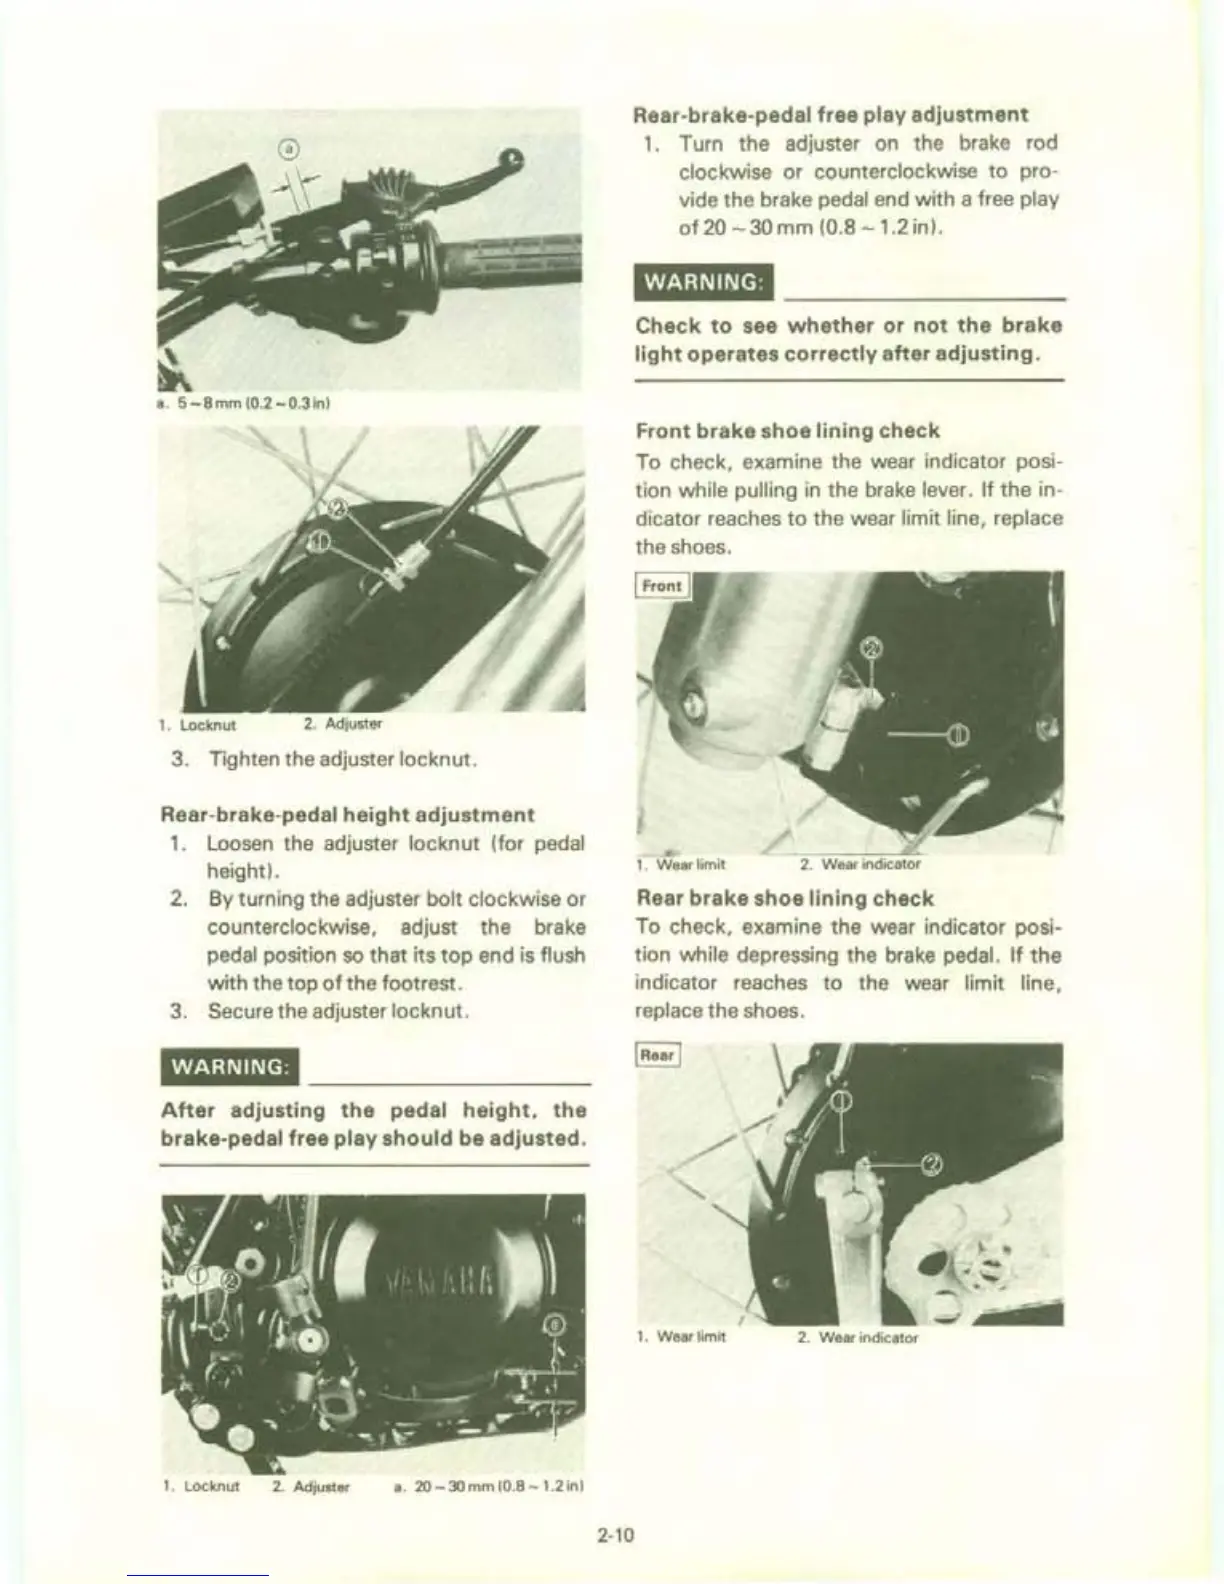
a.
5-8mm
(O
.
2-0.3inl
1.
Locknut
2.
Adjuster
3.
Tighten the adjuster locknut.
Rear-brake-pedal
height
adjustment
1.
Loosen the adjuster locknut (for pedal
height).
2. By turning the adjuster bolt clockwise or
counterclockwise, adjust the brake
pedal position
so
that its
top
end is flush
with the top
of
the footrest.
3.
Secure the adjuster locknut.
WARNING:
After
adjusting
the
pedal
height,
the
brake-pedal
free
play
should
be
adjusted.
1.
Locknut
2.
Adjuster
a.20-30mm(O.8-1
.2inl
2-10
Rear-brake-pedal
free
play
adjustment
1.
Turn the adjuster on the brake rod
clockwise or counterclockwise
to
pro-
vide the brake pedal end with a free play
of
20 - 30 mm (0.8
-1.2
in).
WARNING:
Check
to
see
whether
or
not
the
brake
light
operates
correctly
after
adjusting.
Front
brake
shoe
lining
check
To check, examine the wear indicator posi-
tion while pulling
in
the brake lever. If the in-
dicator reaches
to
the wear limit line, replace
the shoes.
1. Wear
limit
L!_
-::-:-:-;-
-:-
.."..-~.
~
2. Wear indicator
Rear
brake
shoe
lining
check
To check, examine the wear indicator posi-
tion while depressing the brake pedal.
If
the
indicator reaches
to
the wear limit line,
replace the shoes.
1. Wear
limit
2. Wear indicator