C.
Crankshaft
Installation
After
all
bearings and seals have been in-
stalled
in
both crankcase halves, install
crankshaft
as
follows:
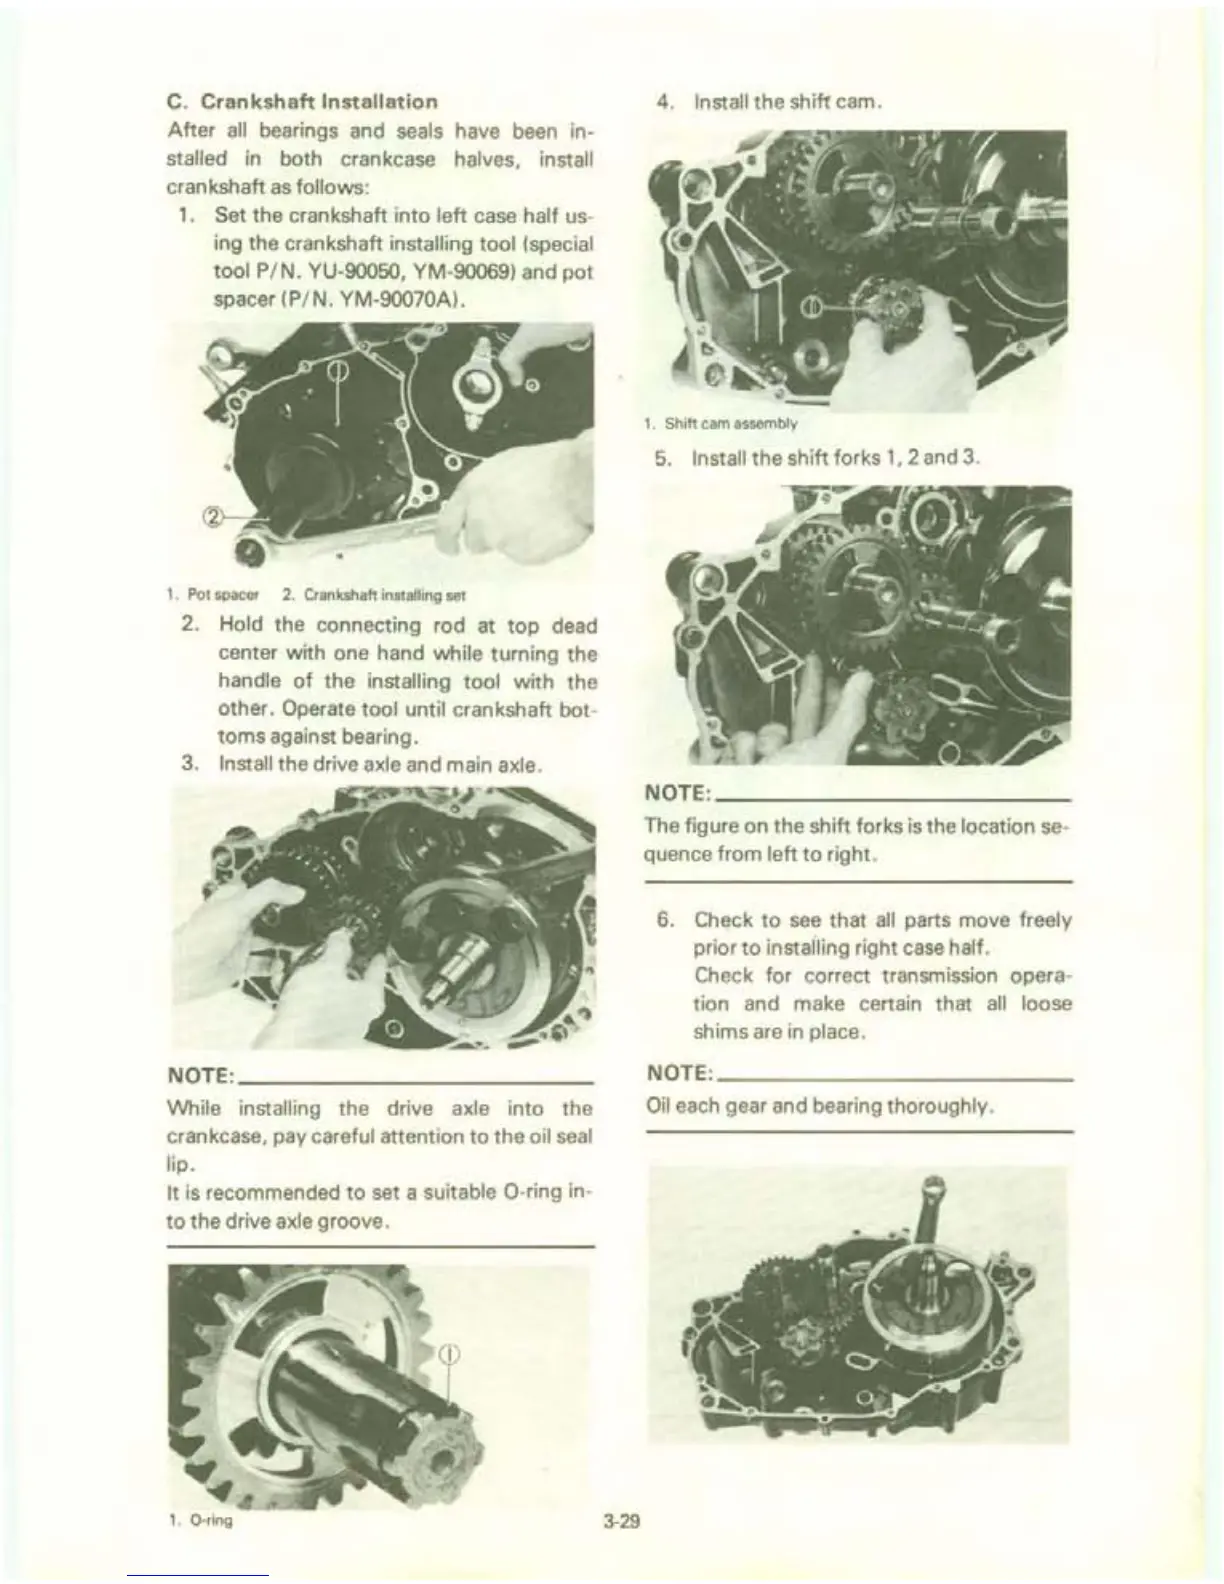
1.
Set the crankshaft into left case half
us-
ing the crankshaft installing tool (special
tool
PIN. YU-90050, YM-90069) and
pot
spacer (PIN. YM-90070A).
,.
Pot spacer
2.
Crankshaft installing set
2.
Hold the connecting rod at
top
dead
center with one hand
while turning the
handle
of
the installing tool with the
other.
Operate tool until cran kshaft bot-
toms against bearing.
3.
Install the drive axle and main axle.
NOTE:
______________________
__
While installing the drive axle into the
crankcase, pay
careful attention
to
the oil
seal
lip.
It
is
recommended
to
set a suitable O-ring in-
to
the drive axle groove.
, . O-ring
3-29
4.
Install the
sh
iff
cam.
-
, . Shift cam assembly
5.
Install the shift forks
1,
2 and
3.
NOTE:
______________________
__
The figure on the shift forks
is
the location se-
quence from
left
to
right.
6.
Ch~ck
to
see
that
all
parts move freely
prior
to
instailing right
case
half.
Check for correct transmission opera-
tion and make certain that
all
loose
shims are
in
place.
NOTE:
______________________
__
Oil
each gear and bearing thoroughly.


 To Next Page