6. MODULE/UNITREPLACEMENTPROCEDURE
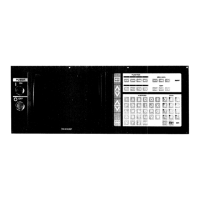
6.1 CPUUNIT
Component Name
Power supply unit CPS-
10N
Main Board JANCD-MB20
PC board JANCD-PC20
Memoryboard JANCD-MM2
Function
Input voltage: 170 to 253 ACV,
300 VA
Output voltage/current:
—
.
.
.
.
.
.
.
.
.
.
—
+5v, 10 A”+12V,1.7
–12 V, 0.3 A
● +24 V, 2.5A
Data controller
Function generator
Servo controller
Spindle interface unit
RS232C interface unit
HDLCinterface unit
Direct-in interface unit
Power supply signal
Parameter memory
Machining tape memroy
“ Built-in type PC
● CRTcontroller
● Remote 1/0 controller
“ Data controller ROM,RAM
“ Servo controller ROM
● PC ladder ROM
Cautions for Replacement
Replace it after checking
input voltage and load
short-circuit if faulty
Refer to Par. 4.5, “SUPPLY
VOLTAGECHECK.”
Whenreplacing MB208
. Parameters and machining
tape data are required
to enter again.
“ Check version no. of
function generator (ROM
#44, #45); servo control-
ler (ROM#48); and that
required ROMis mounted.
● Set SW5correctly for
selecting CRT14a/9”,
power ON/OFFand inter-
nal/external device.
. Ensure version no. of PC
manager (ROM#40);
character generator (ROM
#90); and that required
ROMis mounted.
. Ensure version no. of
data controller (ROM#00
to # ); servo controller
(ROM#36 to #37); PC
ladder (ROM#30 to #33);
and that each required
number of ROMsis mount-
ed.
–53–
 Loading...