2-11
IM 04L51B01-01EN
Operating the GX/GP
2
ShowingtheCustomDisplay(Releasenumber2andlater)
The procedure below is performed after loading a custom display.
For the procedure to load a custom display, see page 1-193 in section 1.21.6, “Loading
and Deleting Custom Displays (/CG option) (Release number 2 and later)”.
1
Press MENU.
The menu screen appears.
2
Tap the Browse tab and then Custom display.
Ifthedisplayistherstoneshown
Of the custom displays that have been assigned, the one with the smallest display number is
shown.
Ifthecurrentlyshowndisplayisnotacustomdisplay
The custom display whose display number was shown previously is shown.
Ifthecurrentlyshowndisplayisacustomdisplay
The Custom Display Selection screen appears.
3
Tap the custom display (display number) you want to show.
The custom display appears.
Operation complete
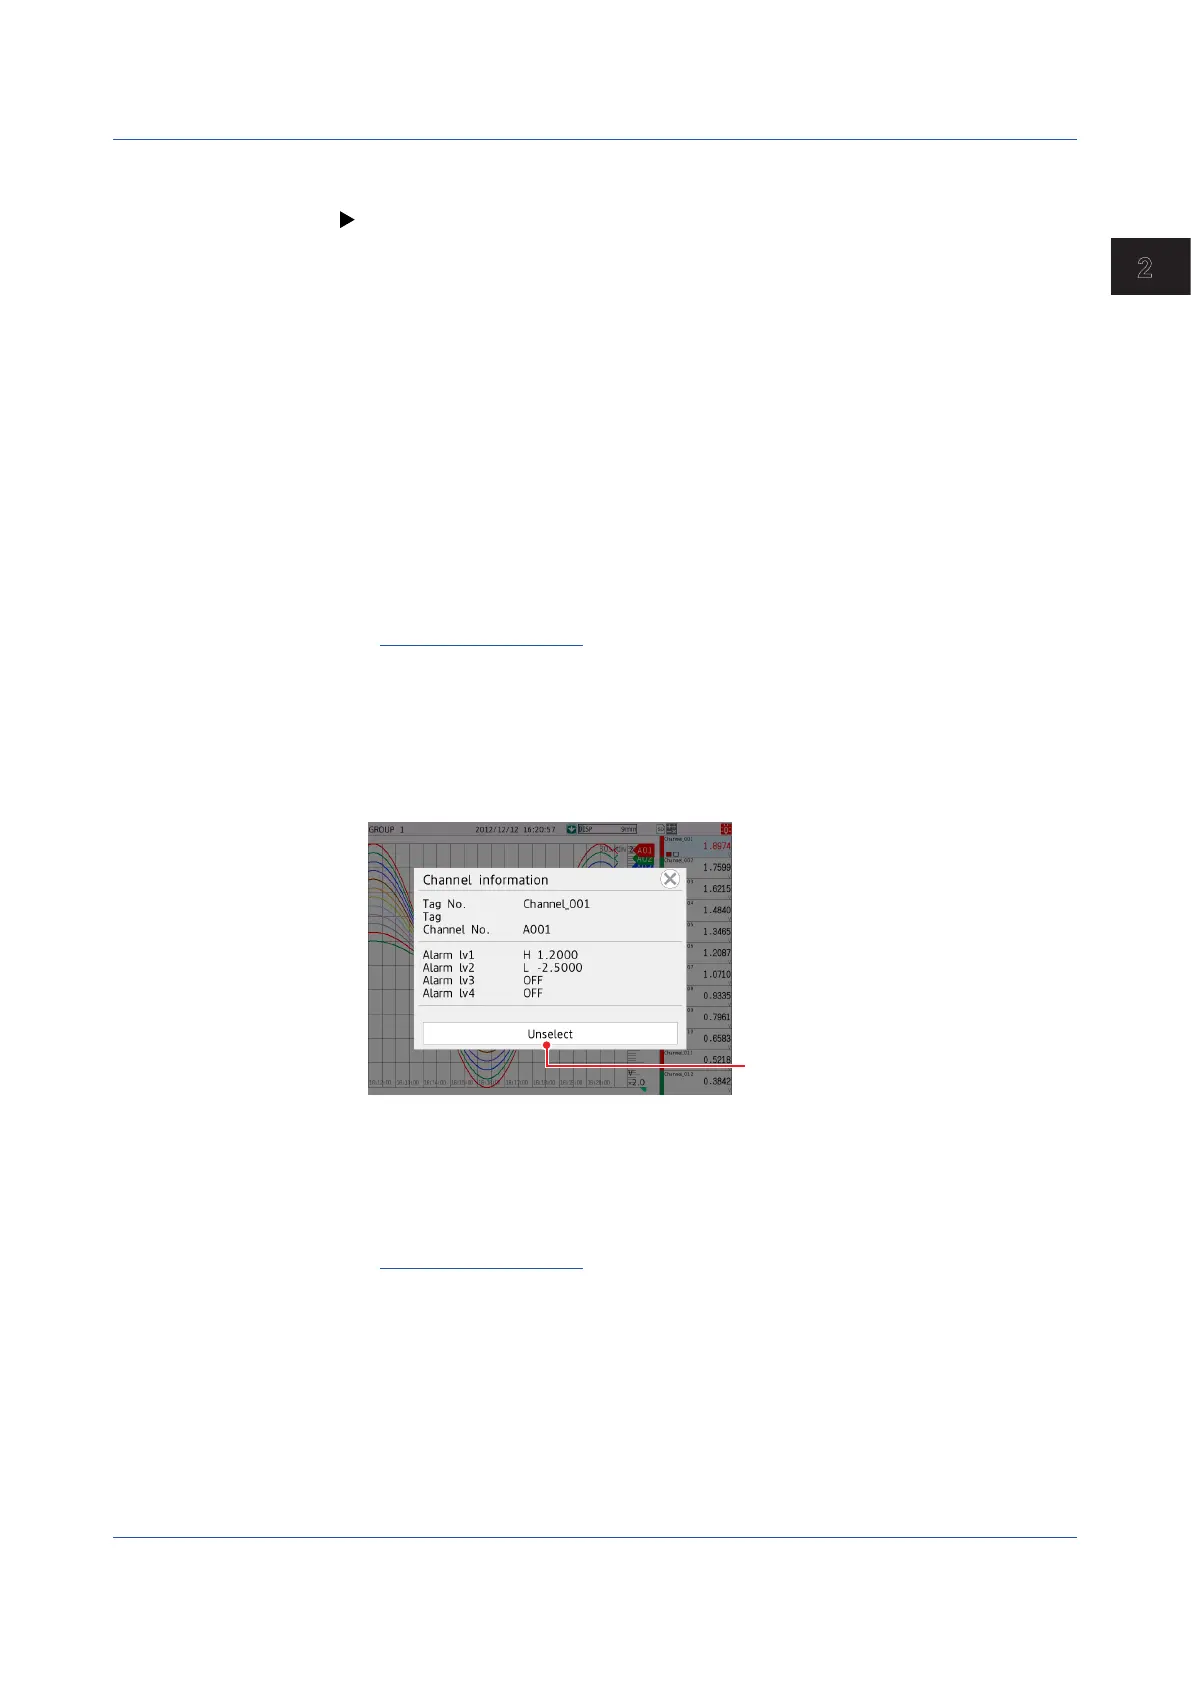
Displaying Channel Information
You can carry out this procedure on the trend, digital, bar graph, overview and report
displays.
1
Tap the channel data digital display section to display the information about the
selected channel. On the trend display, double-tap the digital display section.
The channel information screen appears.
Trend display
Returns the waveform displayed
on top to the original condition.
On the trend display, tapping the digital display section once shows the tapped waveform
on the top.
2
Tap the Close icon.
The channel information screen closes.
Operation complete
2.2 Configuration of Measured Data Display
 Loading...