IM 01C50B01-01E
5-4
5. WIRING
5.5 Wiring Cautions
(1) General-use Type and Intrinsically Safe
Type
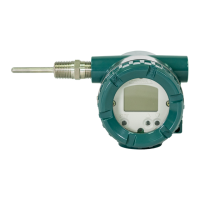
Use metal conduit wiring or a waterproof gland
(metal wiring conduit JIS F 8801) for cable wiring.
•Apply nonhardening sealant to the threads of the
wiring tap and a flexible fitting for secure water-
proofing. Figure 5.10 shows an example of wiring
on the output side. This example also applies to the
wiring on the input side.
F0510.EPS
Apply a nonhardening
sealant to the threads for
waterproofing.
Wiring conduit
Tee
Flexible fitting
Drain plug
Figure 5.10 Example of Wiring Using a Wiring Conduit
(2) JIS Flameproof Type
Wire cables through a flameproof packing adapter,
or using a flameproof metal conduit.
䊏 Wiring cable through flameproof packing
adapter for only JIS flameproof type (see
Figure 5.11)
• Use only flameproof packing adapters approved by
Yokogawa.
• Apply a nonhardening sealant to the terminal box
connection port and to the threads on the flame-
proof packing adapter for waterproofing.
F0510.EPS
Apply a nonhardening
sealant to the threads for
waterproofing.
Wiring conduit
Tee
Flexible fitting
Drain plug
Figure 5.11 Typical Cable Wiring Using Flameproof
Packing Adapter
•Measure the cable outer diameter in two directions
to within 0.1mm.
• Calculate the average of the two diameters, and use
packing with an internal diameter nearest to this
value from among the three provided (see
Table5.1).
Table 5.1 Flameproof Packing and Appropriate Cable
Outer Diameters
Wiring Port
Thread
Diameter
Identifying
Mark
Part
Number
G1/2
G9601AM
Appropriate
Cable Outer
Diameter (mm)
8 -10
10.1-12
16
16
8-10
10-12
T0501.EPS
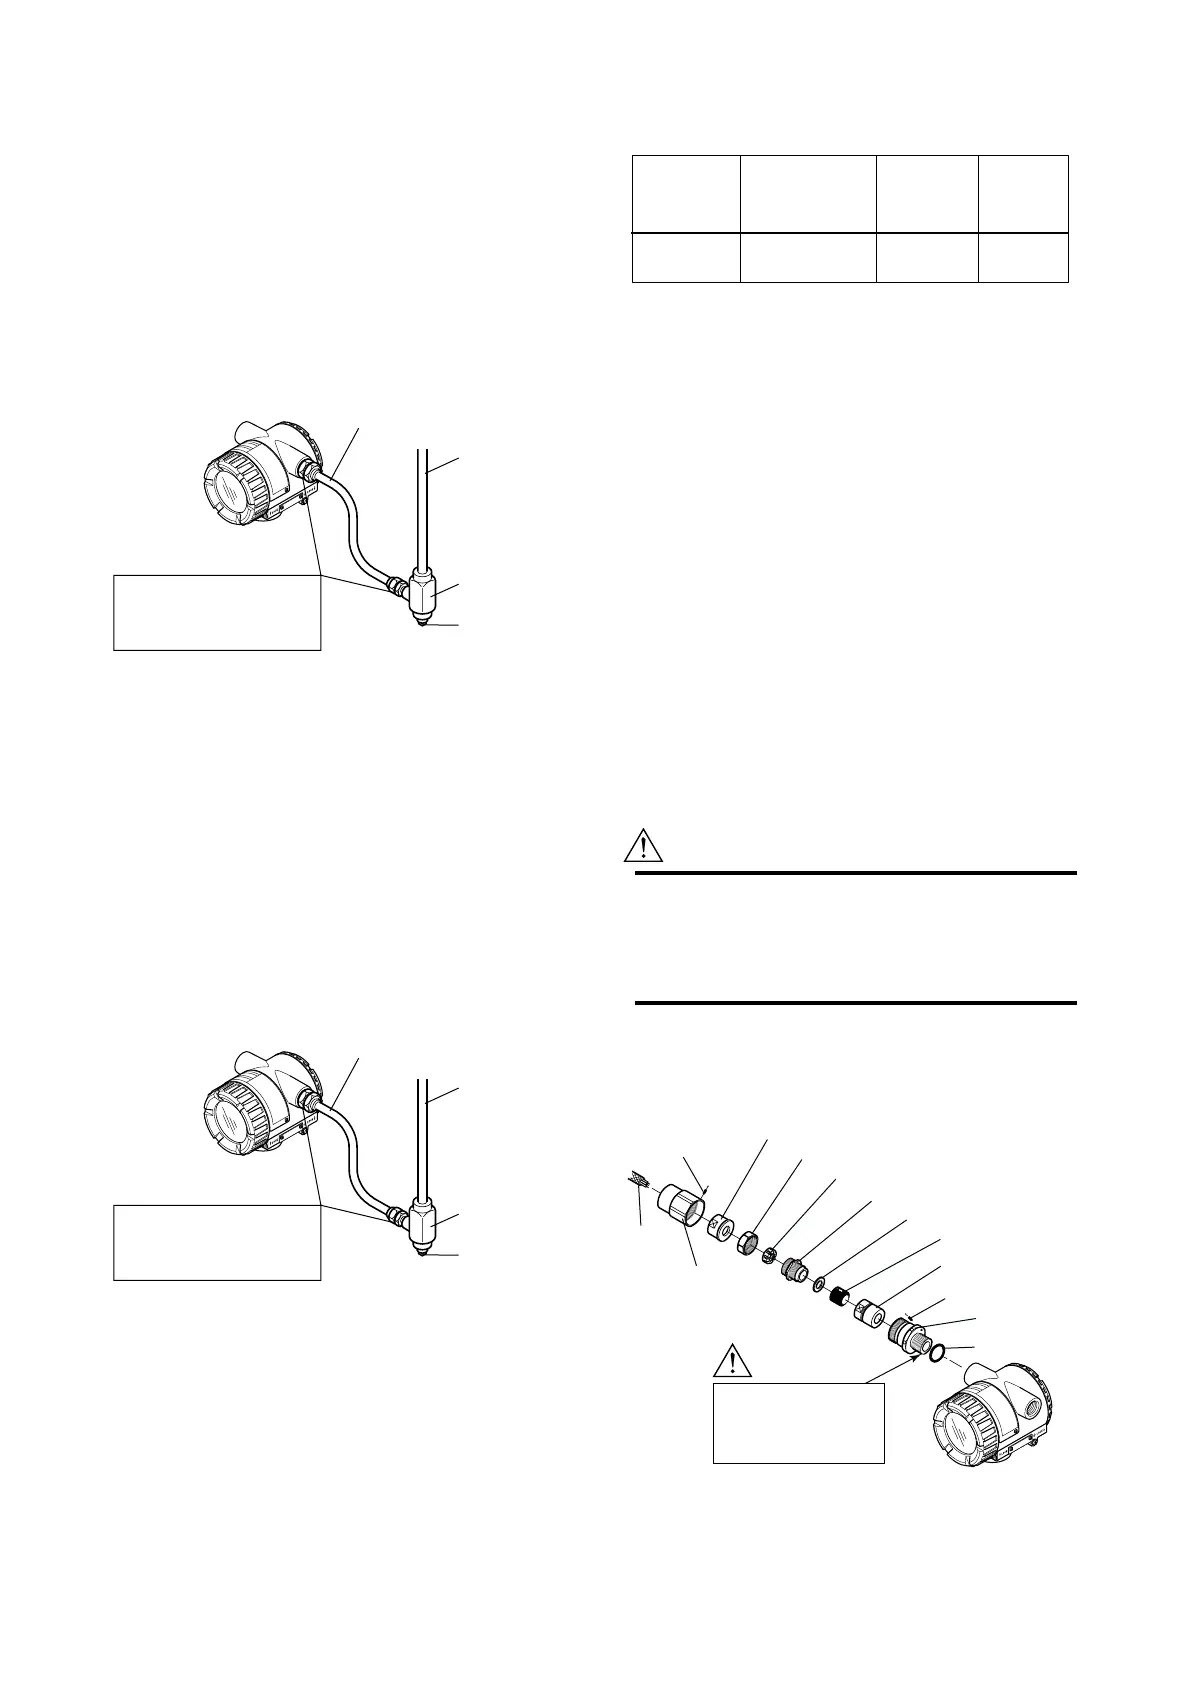
Follow the procedure below to install the flameproof
packing adapter.
1. Screw the flameproof packing adapter into the
terminal box until the O-ring touches the terminal
box wiring port (at least 6 full turns), and tighten the
lock nut.
2. Insert the cable through the union cover, the union
coupling, the gland the clamp nut, the clamp ring,
one washer, the rubber packing, and the packing
box, in that order.
3. Insert the end of the cable into the terminal box.
4. Tighten the union cover to grip the cable. When
tightening the union cover, tighten approximately
one turn past the point where the cable will no
longer move up and down. Proper tightening is
important. If it is too tight, a circuit break in the
cable may occur; if not tight enough, the flameproof
effectiveness will be compromised.
CAUTION
Tighten the union cover approximately one turn
after the point where you can no longer shift the
cable up and down by hand. Take great care in
this step, since proper tightening is very important.
5. Fasten the cable with tightening the clamp nut.
6. Tighten the lock nut on the union cover.
7. Connect the cable wires to each terminal.
Adapter body
Rubber packing
Washer
Packing box
Grand
Clamp ring
Clamp nut
Union coupling
Union cover
O-ring
Lock nut
Lock nut
Cable
CAUTION
Be sure to apply non-
hardening sealant to
the threads for water
proofing.
F0512.EPS
Figure 5.12 Flameproof Gland Packing Adapter
lnstallation

 Loading...