51
Replacing Parts
Replacing the Battery
8/27/08 Thermal Transfer G-Series
TM
Service Manual 980618-001 A
Replacing the Battery
The real-time clock option has a replaceable battery. Be familiar with the safety and hazardous
waste disposal requirements of your local community.
You must remove the bottom case and Main Logic circuit board before performing this
procedure.
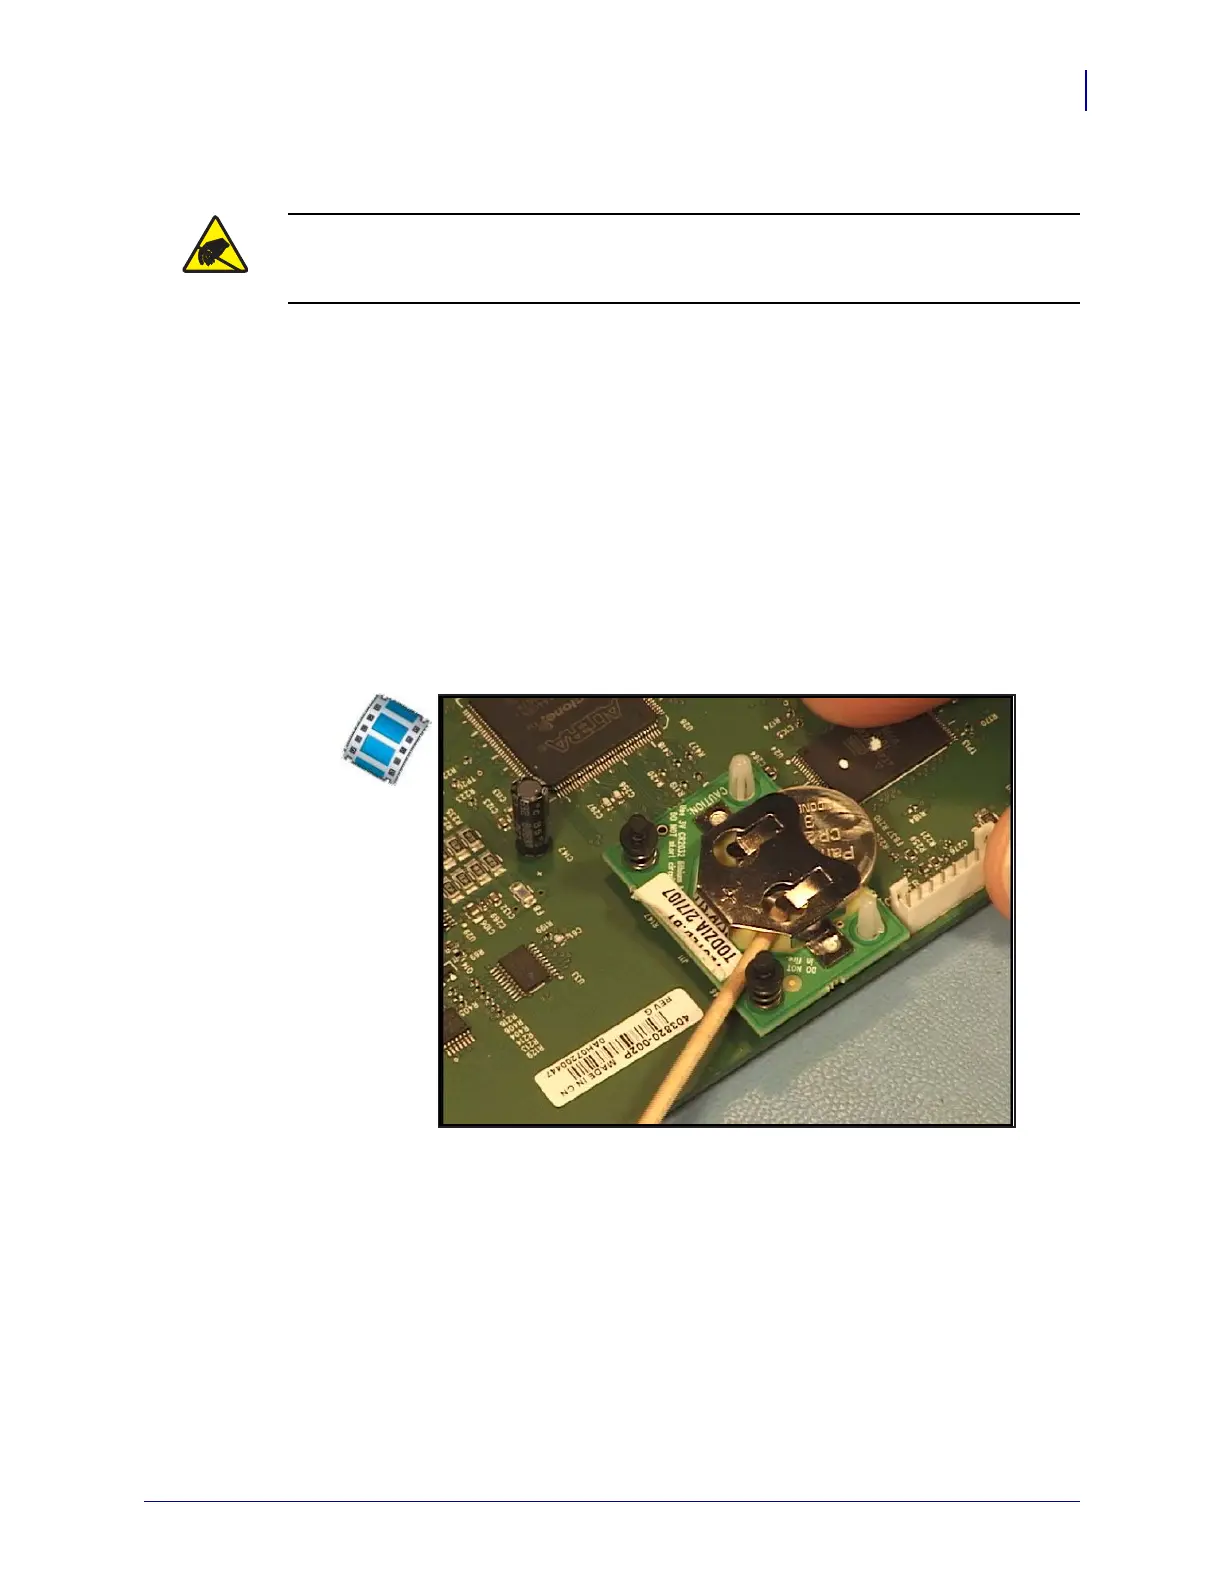
Removal
1. Locate the real-time clock option on the top of the Main Logic circuit board (near the
front).
2. Use a tipped non-conductive blunt tool (such as the shaft of a cotton swab) to press the
battery out of its cradle.
Installation
Check the alignment of the battery! Positive is up! Note the plus symbol (+).
1. Insert the battery into its cradle on the real-time clock board.
Replace the Main Logic circuit board and bottom case. Reload media. Plug in power, turn on
the printer and print a status report to ensure proper function.
Caution • Prepare your work area by protecting against static discharge. Your work area
must be static-safe and include a properly grounded conductive cushioned mat to hold the
printer and a conductive wrist strap for yourself.
 Loading...