UNItivity 5000 Performing Basic Configuration
User Manual
Copyright © 2022 Zinwave. All rights reserved. 8-7
8 Performing Basic Configuration
The following procedures are intended to be executed after the hardware installation is complete. All
hardware has been installed and configured with at least an IP address. All equipment is connected,
and the system is ready to be configured
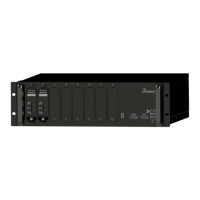
To Configure UNItivity 5000 :
1. The Zinwave Coverage Tool is used to plan the system and calculate the setting required for
its deployment. Gather all needed input information generated by the coverage tool and any
measured signal input powers.
This will provide you the following information:
• Input power from each Service
• Service mix and allocation to Remote Units
• Composite power settings
• Results of any coverage calculations for each Remote Unit
2. Make sure power is on for every unit.
3. Make sure all modules have been inserted.
4. Make sure all connections have been made, self-discovery happens, and LEDs settle to
solid green
Note: Indicator lights will adjust as system setup configuration is corrected.
1. Login to the Primary Hub. See “Accessing the GUI”.
2. Set date and time on Primary Hub in the Hub Setup page. See ”Date and Time”
3. On the Primary Hub check and, if necessary, upgrade to the latest software version.
o See “Software Upgrade”.
4. Enter the System Setup information for all Hubs and Remote Units. See “System Setup”.
5. Review System Status and RU Calculations. See “System Status”
6. Enter sensitivity and configure alarms. See “Understanding Alarms & Reporting”
7. Enter Hub Setup details, if desired. See ”Hub Setup”
8. Save config file and system snapshot. See “System Snapshot”