Performing Maintenance Tests
1-2 www.zoll.com 9650-000278-01 Rev. B
330 PM Test Kit
To perform maintenance tests, you need to assemble the test setup from items contained in the
330 PM (Preventive Maintenance) Test Kit (REF: 8600-000020-01). The 330 PM Test Kit
contains the following item.
• Jar, disposable with Lid (REF: 410-0004-00)
• Kit, Hose, M330 (REF: 540-0050-00)
• Fluke Meter (REF:0350-000090)
• Brass Barbed Hose Fitting 3/8” Hose ID, 1/3 NPTF (Female End) (REF: 0301-000344)
• Straight One-Way Valve (Check Valve) 22M to 22F (REF: 0301-000070)
Note: The valve is not required to assemble the test setup. Use the valve to perform Cosmetic
and Hardware test 1.6 (See, 1.0 Cosmetic and Hardware Tests in this chapter.
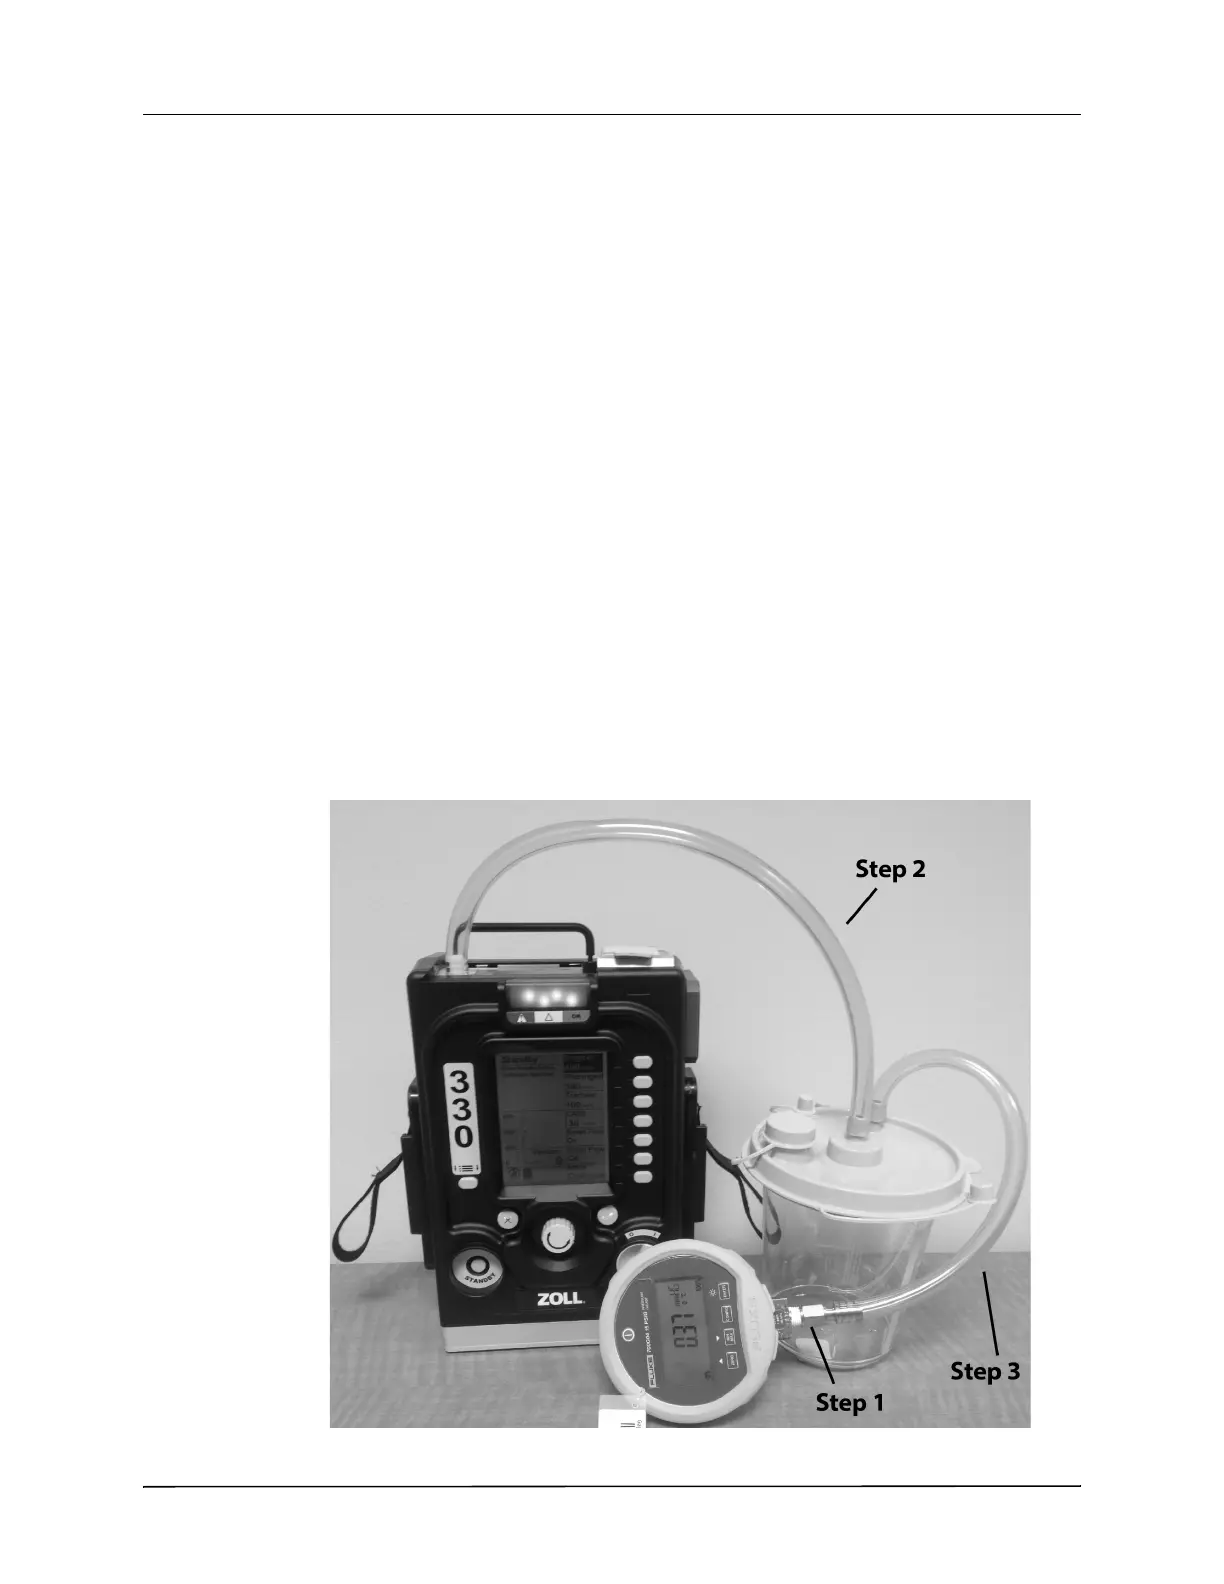
Assembling the Test Setup
To assemble the test setup, follow these steps:
1. Attach the brass barbed hose fitting to the NPT connector of the Fluke Pressure Gauge.
2. Using a piece of tubing from the tubing kit, connect the aspirator VACUUM port to the center
port of the collection canister (also labeled VACUUM).
3. Using a second piece of tubing, connect the collection canister PATIENT port to the Fluke
pressure gauge (barbed hose fitting attached to the gauge in Step 1).
When the test setup is assembled, connect the aspirator power supply to the aspirator and to
AC mains. (AC power outlet).
 Loading...