3D Systems, Inc.
5. Wipe blade off with isopropyl alcohol and inspect for
damage.
NOTE: If blade shows signs of damage replace with
a new one, if blade can be cleaned and no damage is
visible you can replace with existing blade.
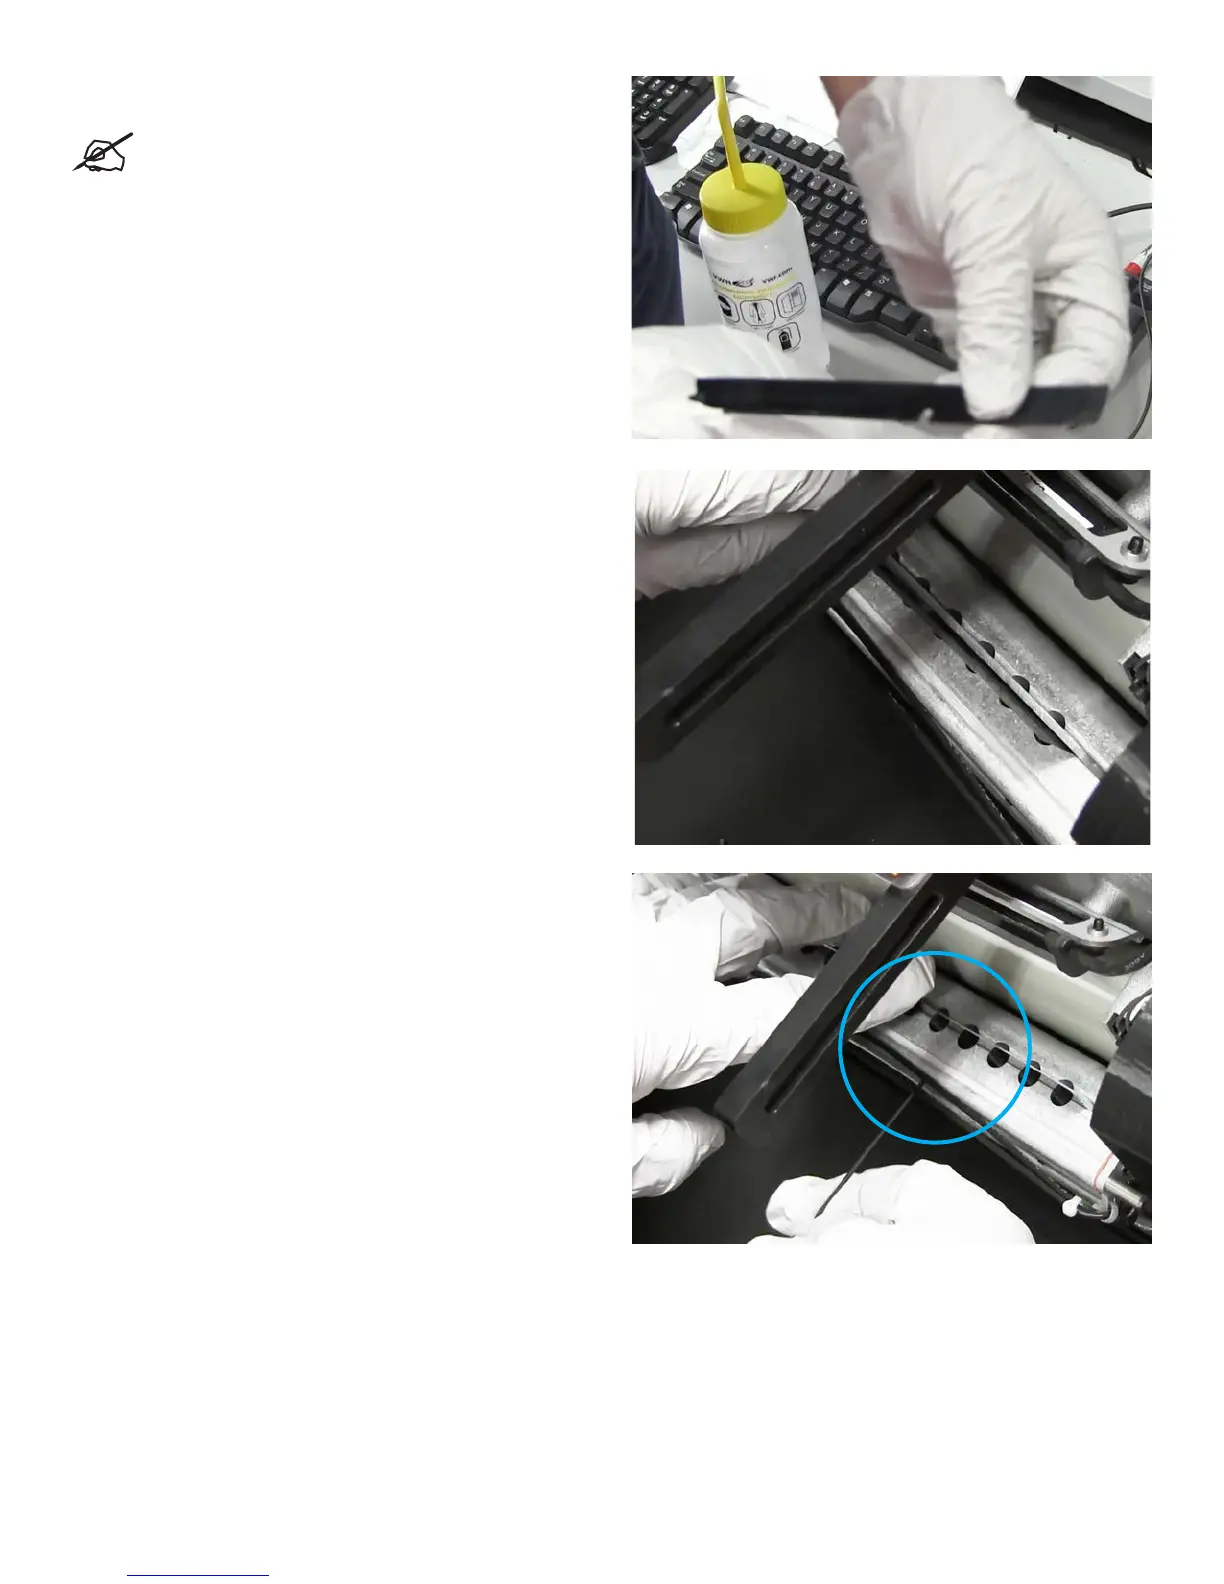
6. Place blade with notch facing towards the inside and resting
behind the metal bar. Start at the left end and insert until you
can feel the blade drop into the notch.
7. Replace 2x5 cap screw, and tighten with a 1.5mm Allen
wrench while holding blade in place with other hand, as
shown.
8. Return planarizer to the Home position. Printer is now ready
to use.
25