3DGence DOUBLE P255 | version 09.2018
4.3.1. Specification of connection
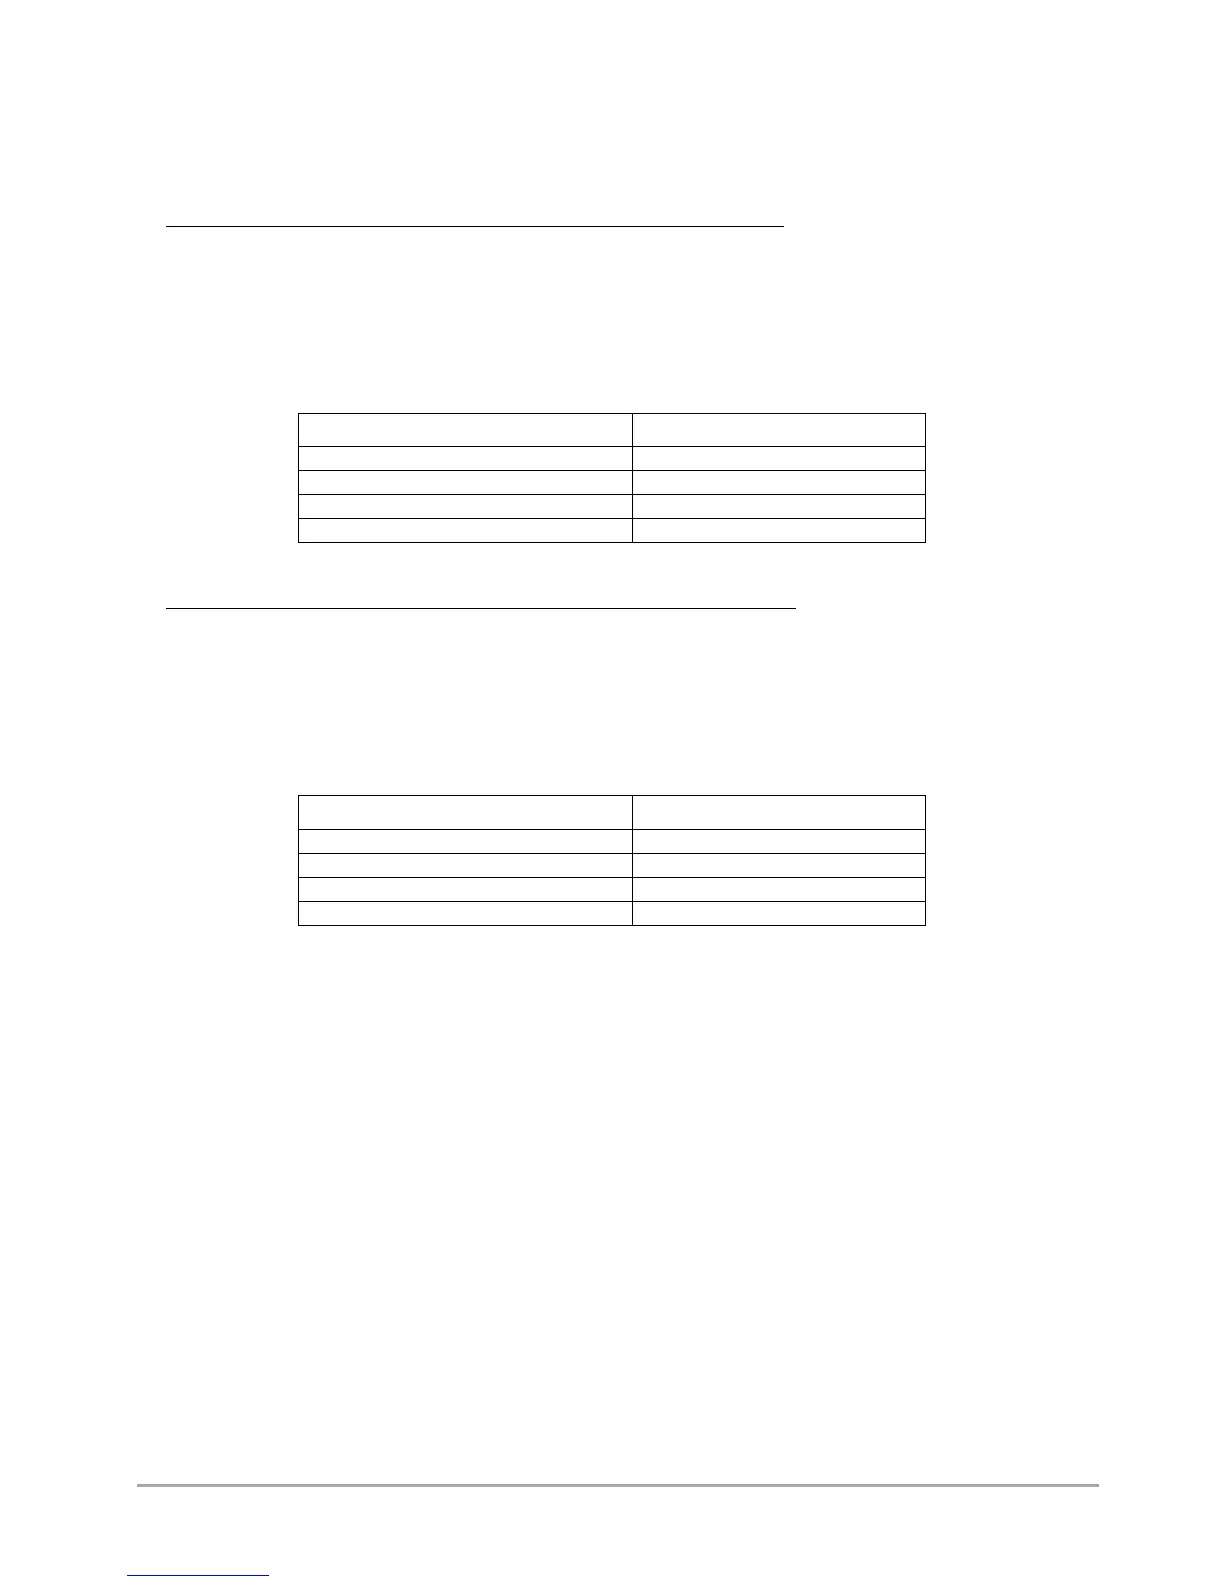
The electrical characteristics of the 3DGence DOUBLE P255 are shown below (tab.2.3). The connection should be adapted to
the given values.
➢ DOUBLE P255 printers with a serial number that begins with the symbol: DOUB
(the printer's serial number is located on a sticker located on the back of the printer and it is preceded by the symbol: S/N).
Voltage: 220-230V AC;
Frequency: 50-60 Hz;
Network with a protective earth lead (PE), protected with a fuse of a rated current intensity not less than 16A;
Rated power consumption: 600 W (maximum instant power consumption: 1.9kW);
Current intensity: ~2,6 A (8 A).
Tab. 2 Electrical characteristics of devices with a serial number beginning with the "DOUB" symbol
Power consumption of the device
Maximum instant power consumption
➢ DOUBLE P255 printers with a serial number that begins with the symbol: DOUBA
(the printer's serial number is located on a sticker located on the back of the printer and it is preceded by the symbol: S/N).
Voltage: 110V AC;
Frequency: 50-60 Hz;
Network with a protective earth lead (PE), protected with a fuse of a rated current intensity not less than 16A;
Rated power consumption: 600 W;
Current intensity: ~5 A.
Tab. 3 Electrical characteristics of devices with a serial number beginning with the "DOUBA" symbol
Power consumption of the device
Maximum instant power consumption
4.4. Before starting the printer
Each time before starting the printer, make sure that the following conditions are met and the following actions have been
performed:
• check the conduits for abrasion or other visible defects. If the conduits are damaged, notify the 3DGence technical service
department immediately using the problem notification form at www.3dgence.com/support. Do not connect the printer
to power supply and/or make repairs on your own;
• confirm that filament is not contaminated, broken, bent or tangled on the spool;
• confirm that in the printer's working area there are no objects or remains of printouts that could cause a jam or damage
to the machine;
• check X axis and Y axis, confirm that their movements are not blocked by moving the printing module manually to the left
and to the right and by moving the heatbed manually forwards and backwards;
• confirm that the Z axis breaker (fig. 6) is not damaged, broken or bent and that it coincides with the Z axis endstop (is
aligned with the endstop notch);
• confirm that thermistors (temperature sensors) of hotends and heatbed properly. To do this, start heating the hotends
and heatbed and check that temperature indications on the LCD screen increase. A problem exists if def value is displayed;
• immediately before starting the printer, make certain that no person or undesirable object is within the printer's working
range.