III PREPARATION FOR WORK
1. FIRMWARE UPDATE
No additional drivers are required to be installed for 3DGence DOUBLE P255 printer. The only program required to operate the
printer is 3DGence Slicer that generates the machine code. More information on the 3DGence Slicer program can be found in
chapter V.
1.1. Updating the firmware
The printer's firmware is periodically updated. It is important to ensure that the firmware is always updated to the latest
available version.
The latest printer's firmware is available at: www.3dgence.com/support in Firmware category (the Firmware category is
available after creating an account and registering the device).
The firmware update procedure is as follows:
1. Download the firmware file from the website mentioned above (the folder contains the firmware with .hex extension, free
Xloader program that allows you to upload the firmware to the printer's controllers and the user manual).
2. Connect USB cable to USB port B on the printer (fig. 10).
3. Connect USB cable to USB port on the computer.
4. Switch the printer on.
5. Wait for the new hardware installer to finish working if it was automatically started.
6. In the Xloader program, in the "Hex file" field, indicate the newly downloaded firmware file.
7. In the field "Device", set the Mega(ATMEGA2560) option.
8. In the "COM port" field, indicate the port assigned to the printer. In order to check Port COM enter: Windows Control
Panel -> System and Security -> System -> Device Manager -> Ports (COM and LPT) -> USB Serial Port (COM...). The rest of
the information should remain unchanged.
9. Press Upload key. The new firmware upload may take several minutes. When uploading the firmware, coloured noise may
appear on the display, but this is completely normal. Successful update will be confirmed by the message on the computer
screen: ‘… bites uploaded’.
10. Disconnect USB cable from the printer and restart the printer.
2. UNPACKING AND STARTING THE PRINTER
The detailed instructions for unpacking and starting the printer for the first time can be found on "Quickstart" card attached
to the printer.
ATTENTION: The printer may be connected only to a supply network that meets the requirements described in chapter I, point
4.3.1.
2.1. Unpacking the printer
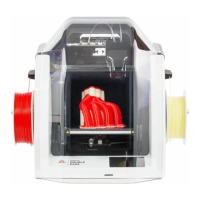
3DGence DOUBLE P255 printer is protected for storage and transport with profiled EPS shapes placed inside the cardboard box
with the printer. A box with accessories (chapter II, point 2) is located at the top EPS protective shape.
Unpacking the printer:
1. Cut the adhesive tape on the cardboard box.
2. Take out the top EPS protective shape with the accessories.
3. Take the box with accessories out of the EPS protective shape.
4. Take the printer out of the cardboard box.
5. Take the printer out of the protective film.