IX ENCLOSURE ASSEMBLY
WARNING: Printer has to be placed on a firm, level surface at least 630×630 mm big.
1. If the materials are loaded – turn the printer on and unload them by choosing: MATERIALS → UNLOAD MODEL
MATERIAL/UNLOAD SUPPORT MATERIAL and follow the steps on the screen.
WARNING: in case of problems with material unloading, refer to user's manual (chapter III, point 4.3).
2. Turn the printer off.
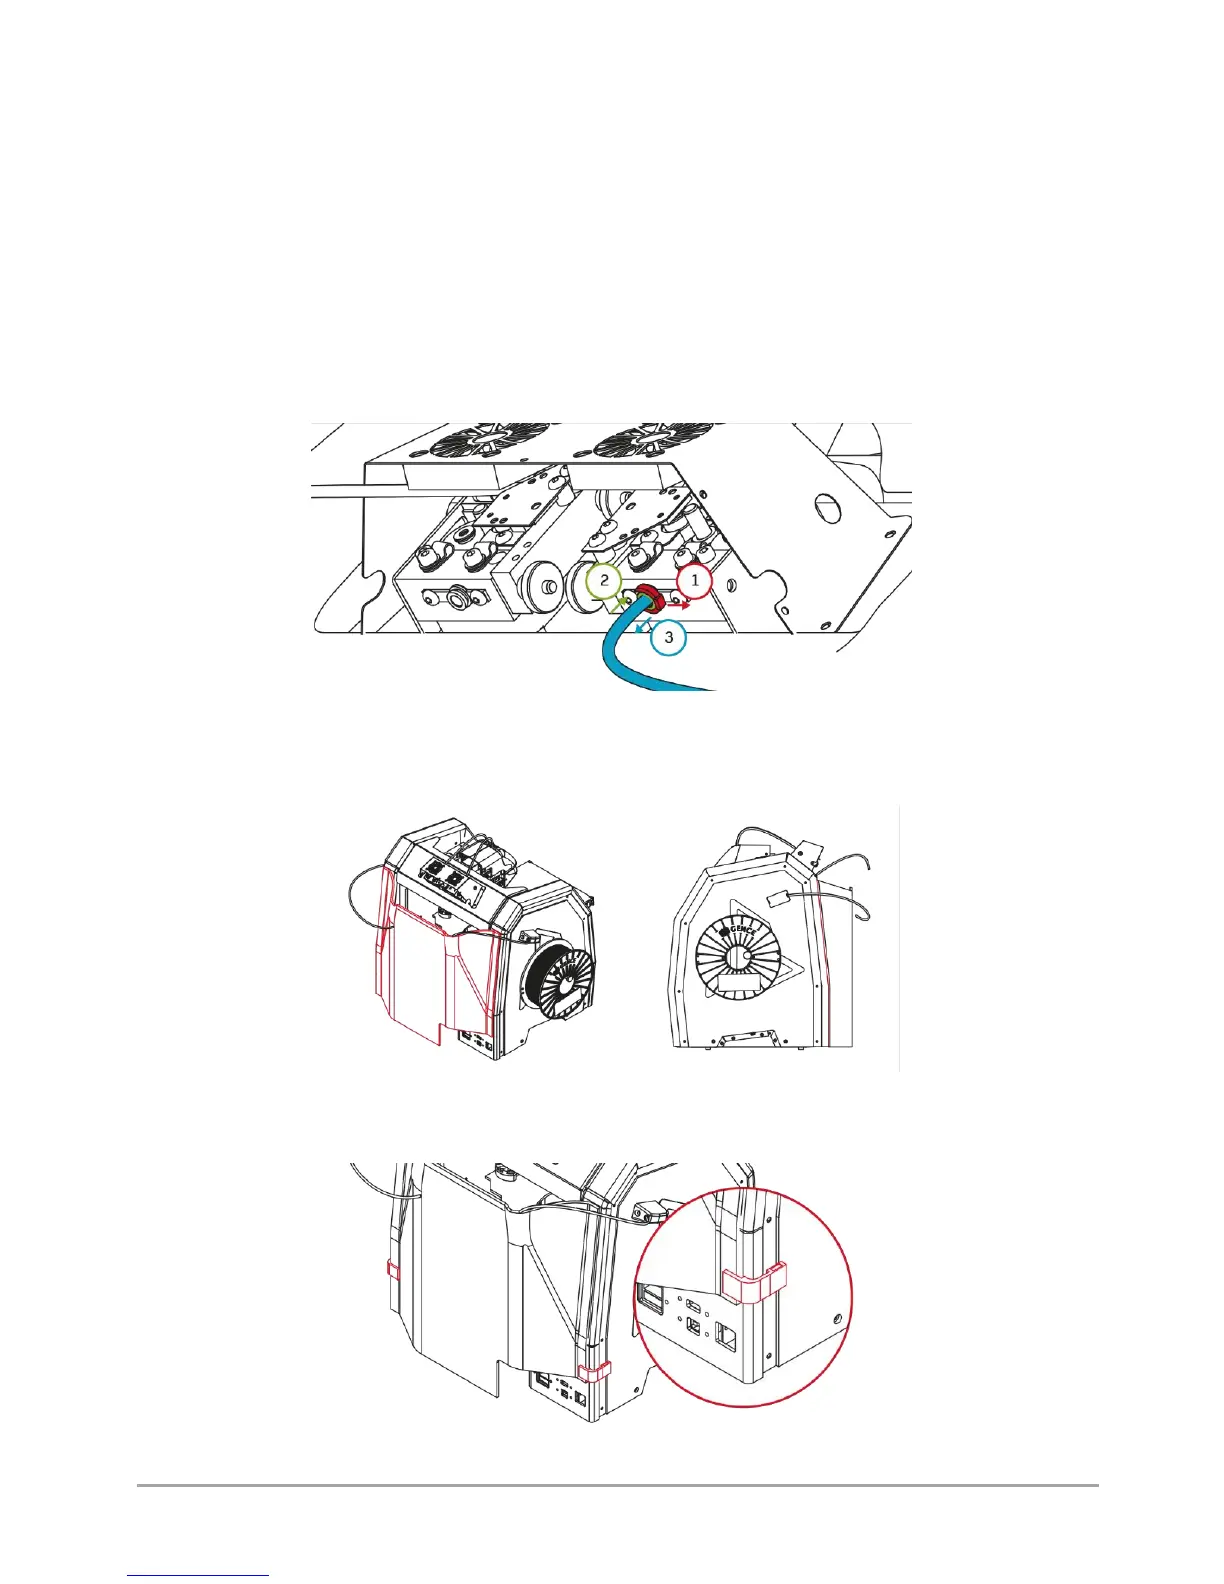
3. Pull out the bowden tubes from both extruders (fig. 67). To do that:
• remove the collet clip (fig. 67, step 1),
• push and hold the protective ring down (fig. 67, step 2), at the same time pull out the bowden tube (fig. 67, step 3).
Fig. 67 Pulling out the bowden tubes from both extruders
4. Mount the rear enclosure part (fig. 68). Align the curvature of the enclosure, so that it interlocks with the back of the
printer (fig. 68).
Fig. 68 Mounting the rear enclosure part
5. Mount the clips on the rear enclosure part. The side of the magnetic clips should fit into the recess on the printer (fig. 69).
Fig. 69 Mounting the clips on the rear enclosure part