Installation – Preparing and fixing the wallbox in place |
17
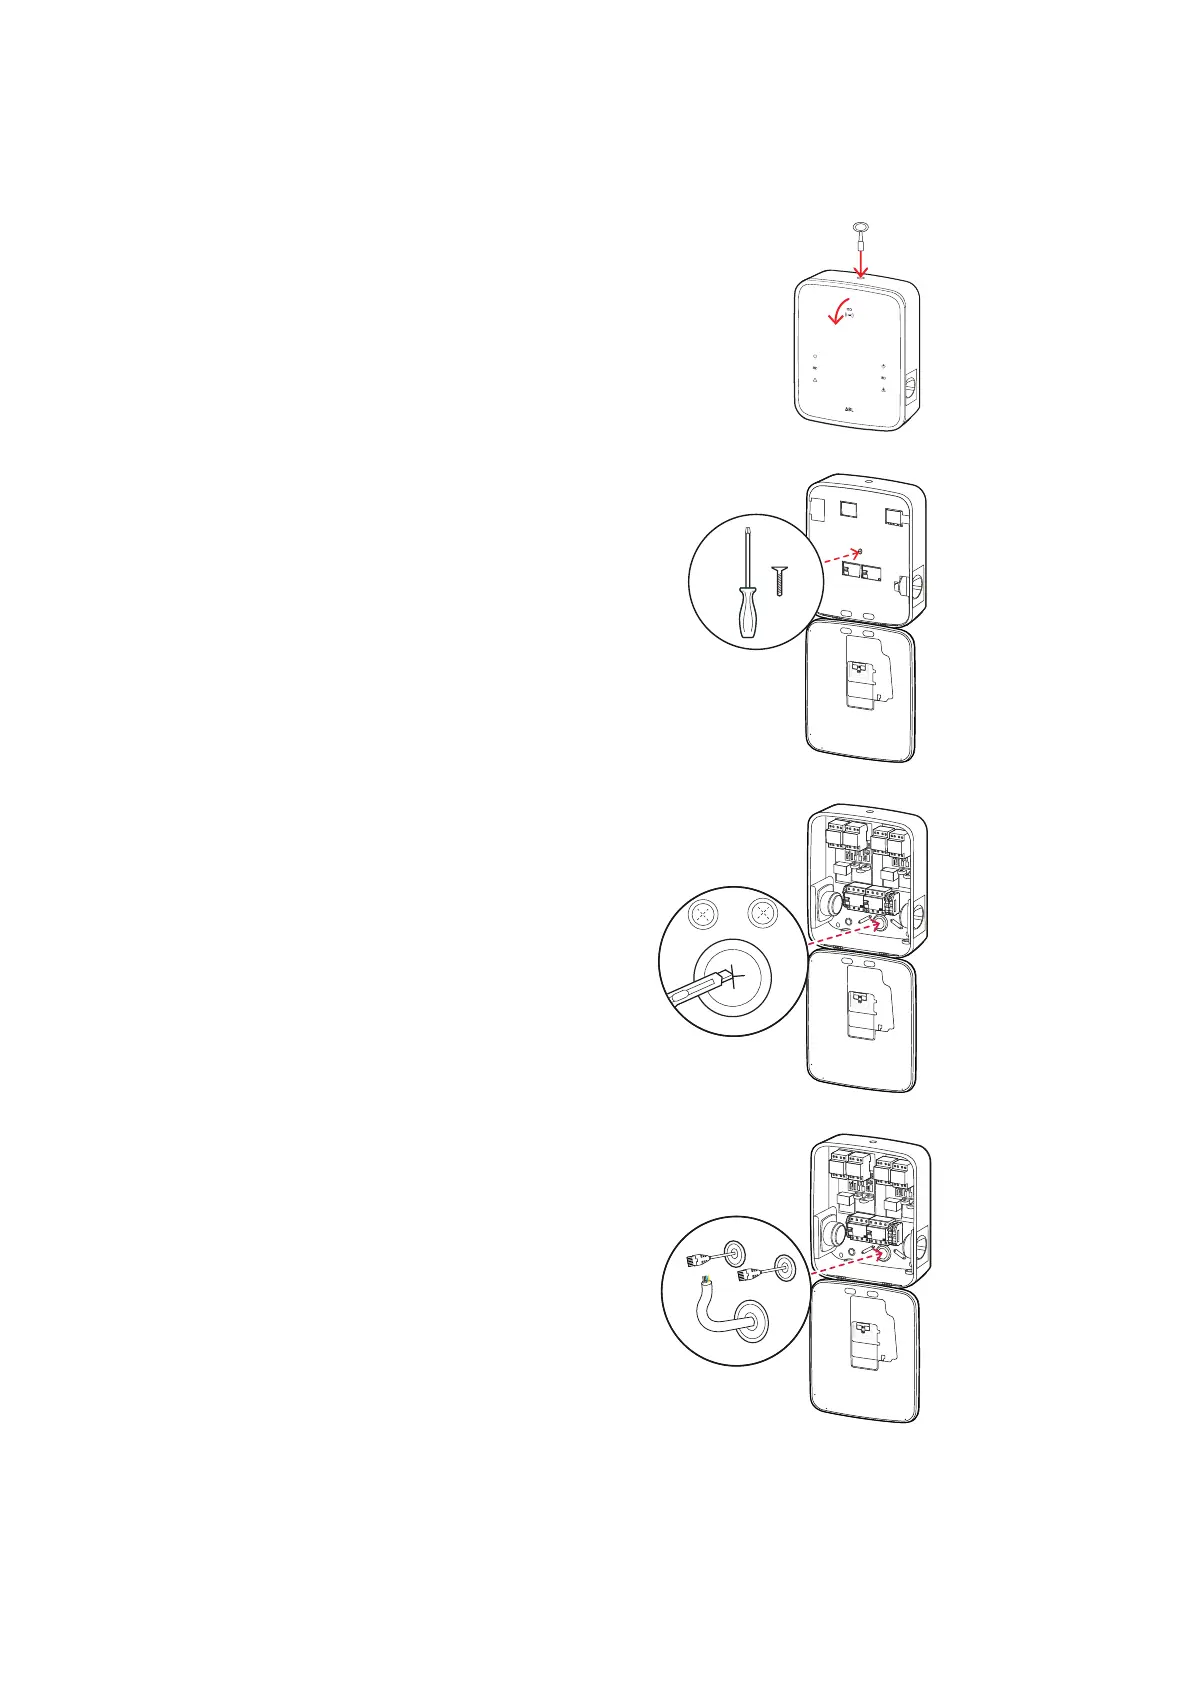
Preparing and fixing the wallbox in place
Continue to prepare the wallbox:
8 Open the housing cover of the wallbox using the
triangular key and lower it.
T
T
T
9 Loosen the screw holding the internal electronic
components cover in place using the screwdriver
(Torx 20) and put it aside.
y Keep the screw in a safe place.
METER
M
E
T
E
R
C
N
T
R
L
CONTROL
CONTROL
METER
10 Use the utility knife to cut an opening for the pow-
er supply cable into the large rubber grommet, and
then insert it into the housing base.
y Insert the two smaller grommets into the hous-
ing base.
y For wiring up group installations, you must also
make cuts into the two smaller grommets for the
data cables (see "Data cable connections" on
page19).
METER
M
E
T
E
R
C
N
T
R
L
CONTROL
CONTROL
METER
11 Insert the power supply cable into the housing base
through the large rubber grommet.
y For wiring up group installations, you must also
insert the data cables into the housing base
through the small grommets.
METER
M
E
T
E
R
C
N
T
R
L
CONTROL
CONTROL
METER

 Loading...