| Configuring the Wallbox eMH3 – Completing the set-up
40
y Only for SOAP:
» Local port: Enter a port address between
1000 and 10000 or use the default (7890).
» Local path: Enter the path of the local
endpoint here.
2 Confirm by clicking the Save button.
3 Only for WSS: Click the Connectivity > TLS tab
and check the TLS versions and certificates shown
here.
y Contact your network administrator if necessary.
Completing the set-up
After setting up communication with the backend, the group installation is complete.
1 Close the Charge Point Administration applica-
tion via the browser window.
MODBUS EN1 MODBUS
METER
M
E
T
E
R
C
N
T
R
L
CONTROL
CONTROL
METER
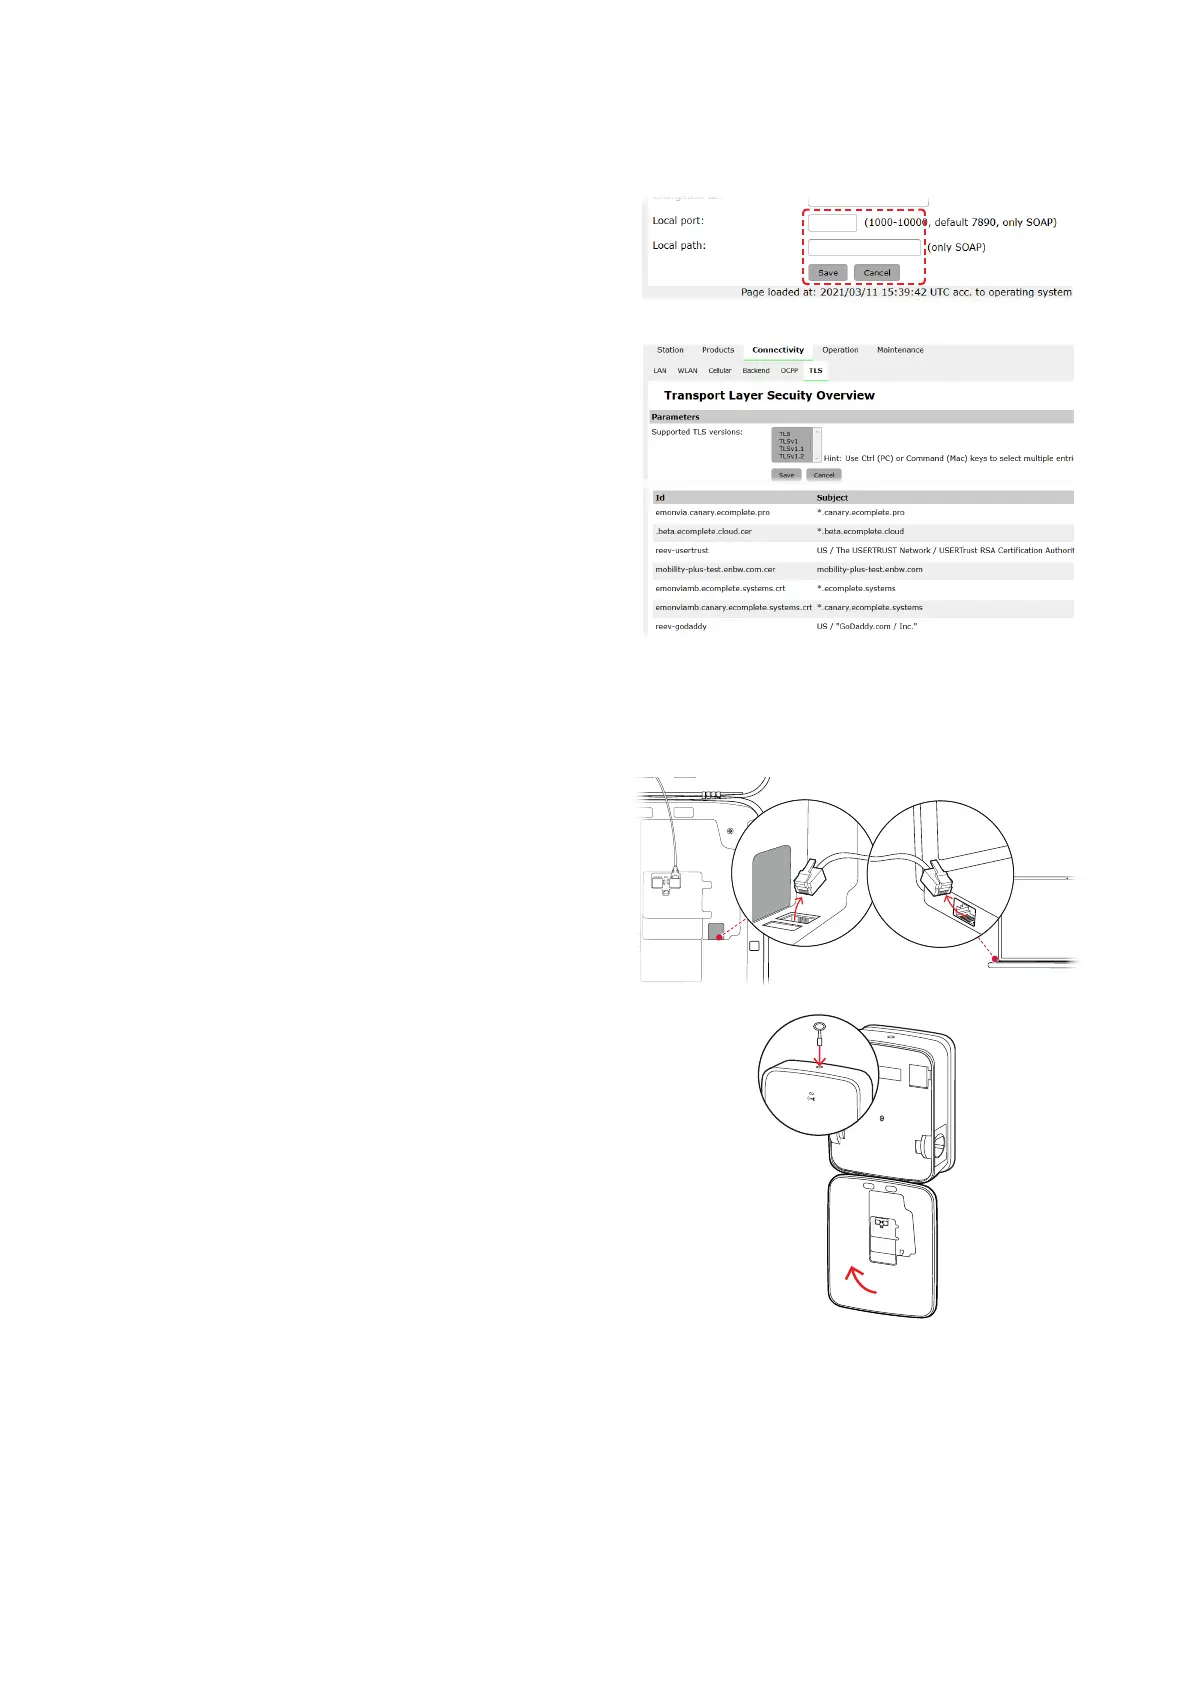
2 Disconnect the computer from the wallbox by un-
plugging the RJ45 data cable from the SBC of the
Controller charging station and the computer.
3 Flip the housing cover up so that it clicks into the
housing and lock it with the triangular key.
T
T
T
METER
M
E
T
E
R
C
N
T
R
L
CONTROL
CONTROL
METER
Manual RFID card administration
The stand-alone Wallbox 3W2214 leaves the factory with one teach-in and five ID cards included. For all other Wall-
boxes eMH3 (except product bundles), the E017869 package of 5 ID cards is available, which can be configured for
use as a teach-in card (1 pc) and RFID user cards (4 pcs) using the ABL Configuration Software.
Using the teach-in card, ID tag cards can be registered on the user list of the wallbox, and then used to authorise
charging procedures. In addition, the user list of the wallbox can be reset, and all previously registered ID tag cards
can be deleted using the teach-in card.
 Loading...