Installation – Commissioning the wallbox |
21
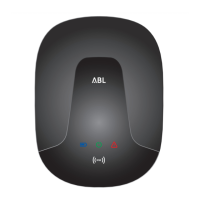
3 Connect the RJ45 plug of the incoming data cable
with the E2I interface inside the housing cover of the
last Extender wallbox.
MODBUS EN1 MODBUS
METER
M
E
T
E
R
C
N
T
R
L
CONTROL
CONTROL
METER
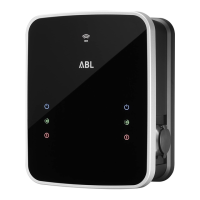
WARNING!
Terminating the data bus
For correct communication, the data bus must be terminated. The circuit board of the E2I interface provides two
pairs of pin contacts marked CONTROL and METER for this purpose.
4 Connect the pin contacts marked CONTROL and ME-
TER using a jumper for each.
y Carry out this process of terminating the data
buses in the first (2jumpers) and last (2jumpers)
charging station in the group.
MODBUS EN1 MODBUS
METER
M
E
T
E
R
C
N
T
R
L
CONTROL
CONTROL
METER
MODBUS EN1 MODBUS
METER
M
E
T
E
R
C
N
T
R
L
CONTROL
CONTROL
METER
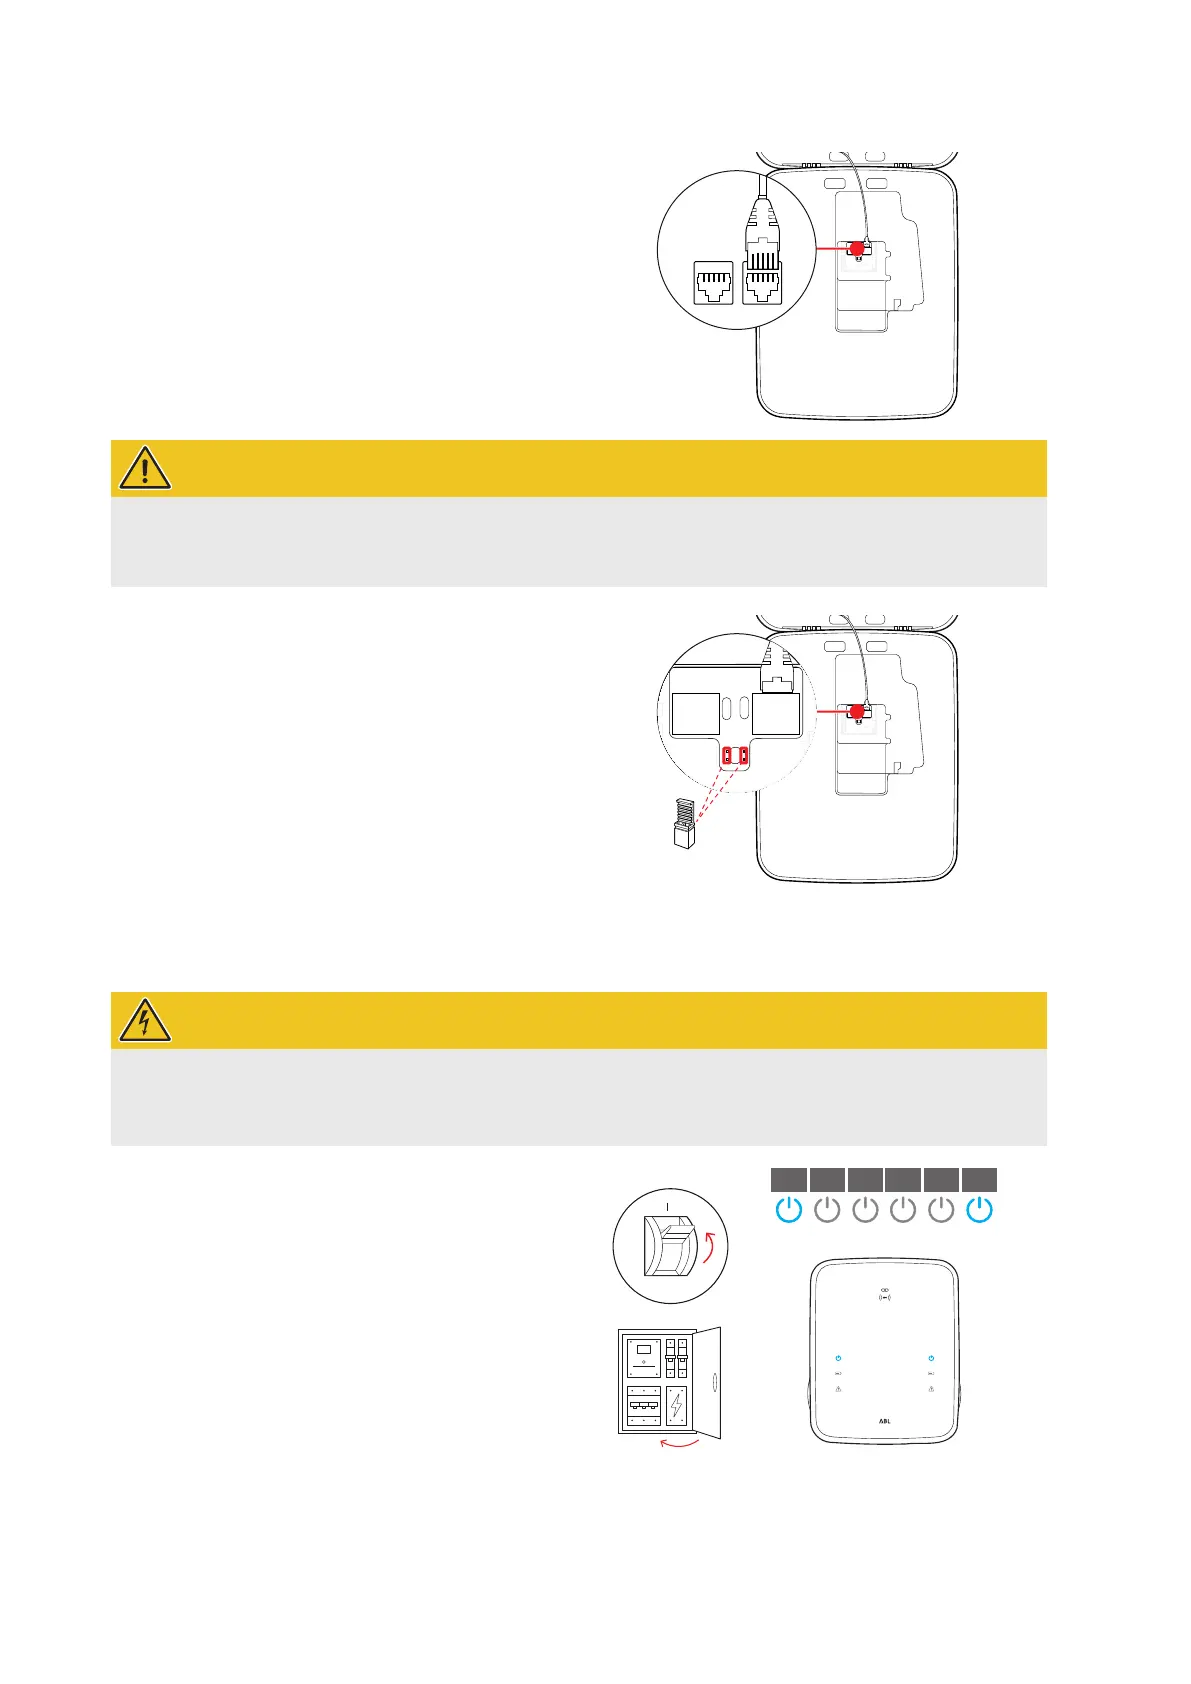
Commissioning the wallbox
To commission the wallbox, the power supply cable must be connected to the electricity grid.
DANGER!
Dangerous electrical currents
The following working steps must be carried out with the utmost care: There is a risk of electric shock if conduc-
tive components are touched.
1 Switch on the MCB in the domestic power distribu-
tion box.
y As soon as the wallbox is connected to the
electricity grid and start-up is complete, the blue
power symbol at the front of the housing cover
flashes every 5 seconds, while the other LEDs
remain OFF.
0
1 sec1 sec 1 sec
1 sec 1 sec 1 sec
 Loading...