Configuring the Wallbox eMH3 – Set-up via Charge Point Administration application |
35
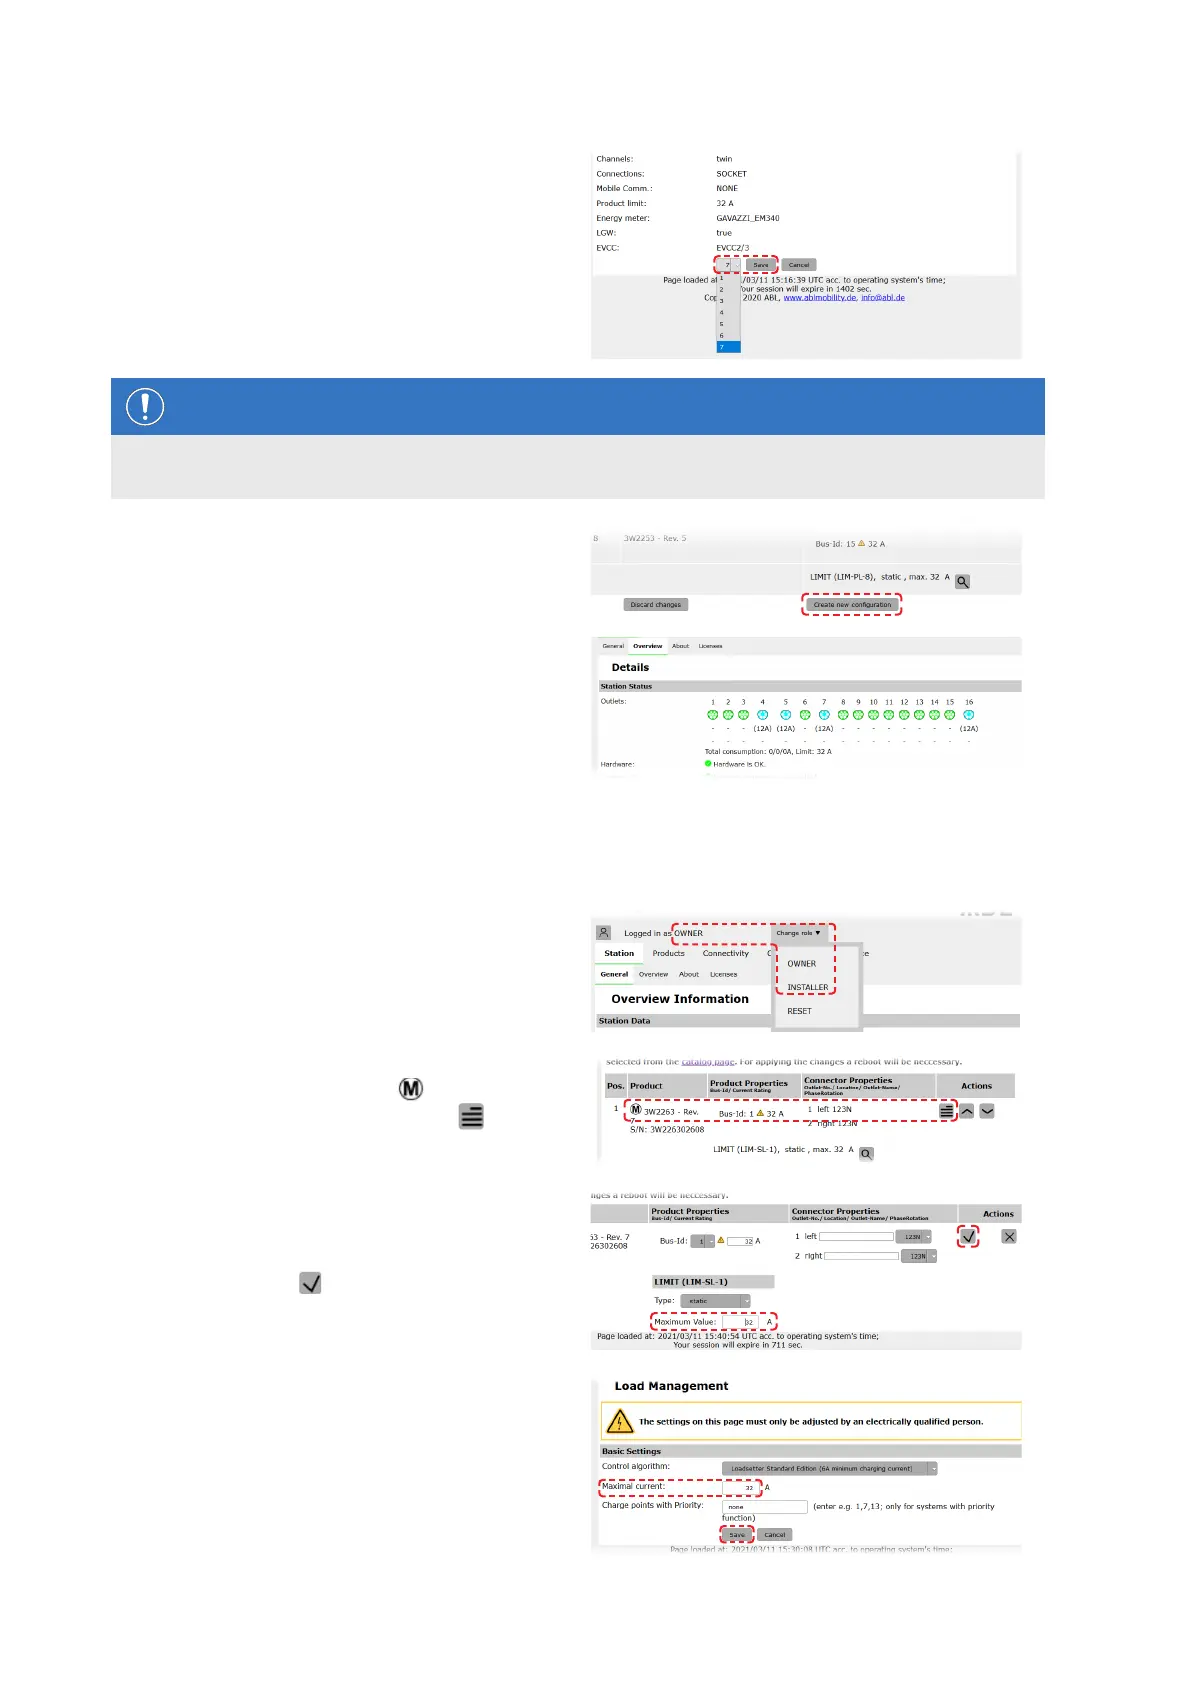
7 Use the selection list at the bottom to enter the de-
sired number and click the Save button.
y These Extender charging stations are then
displayed together with the Controller in the
Products > Installation tab.
y The Cancel button returns you to the Products
> Catalog list without making a selection.
NOTE
Completing the system configuration
Repeat these steps to add all additional Extender charging stations in the system.
8 Navigate to the bottom of the Products > Instal-
lation tab and click the Create new configura-
tion button.
9 Switch to the Overview > Details tab: this shows
at a glance whether your system is set up correctly.
After you have set up all Extender charging stations for the Controller, you must also define the maximum available
current for the entire system.
To do so, proceed as follows:
10 Make sure you are still logged into the Charge
Point Administration application in the Installer
role.
y If not, change your role as described in step 4.
11 Switch to the Products > Installation tab, and,
in the Actions column, click the button for the
Controller charging station marked with .
12 In the Maximum Value field in the LIMIT (LIM
SL-1) section, enter the desired maximum current
(for example: 32A) for the entire system.
y Confirm with the button on the right.
13 Switch to the Operation > Load Management
tab and enter the same value in the Maximum
Current field in the Basic Settings section that
you entered for the Maximum current in step 12
(for example: 32A).
y Confirm with the Save button.
 Loading...