7.
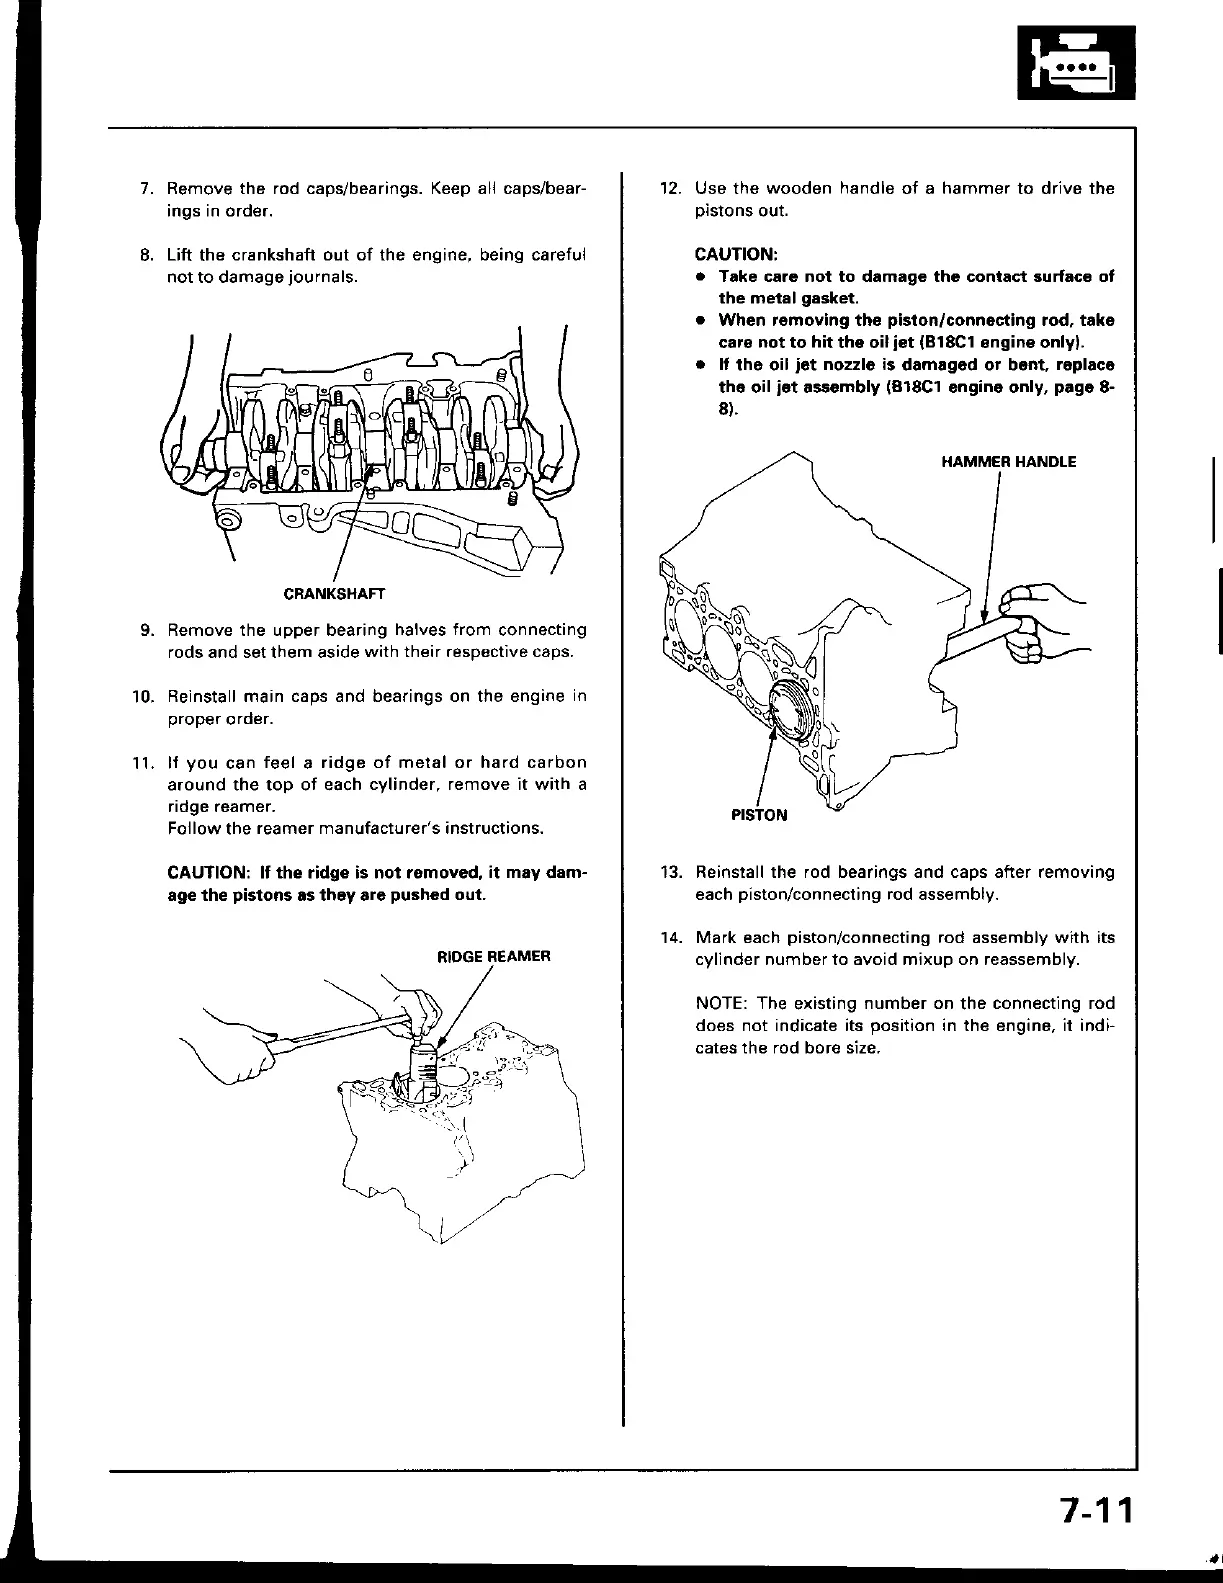
8.
11.
9.
10.
Remove the rod caps/bearings. Keep all caps/bear-
ings in order.
Lift
the
crankshaft out of the engine, being careful
not to damage
journals.
Remove the upper bearing
halves from
connecting
rods and set them aside
with their resDective caDs.
Reinstall main caps and bearings on the engine
in
oroDer order.
lf
you
can
feel
a
ridge of metal or hard carbon
around the top of each
cylinder, remove it with a
ndge reamer.
Follow the
reamer manufacturer's instructions.
CAUTION:
It the ridge is not removed,
it may
dam-
age the
pistons
as they are
pushed
oul.
CRANKSHAFT
RIDGE
REAMER
12. Use the wooden
handle
of a hammer to drive the
prslons
ouI.
CAUTION:
a
Take care not to damage the contact surfaco ot
the metal
gasket.
.
When removing the
piston/connecting
rod, taks
caro
not
to
hit
the oil
iot
{818C1
sngins onlyl.
.
It
tho oil
iet
nozzlo is
damag6d or bont,
replaco
the oil
ist
assembly
(818C1
engine only,
page
8-
8).
Reinstall the rod bearings and caps after removing
each
piston/connecting
rod assembly.
Mark each
piston/connecting
rod assembly with its
cylinder number to avoid mixup on reassembly.
NOTE: The
existing
number on
the
connecting rod
does not indicate its
position
in the engine, it indi-
cates the rod bore size.
13.
14.
7-11

 Loading...