Save the following to your CIRCUITPY drive as code.py.
Click the Download Project Bundle button below to download the necessary libraries
and the code.py file in a zip file. Extract the contents of the zip file, find your
CircuitPython version, and copy the matching code.py file to your CIRCUITPY drive.
Your CIRCUITPY drive should now look similar to the following image:
# SPDX-FileCopyrightText: 2021 Kattni Rembor for Adafruit Industries
# SPDX-License-Identifier: MIT
"""CircuitPython I2C Device Address Scan"""
import time
import board
i2c = board.I2C() # uses board.SCL and board.SDA
# i2c = board.STEMMA_I2C() # For using the built-in STEMMA QT connector on a
microcontroller
# To create I2C bus on specific pins
# import busio
# i2c = busio.I2C(board.GP1, board.GP0) # Pi Pico RP2040
while not i2c.try_lock():
pass
try:
while True:
print(
"I2C addresses found:",
[hex(device_address) for device_address in i2c.scan()],
)
time.sleep(2)
finally: # unlock the i2c bus when ctrl-c'ing out of the loop
i2c.unlock()
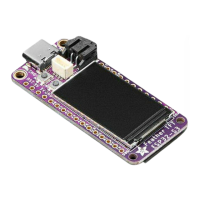
There is a TFT_I2C_POWER pin on the ESP32-S3 TFT Feather. It is enabled by default
in CircuitPython, so there's no action to be done on your part. However, if you
manually disabled it, you'll need to enable it for the scan to work.
The ESP32-S3 TFT Feather comes with one I2C sensor built in. The I2C scan
code will show the addresses from the built in sensor and the MCP9808.
©Adafruit Industries Page 160 of 263
 Loading...