11
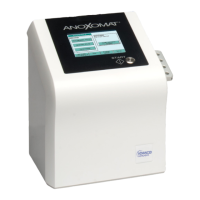
Anoxomat
®
III Service Guide
1.3 Carton contents
Quantity Description
1 Anoxomat III
1 Parts package
• Gas hose(s) and fittings or gas tube(s)
• Jar tube test plug
• Soft-touch pen
1 USB stick containing
• User’s guide
• Data Interface spreadsheet template
1 AC line cord
Accessories and optional parts
• Jar
• Petri dish holder
• Palladox™ catalyst (disposable sachet)
• 1 Recipe printer (optional)
• 1 Barcode scanner (optional)
Unpacking
1. Carefully unpack the carton and inspect the contents
for damage.
Save the shipping material in case you need to
transport the instrument.
2. Use the packing list to verify you have all items.
NOTE: Notify your receiving department immediately if
items are missing. Advanced Instruments is
responsible for items reported missing within 10
days of a shipment’s arrival.
3. If an item is damaged, save the shipping material for
inspection by the insurer.
4. Notify the dealer and Advanced Instruments within
24 hours for your warranty and insurance to apply.
Chapter 1
Installation and setup
NOTICE: In order to set up your instrument
properly, it is important that you read and
follow the steps in this section.
1.1 Location requirements
When choosing a location for your Anoxomat, make sure
to meet the following criteria.
Adequate space
• Instrument dimensions:
12 × 9 × 13 inches (30.5 × 23 × 33 cm).
• Keep workplace free of debris and allow 6 inches
(15 cm) of clear space on each side of the instrument.
• Allow space for jars and accessories, such as a printer.
Electric outlet availability
WARNING: Your instrument needs to operate
within five feet of a properly-grounded,
three-prong electrical outlet capable of
continuously supplying 2 amperes at 220V and
5 amperes at 100-110V. If the instrument is not
grounded properly, its operation may be
impaired and a safety hazard may exist.
Therefore, verify the AC voltage that your
instrument operates at, be sure to test the
outlet, and record the results before operating
your instrument.
1.2 Additional items needed for installation
• Adjustable wrench to tighten the dual stage regulator.
• 5/8 in & 11/16 in wrenches to tighten the hose/fitting
gas connection(s).
• Gas cylinder containing appropriate anaerobic mixture.
• Dual stage regulator. See Installing the gas supply on
page12.

 Loading...