Chapter 1 Installation and setup
15
Anoxomat
®
III Service Guide
1.8 Set up System Language
Your Anoxomat contains multiple languages. The
supported languages are: Chinese, Dutch, French,
German, Japanese, Korean, Russian, and Spanish.
1. To set the language, press Language on the Setup
screen.
2. Select the language.
3. Press Close and reboot the system.
The system displays in the selected language.
1.9 How to input data
When programming or changing settings in the
Anoxomat, you must enter data on an input line using an
onscreen keyboard. Using the soft-touch pen or your
fingernail, tap in the input line to position a blinking
cursor, and a keyboard appears.
1.10 Setting up the instrument
This section is restricted for use by the Supervisor, who
is required to enter the Set-up Code from the red label
(Figure 1.1) before defining or changing settings.
1. Press Setup. The setup code screen displays with
keyboard.
2. Enter the Setup Code from the red label (Figure 1.1)
and press Ok. The main Setup screen displays.
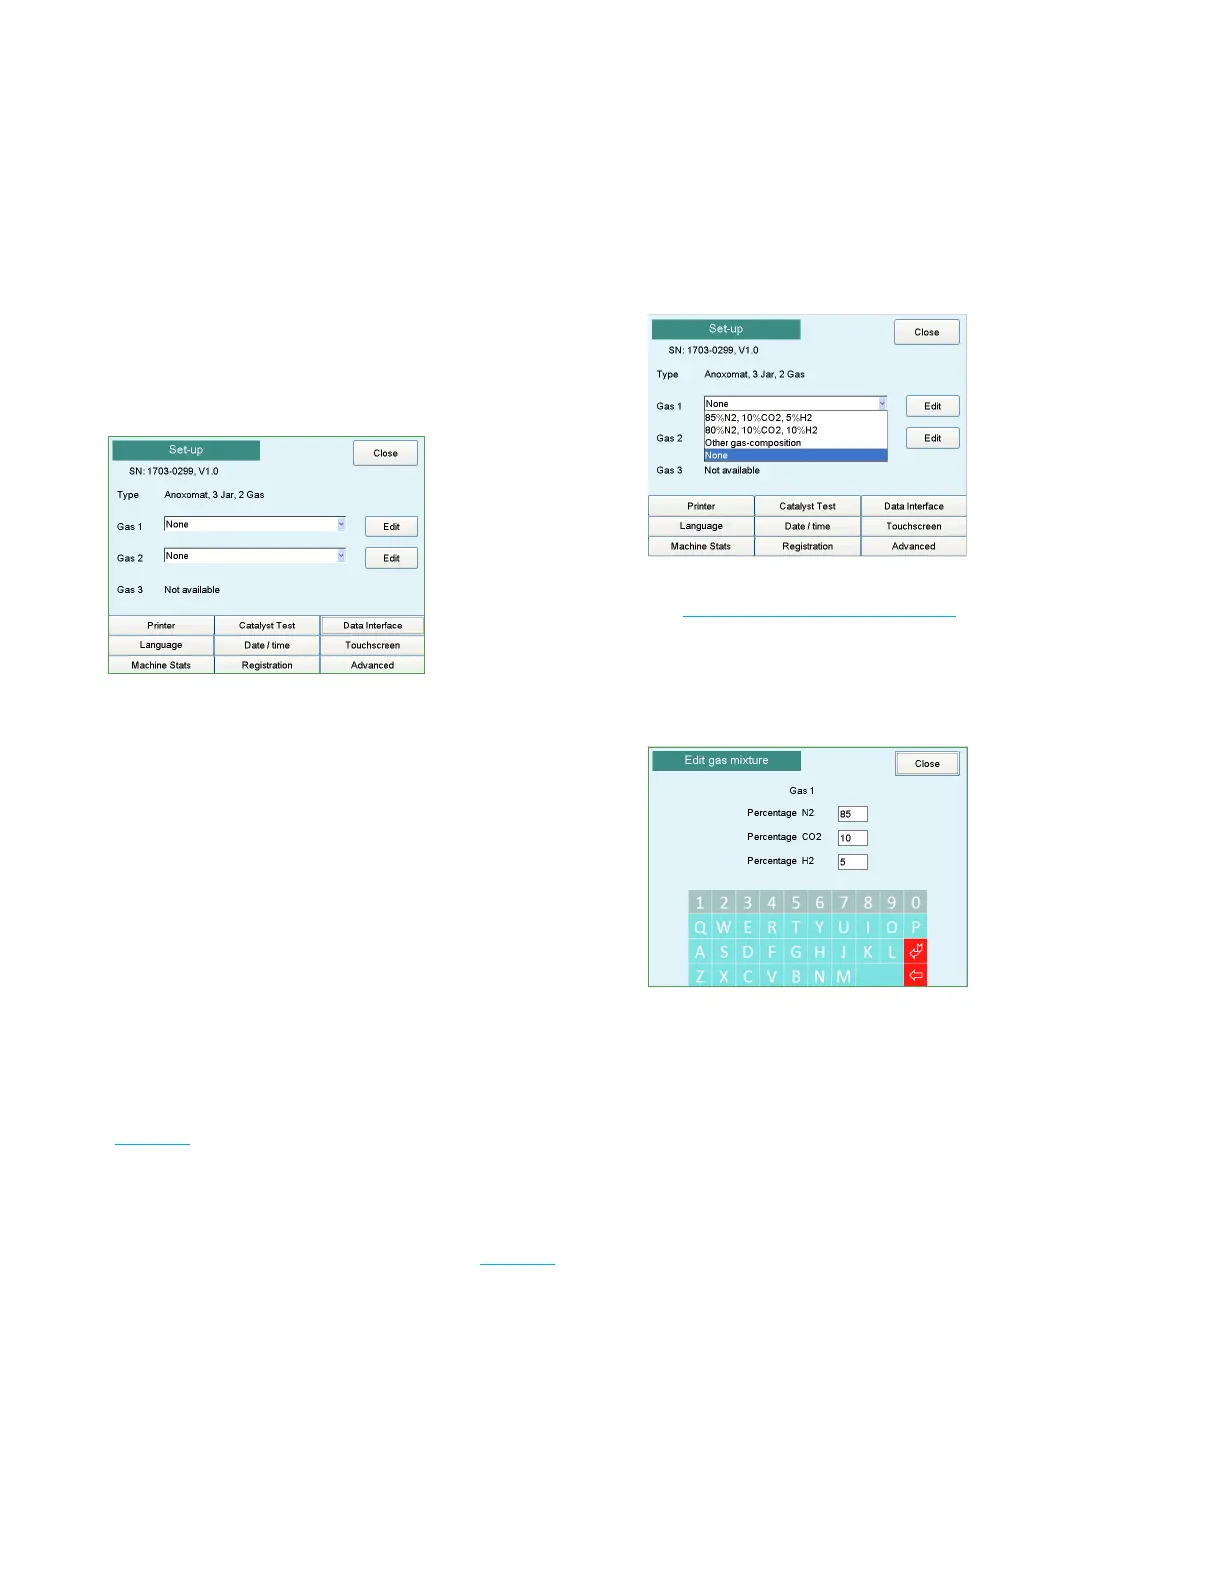
Set up gas connection(s)
The Anoxomat allows a maximum of three gas supply
connections. For each gas connection, you need to
specify the gas mixture on the Setup screen.
For Gas #1, select the gas composition of your gas from
the corresponding pull-down menu.
Specify the gas composition for each gas supply.
See Standard gas mixture on page16.
If your gas composition is not available from the pull-
down list, you can define the mixture by selecting
Other gas-composition. This screen appears:
Enter the required percentages in each field and press
Close to exit the screen and save changes.
If the second or third gas connection is not used, leave
the field empty or select None.
Setup date and time
If your Anoxomat is equipped with a printer and/or is
using a data interface, the date and time of a process
appears on the printout or in the database.
To set the date and time, press Date/time on the Setup
screen. Enter the date as DD-MM-YYYY (e.g., 30-04-2010
= April 30, 2010). Based on 24-hour clock, set the time in
HHMM (e.g., 09-07 = 9:07 AM).
Exit Setup
Press Close to return to the Main Operation Screen.

 Loading...


