Chapter 2 Maintenance and Service
20
Anoxomat
®
III Service Guide
2.3 Cleaning and disinfecting jars
The Mart Jars are never to be cleaned with bleach
alcohol, and are not to be exposed to temperatures
greater than 80˚C.
NOTICE: Autoclaving is not permitted.
Advanced Instruments recommends using a general dis-
infectant used for lab equipment that does not contain
bleach or alcohol.
Anoxomat jars are designed specifically for use with the
Advanced Anoxomat System
2.4 Expected jar service life
The expected service life of Anoxomat Jars depends
on proper usage, frequency of processing, appropriate
cleaning/maintenance, and prevention of accidental
abuse. Under normal conditions, a jar processed twice
per week will have an expected life of about five years or
approximately 500 cycles.
It is important that jars are inspected frequently (about
once per month) for signs of excessive wear or damage.
If a jar appears to be visibly worn or damaged, then it
must be replaced. Also, closely inspect the jar if it fails
the Jar Test or Seal-Leak Test during processing and/or if
the Pump Time Exceeded or Fill Time Exceeded message
appears.
Deep, horizontal cracks, especially near the top, are
indications that the jar has been dropped or the clamps
have been tightened excessively. Fine, vertical cracks on
the surface of the jar may result from frequent use due
to flexing that occurs when the jar is evacuated and then
filled. It also may be indicative that the jar has been
cleaned with alcohol.
Immediately discontinue use of a jar if it shows
significant cracking or other signs of excessive wear.
Replace all jars with visible cracks where the clamp ring
is glued to the jar base, In addition, the jar base must be
replaced if it is cracked where the disc is glued to the
cylinder or if the disc separates from the cylinder.
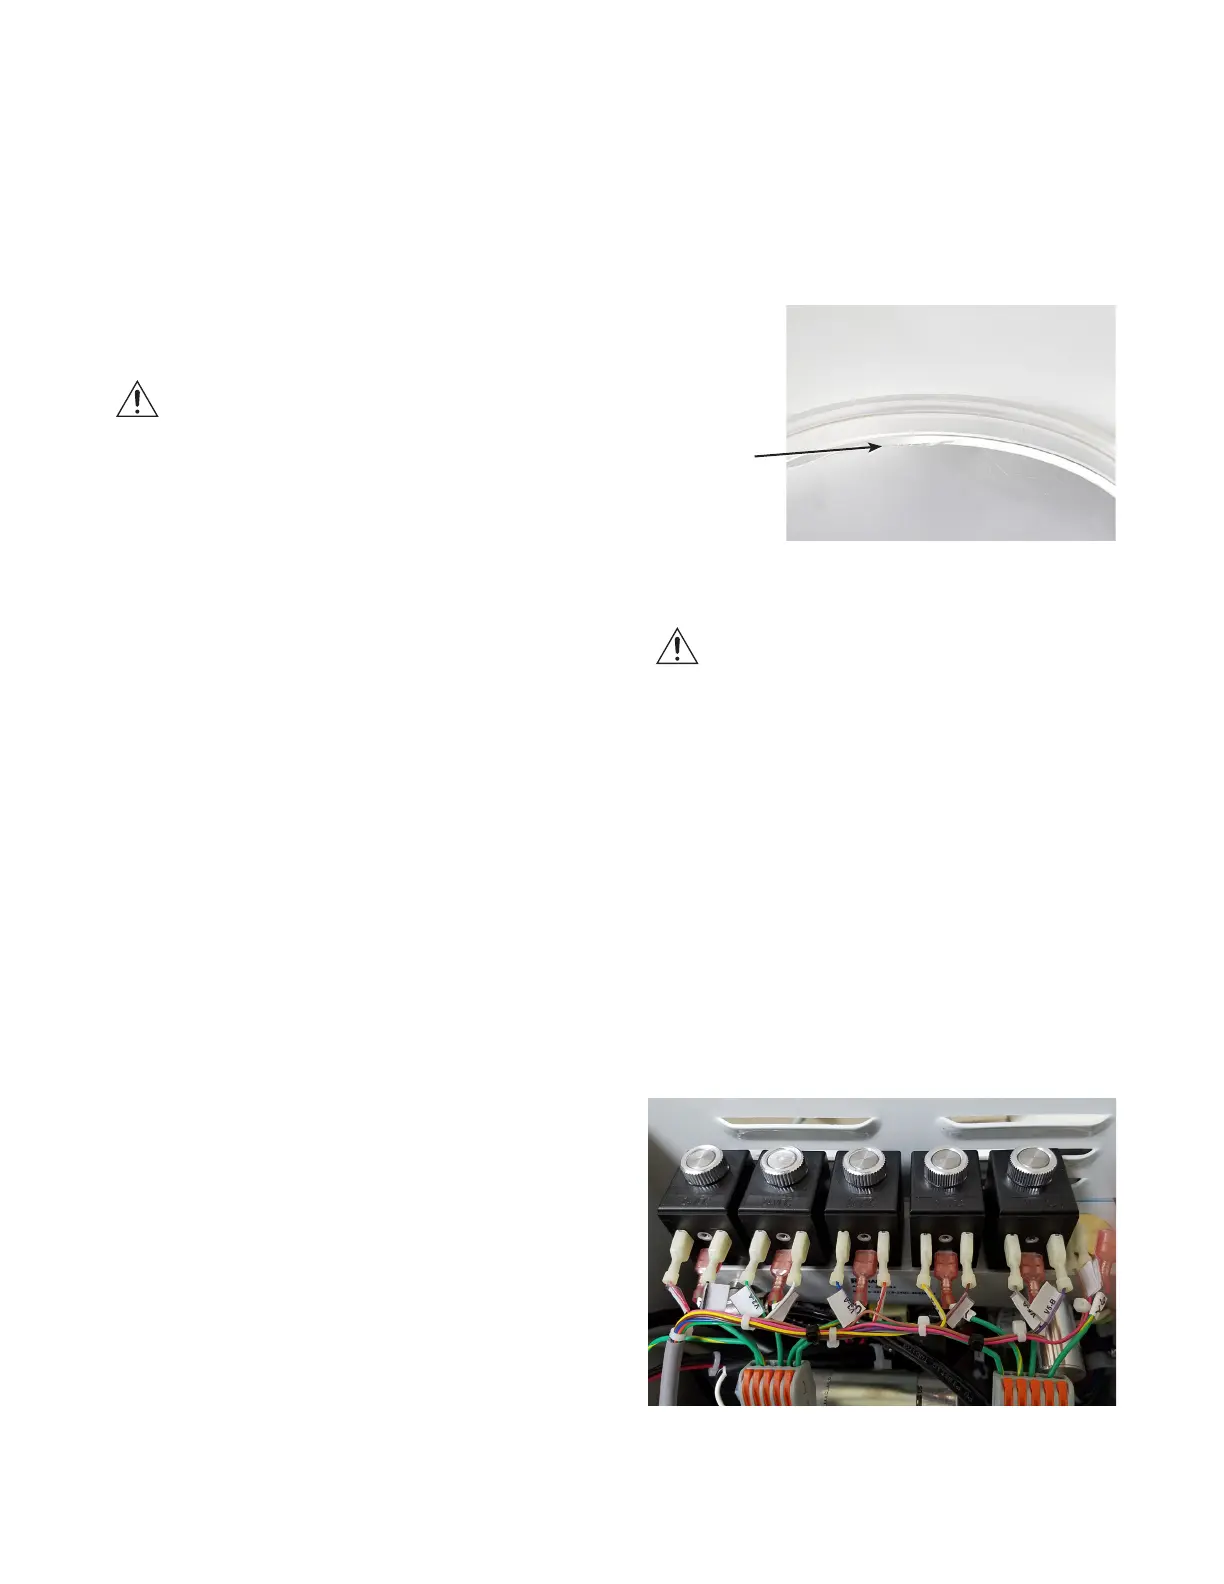
Please use the image below as a guide for viewing of
cracks on the jars.
Crack in jar
2.5 Maintaining valves
NOTICE: Work with one valve at a time.
The valves are located on the rear panel of the chassis.
Periodically, they must be inspected to ensure that there
is no dust or debris obstructing the valve block and/or
the interior of the valves.
2.6 Cleaning valves
1. Unplug the Anoxomat.
2. Close o the gas pressure and disconnect all of the
gas hoses from the instrument.
3. Remove the two screws securing the top cover to
the chassis and tilt the cover forward.
4. Unscrew the thumb nut on top of the coil.

 Loading...


