Chapter 1 Installation and setup
17
Anoxomat
®
III Service Guide
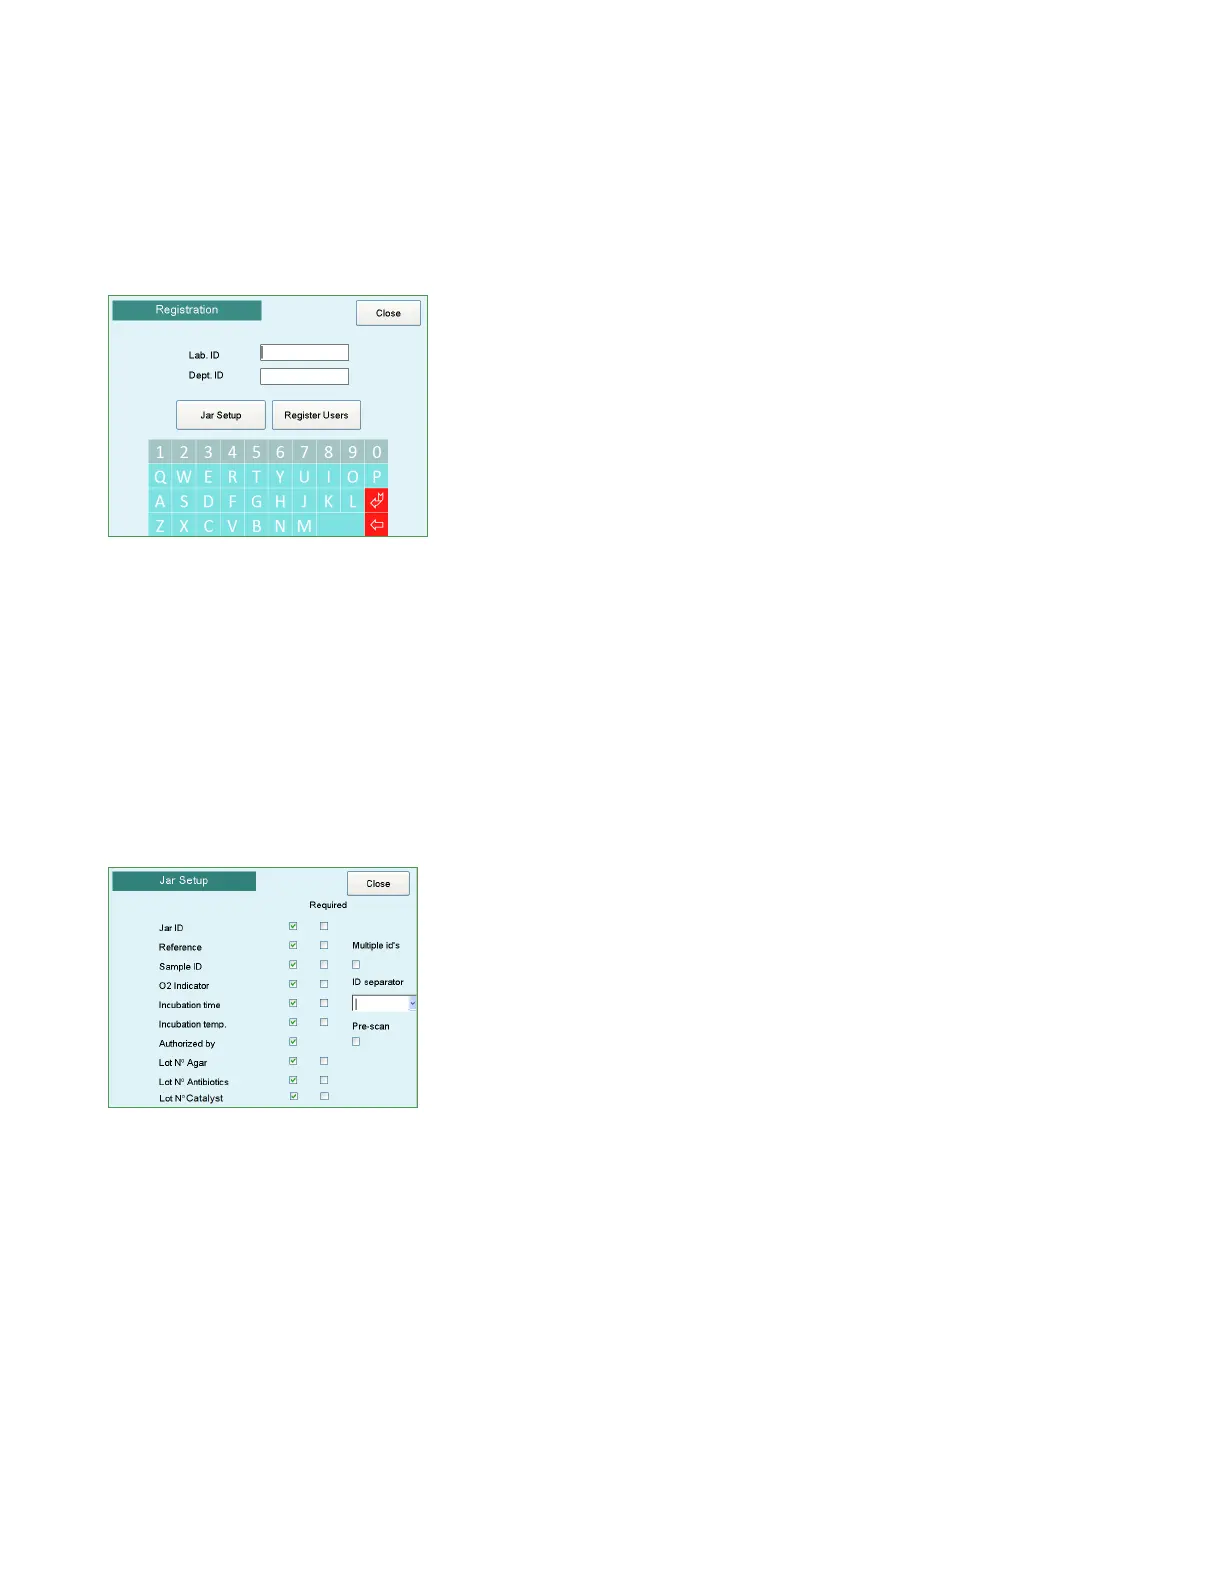
3. The main Registration screen appears.
4. Using the keyboard, enter the Lab ID and Dept. ID.
Jar setup
If you configure the jar setup, the user is prompted to
input data (e.g., Jar ID, contents of jars, job reference,
etc.) before each recipe is started.
1. On the Registration screen, press Jar Setup.
The Jar Setup screen displays a list of options and
corresponding checkboxes.
2. Using the soft-touch pen or your fingernail, select the
fields you want to include by tapping each box to
place a checkmark. If you checked a box by mistake,
tap again to remove the checkmark.
3. If you select the Authorized by checkbox, a blank line
for signature/name authorization appears on the
printout.
4. Press Close to save your settings and exit to the
Registration screen.
For each field selected, the user can enter the respective
information for each jar connected. If no information is
entered, a blank line appears on the printout. However, if
the Required checkbox is selected, the user must enter
the information.
NOTE: The ID separator is used when multiple patient
plates are scanned and processed in the jar.
Register users
To limit access to the Anoxomat, user IDs can be
established to identify the technician before every recipe
is run.
1. On the Registration screen, press Register Users.
2. In the “Add user” section of the screen, enter the user’s
full name as you want it to appear on the printout and
in the database.
3. Enter the user code for the user. The user code does
not appear anywhere but must be entered each time a
recipe is started.
NOTE: As long as even a single user has been registered
to use the Anoxomat, the Anoxomat cannot be
operated without entering a correct user code.
4. Press Submit to add the name and code to the list of
registered users.
5. Repeat steps 2–4 for each registered user.
6. To delete a registered user, select the entry from the
Registered Users list and press Remove.
7. Press Close to save your settings and exit to the
Registration screen. When you're finished configuring
Jar Setup and Register Users, press Close.

 Loading...


