Chapter 5 Settings
31
Osmo1™ Single-Sample Micro-Osmometer Service Guide
7. Tap Save.
8. Optional: If you also want to set up a LAN
connection, tap the LAN tab to bring it to the front;
then refer to the instructions in “Confi guring a LAN
connection” on page31.
9. Tap Exit to return to the Settings menu.
5.12 Confi guring a LAN connection
The Osmo1 can connect to a computer or other device
over a Local Area Network (LAN). An Ethernet port is
available on the back of the instrument.
NOTE: Also see Appendix E.
To set up a LAN connection:
1. From the Settings menu, select LIS/LAN.
The system prompts you to log in.
2. Select the Admin user and enter the appropriate
password.
The LIS/LAN screen displays, with the LIS tab in
front (Figure 34 on page30).
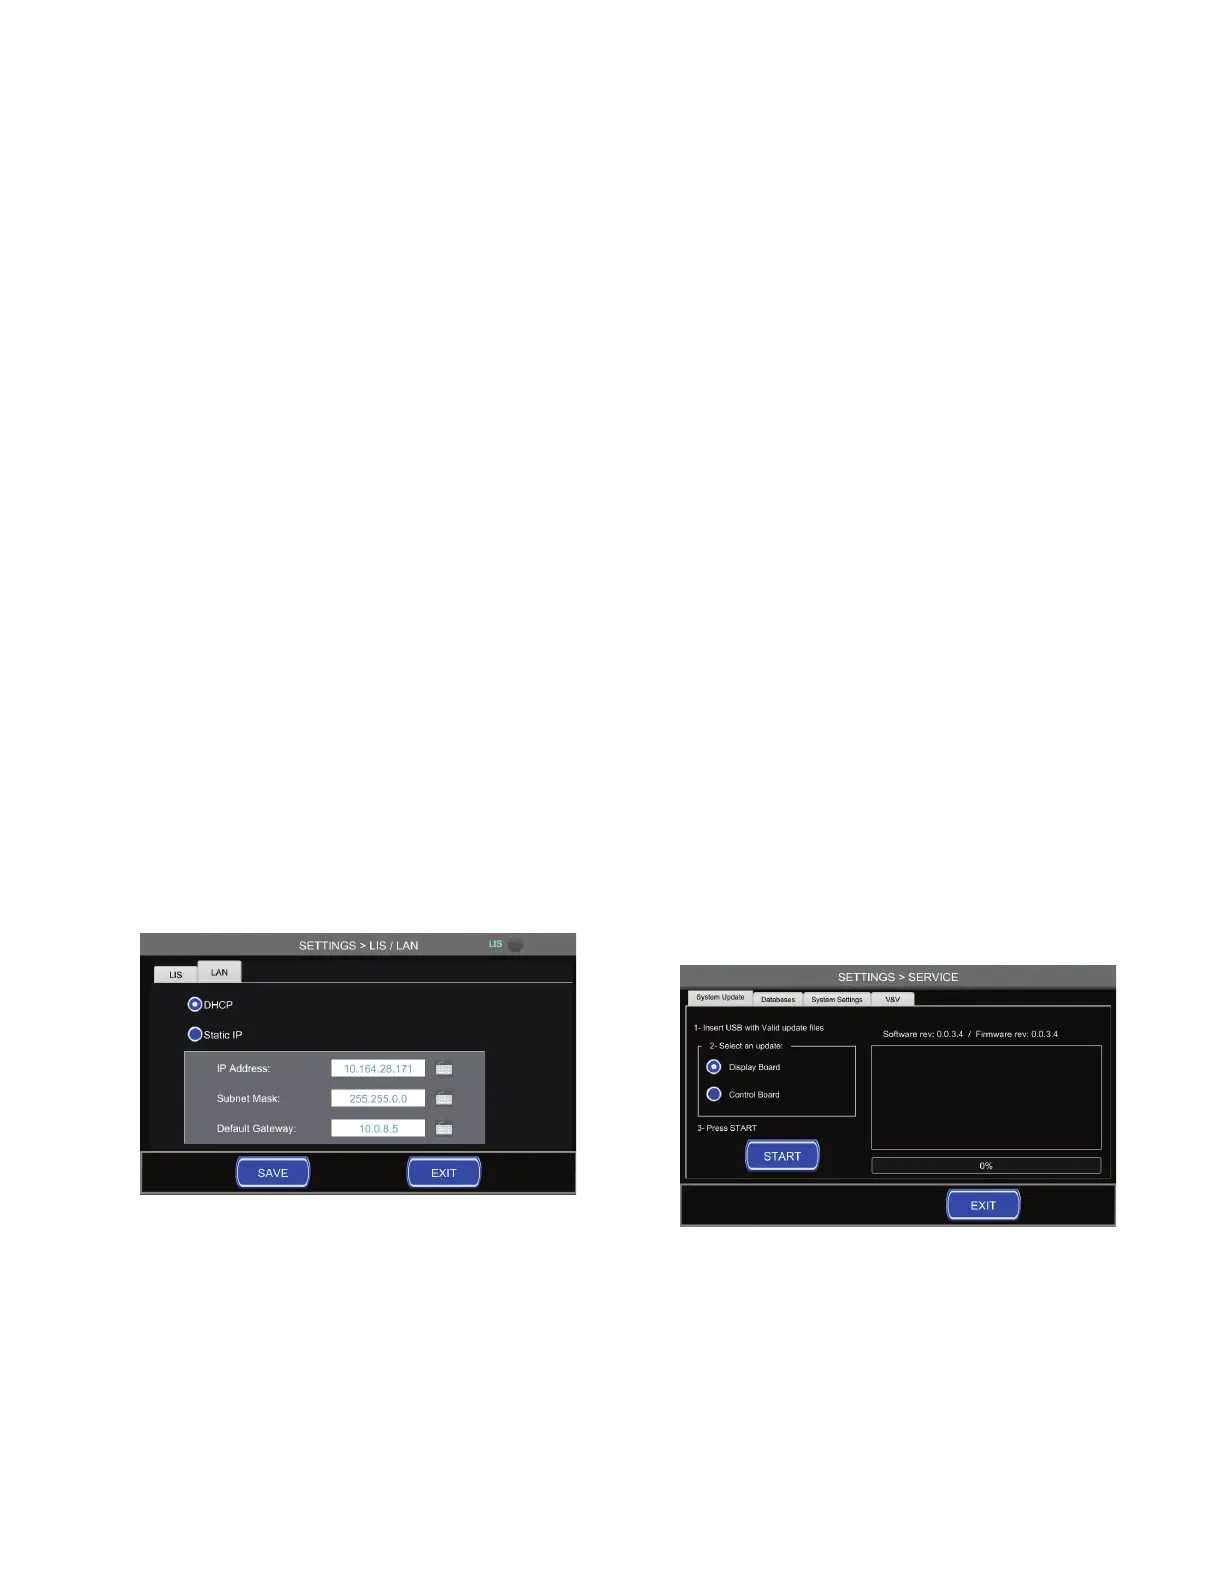
3. Tap the LAN tab to bring it to the front (Figure 36).
Figure 36: LAN tab of the LIS/LAN screen
4. On the LAN tab, select DHCP or Static IP.
NOTE: For best results, assign the Osmo1 a static IP
address.
5. Enter the IP address, subnet mask, and default
gateway in the designated fi elds.
NOTE: Tap the keyboard icon beside each fi eld to
display a numeric keypad. Use the keypad to
enter the value; then tap Enter to close the
keypad and return to the LAN tab.
6. Tap Save to save the LAN settings.
7. Tap Exit to return to the Settings menu.
5.13 Managing the system
The Admin screen provides access to utilities for system
management. From here, you can perform software
updates and export or clear Osmo1 databases.
Performing a software/fi rmware update
NOTE: To perform this task, you must have a USB drive
that contains valid update fi les.
1. From the Settings menu, tap Service.
The system prompts you to log in.
2. Select the Admin user and enter the appropriate
password.
The Service screen displays, with the System Update
tab in front (Figure 37).
Figure 37: Service screen > System Update tab
3. Insert the USB drive that contains the update fi les
into the USB port on the back of the instrument.
4. Select the type of update to perform: either Display
Board or Control Board.