Chapter 7 Maintenance & service
38
Osmo1™ Single-Sample Micro-Osmometer Service Guide
Figure 50: Access the solenoid assembly inside Osmo1
2. Insert a disposable chamber cleaner into the sample
probe opening until you feel a positive stop.
3. Unscrew the two solenoid retainer bracket screws
and gently remove the bracket.
4. Being careful not to lose any small parts, grasp the
enclosed solenoid plunger assembly, lift it up, and
then withdraw it from the body cylinder
(stepFigure 51).
NOTE: Leave the body cylinder in place inside the
instrument.
Figure 51: Solenoid plunger assembly
5. Dampen the wooden end of a cotton-tipped
applicator with a 70% isopropanol solution; then
insert it down through the solenoid body into the
smaller diameter plunger hole until it reaches the
chamber cleaner you inserted in step2.
Move the applicator in and out to scrub the sides of
the hole.
6. Clean the smaller diameter plunger of the solenoid
assembly with a 70% isopropanol solution on a soft
cloth.
Do not use any abrasive for this cleaning procedure.
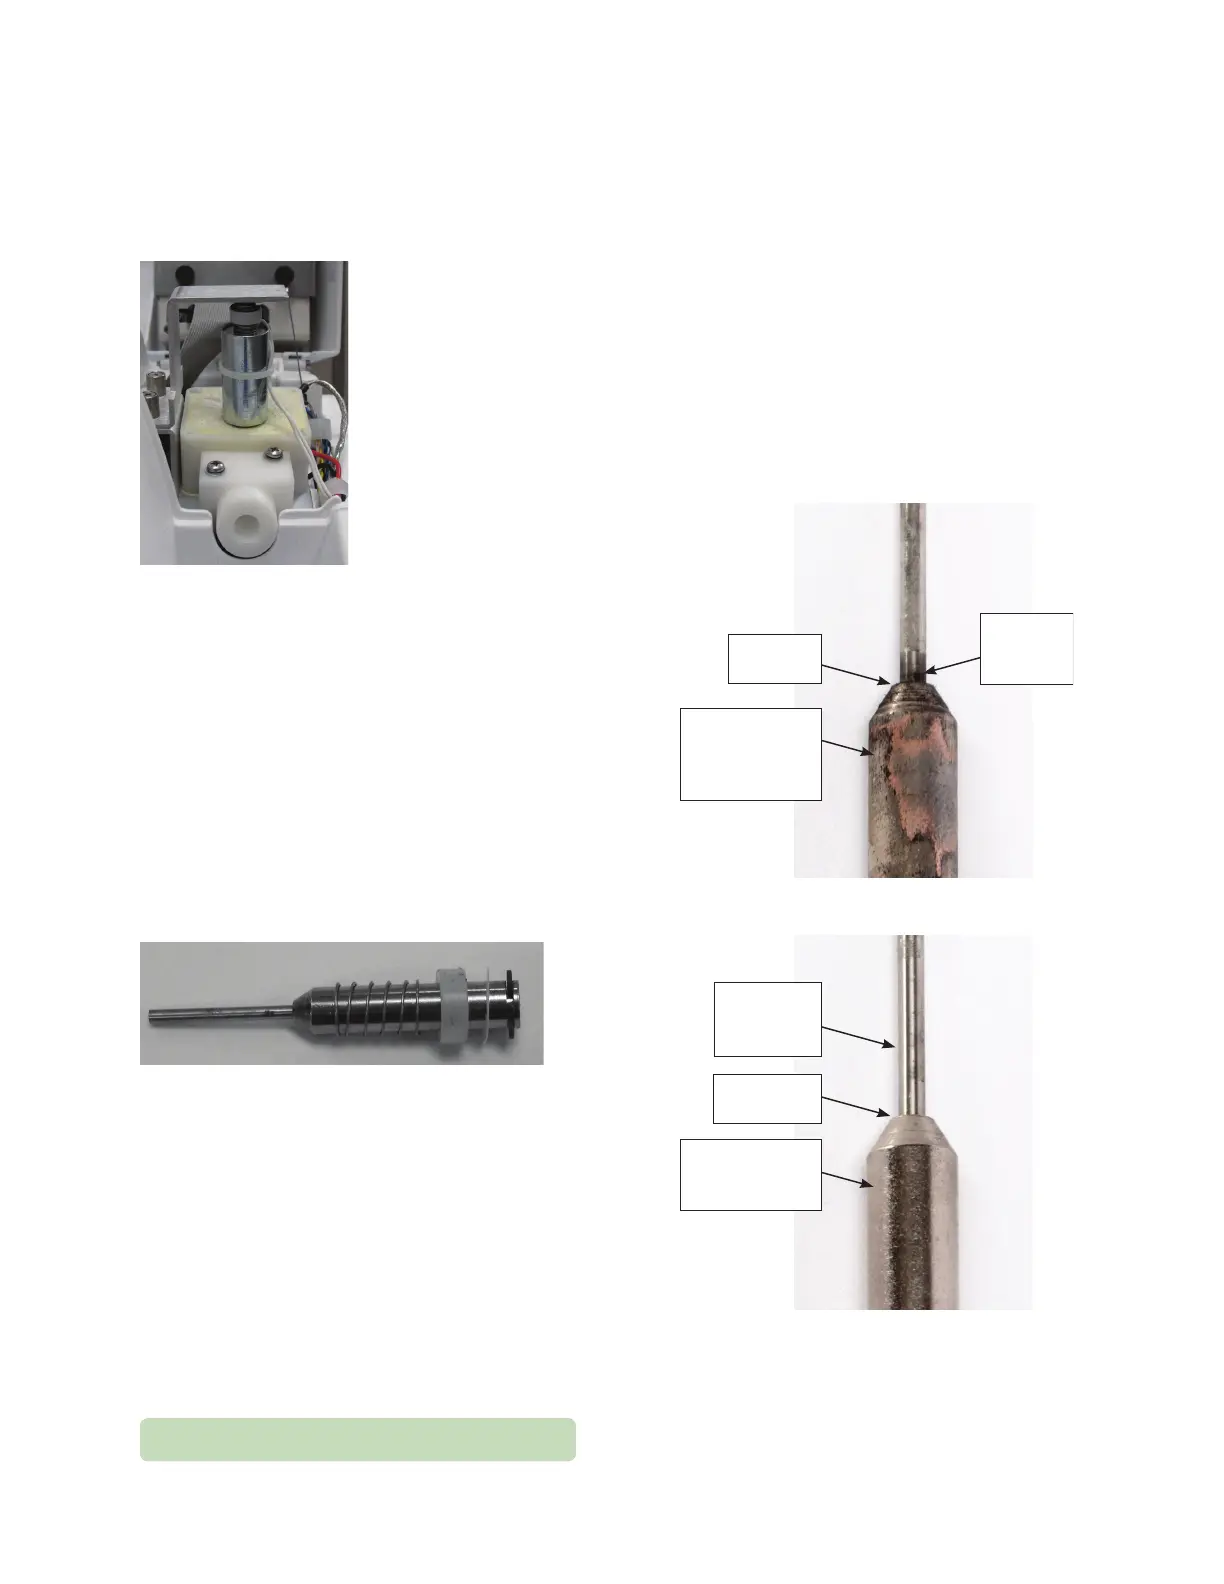
7. Inspect the solenoid plunger for excessive wear and
deposits.
• If the plunger shows signs of fouling (Figure 52),
clean it with a lint-free cloth dampened with
isopropyl alcohol or a cleaning solution for protein
removal. (Thermo Scientific Orion Cleaning
Solution, part number 900021 is recommended.)
• If the plunger does not show signs of wear
(Figure 53), continue to step8.
Black
deposits
on shaft
Filings
present
Plating is
uneven, with a
dull, hammered
appearance
Figure 52: Solenoid plunger with visible signs of wear
No black
deposits
on shaft
No filings
present
Plating is
even, bright,
and shiny
Figure 53: Solenoid plunger with no signs of wear