en
1
2
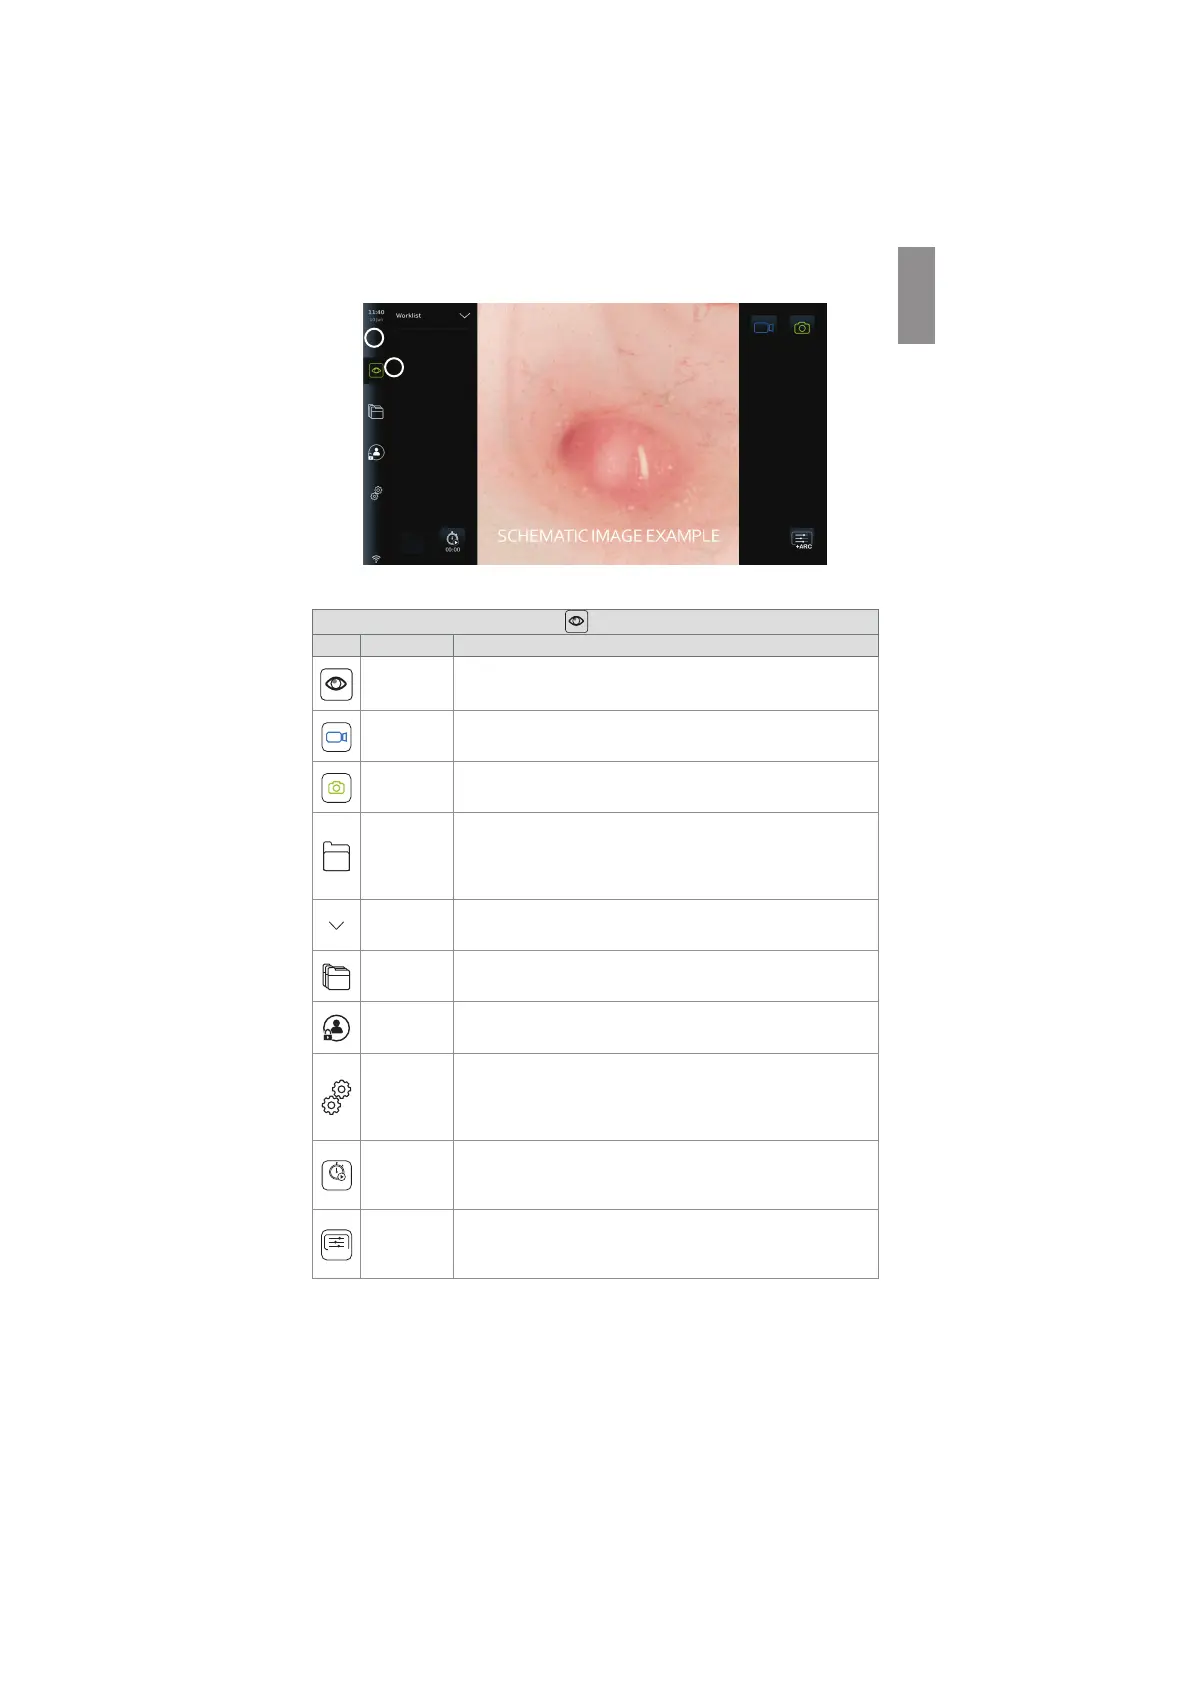
The icons visible in the Live view screen are described in the table below. The functions are
explained in further detail in the following sections.
Explanations of functions in Live View
Icon Name Function
Live view
This tab shows the live image when an Ambu visualization device is
connected.
Video
recording
Press the blue video recording button to start recording video
during a procedure. Press again to stop recording.
Photo
Press the green Photo button to take a photo during the
procedure. Photos can also be taken during video recording.
Current
procedure
View videos and photos recorded in the current procedure. The
folder icon appears on the screen if a patient has been selected
from the worklist, if a photo or video has been made, or if the
stopwatch has been activated. See section 7.3.3
Worklist
Expand the worklist drop down menu to select a patient. Now,
patient data will be added to photos and videos. See section 7.3.5.
Archive
Access photos and videos. Manage and export files. Login is
required. See section 7.4.
Login
Login is required to access Settings, Archive and Export files via
DICOM.
Settings
Access system settings. Login as Administrator or Service user to
change settings. Default and Advanced users only have access to
view device information and the current configuration of the
endoscope buttons.
00:00
Stopwatch
Press the stopwatch to start a video on the exact procedure time.
While the stopwatch is active, multiple timestamps can be
recorded during the procedure. See section 7.3.10.
+ARC
Image
adjustment
Adjust Colour, Contrast, Sharpness, Brightness. Access the Zoom
function and ARC (Advanced Red Contrast) imaging technology.
See section 7.3.6.
7.3.1. Taking photos and recording videos
The displaying unit can record still photos and video sequences of the live image using the
recording icons in the upper right corner of the user interface (indicated with a red box below)
or by using the buttons directly on a connected endoscope (see section 5.10. for endoscope
buttons configuration).
25