3
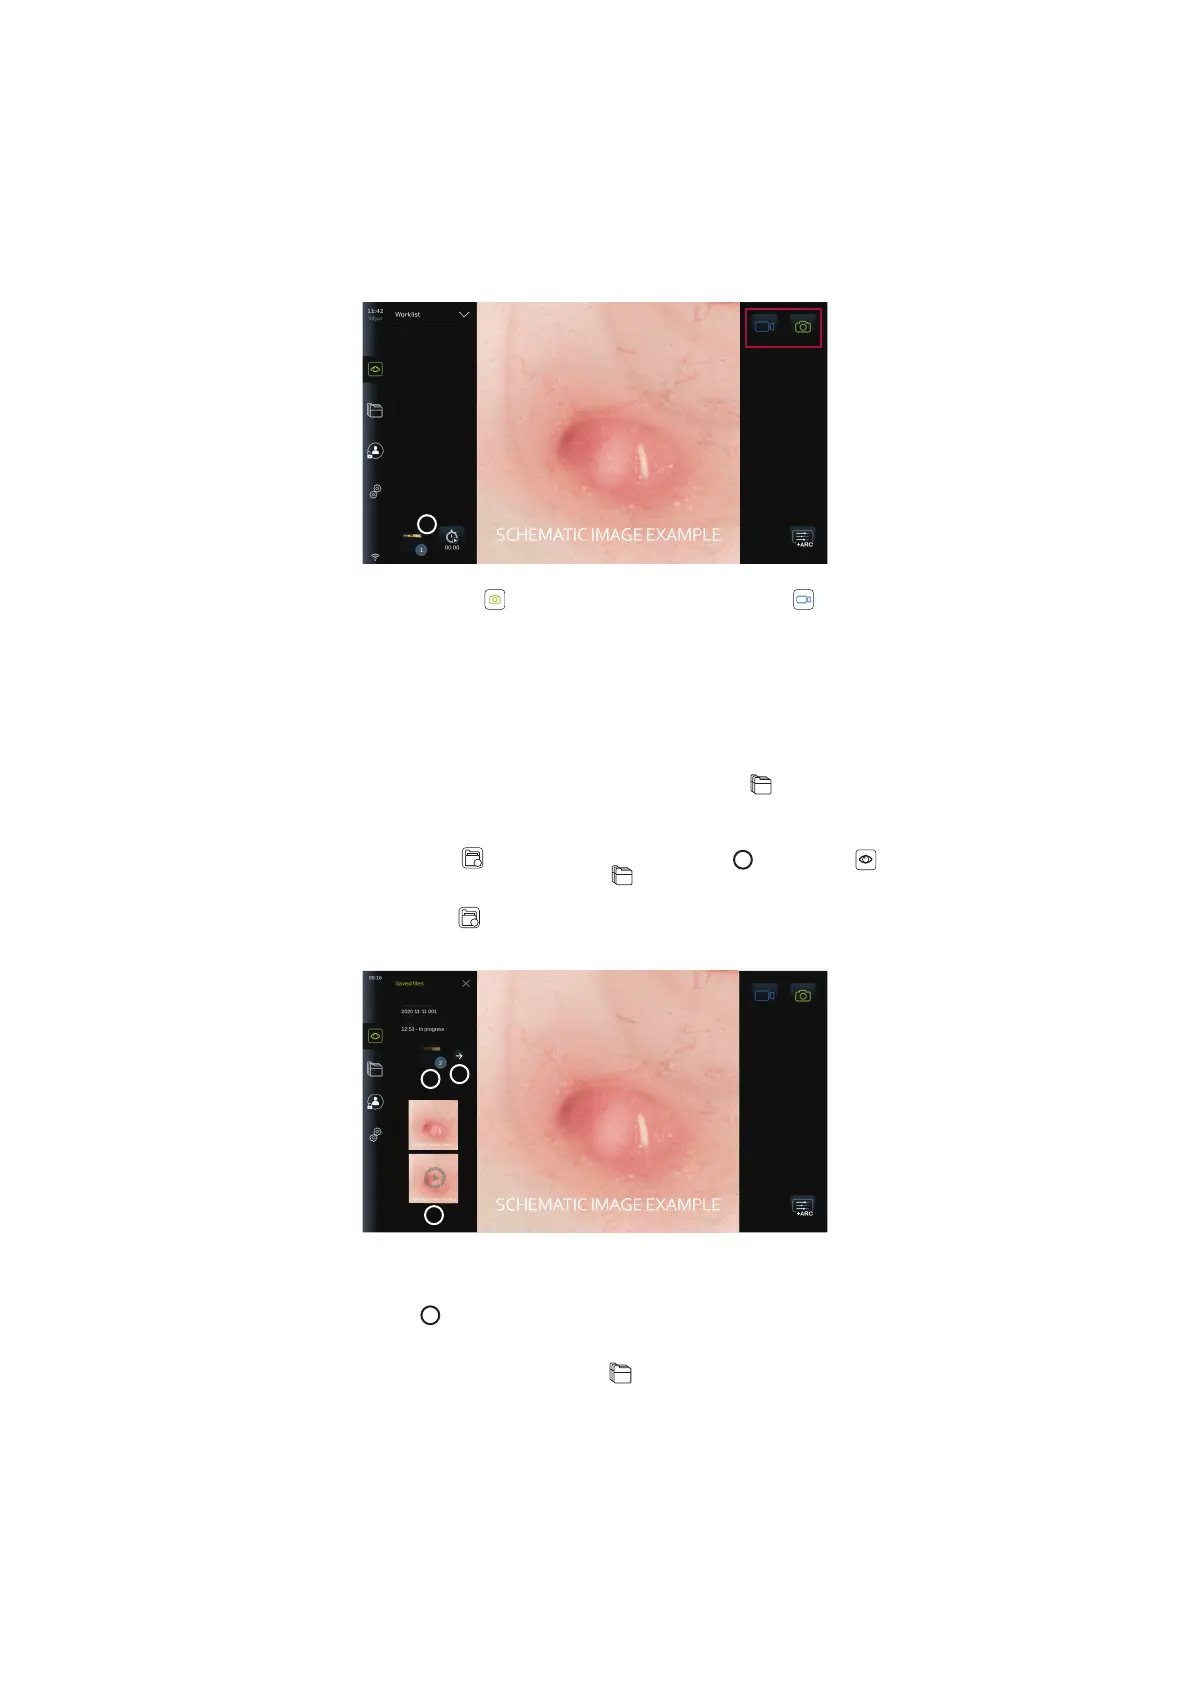
7.3.2. To record a photo or video:
• Press the green Photo
button to take a photo or the Video recording button to
record a video sequence during a procedure.
• It is also possible to take photos while recording a video.
When a photo or video has been recorded it will be stored in the Current procedure folder. If
a patient has been selected in the Worklist (see section 7.3.5), patient information will be
stored with the photos and videos.
Maximum video recording length
The maximum duration of a recorded video sequence is 30 minutes. A notification will be
shown in the user interface area when the maximum recording time is almost up. See section
7.4. for information on access to stored photos and videos in the Archive
tab.
7.3.3. Current procedure
When a photo or video has been recorded or a patient has been selected in the Worklist (see
section 7.3.5.) a procedure folder for the Current procedure is created on the displaying unit.
The Current procedure
folder will appear in the lower left corner
3
in the Live view
tab, and will also be accessible under the Archive
tab. A number on the icon informs
about the number of photos and videos recorded and stored in the Current procedure.
The Current procedure
folder can be accessed without logging in, but is only accessible
during a procedure. When the Current procedure is finished, the procedure folder will move to
the Recent folder and will require login to access.
4
6
5
When opening the Current procedure folder, the saved files will be shown on the left side of
the screen. You can also see the Procedure name and the Time the visualization device was
first connected.
• Scroll down
5
to see all available photos or videos from the procedure. The photos or
videos are shown in descending order with the newest from the top.
• You can view a specific recorded file by selecting it directly in the Current procedure
folder. This will open the file in the Archive
tab (see section 7.4).
26