Initial Configuration
21
NetLinx Integrated Controllers (Firmware v4)- WebConsole & Programming Guide
9. Click Done to close the dialog.
NOTE: On the front panel of the NetLinx Master, the STATUS and OUTPUT LEDs should begin to alternately blink during the
incorporation. Wait until the STATUS LED is the only LED to blink.
Complete the communication process by continuing on to the Communicating Via IP Address section on page 21.
Communicating Via IP Address
Whether the on-board Master’s IP Address was set or obtained via DHCP, use the IP Address information from the Network
Addresses dialog to establish communication via the LAN-connected Master.
1. Use NetLinx Studio to obtain the IP Address of the NI Controller from your System Administrator.
If you do not have an IP Address, follow the steps outlined in either the Obtaining the NI Controller’s IP Address (using
DHCP) section on page 19, or the Assigning a Static IP to the NI Controller section on page 20.
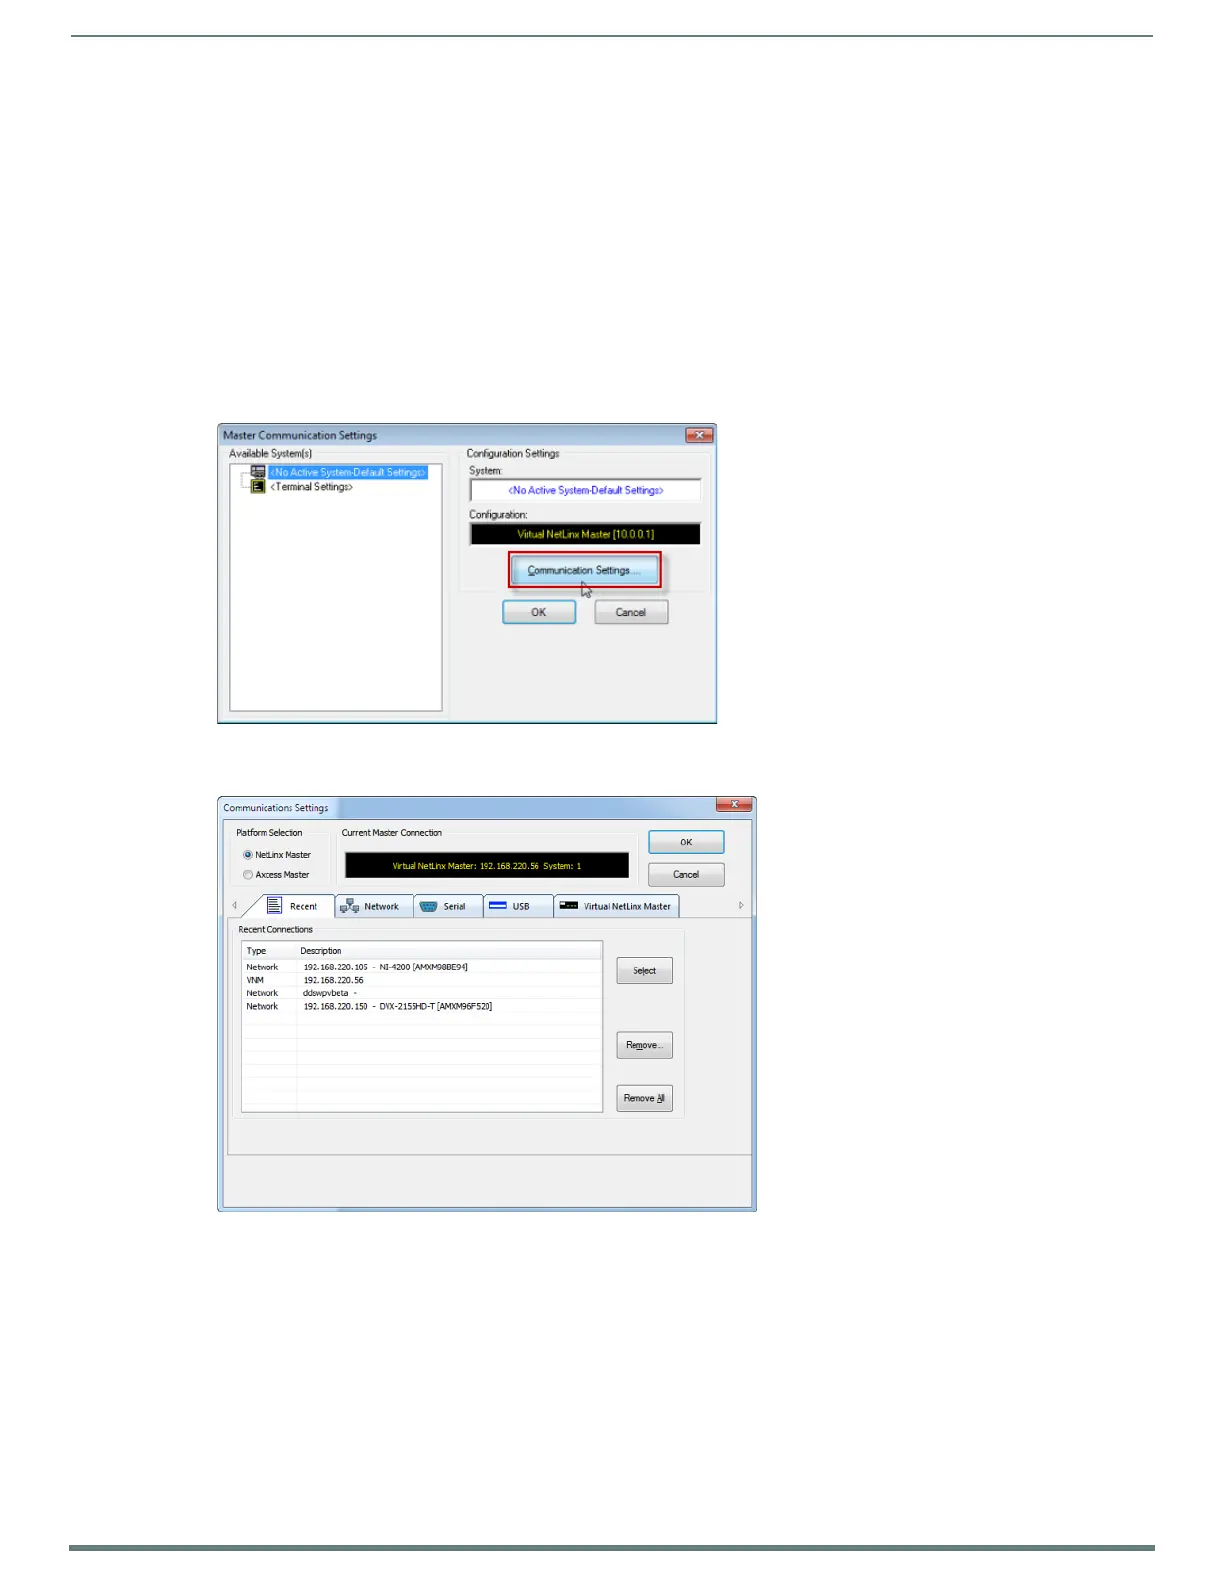
2. Select Settings > Master Communication Settings from the Main menu to open the Master Communication Settings dialog
(FIG. 18):
3. Click Communications Settings to open the Communications Settings dialog (FIG. 19):
4. In the Platform Selection area, select NetLinx Master.
5. Select the Network tab (FIG. 20).
FIG. 18
NetLinx Studio - Master Communication Settings dialog
FIG. 19 NetLinx Studio - Communication Settings dialog (TCP/IP selected)

 Loading...


