version 2.0 rev 18 Feb 2021
62
SECTION 4: OPERATION
4.1 Connecting your Camera and Switching it on
Ensure that the Camera on / o switch is in the OFF position AND your PC is switched OFF.
For water cooled models, ensure the cooling water supply is connected prior to powering the
camera (refer to Section 3.3).
• Before inserting the 12V DC power connector to the rear of the camera, ensure the orientation is
correct. Never forcibly insert the connector. For water-cooled models, connect water cooling hoses
(see Section 3.3.2) and ensure re-circulator/chiller is on.
• Securely connect the Camera to PC cable between the appropriate connector(s) on the rear of the
camera and the corresponding port on the PCIe card.
(See Figure 36, please refer also to diagram in Section 3.5 for correct PCIe slot connection).
Notes:
Andor Camera Link cables are labelled to assist correct installation.
For USB 3.0 models, use only the supplied USB 3.0 cable to ensure performance.
• If required connect the I/O expander cable to the 15 way I/O connector.
• SwitchthecameraonusingtheON/OFFswitch.Youshouldhearanaudibleconrmation(ashort
beep followed by a long beep)
• Turn on the PC.
• Start your software.
• Start acquiring data.
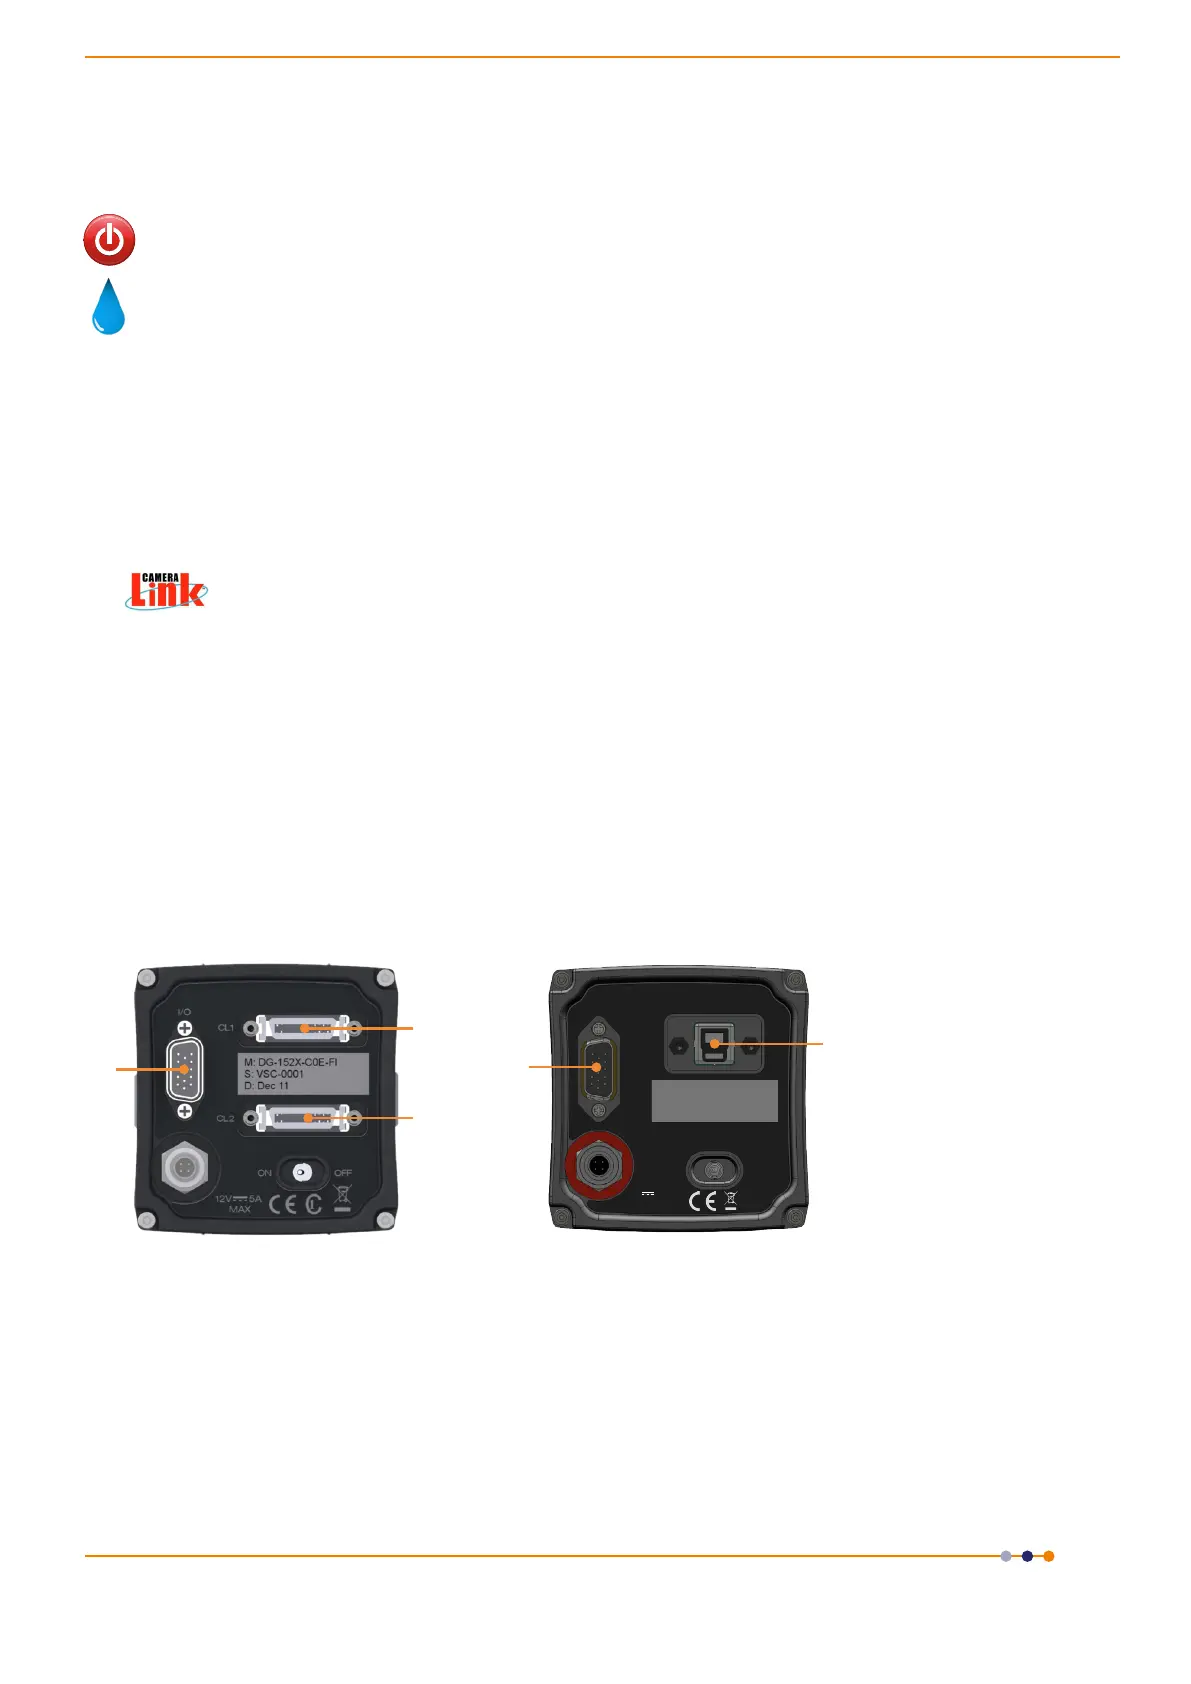
Figure 38: ConnecttheZylatotheportonthePCbytheconnectionsshownabove(Left)CameraLinkmodel,(Right)USB3.0model
TT
12V 5A
Max
OFFON
I/O
USB
3.0
Made in UK
1
1
2
3
4
1. I/O 15-Way D Type
Connector
2. CL1 connector
3. CL2 connector (10-tap
cameralink versions only)
4. USB 3.0 Connector
Camera Link Model
USB 3.0 Model

 Loading...