12
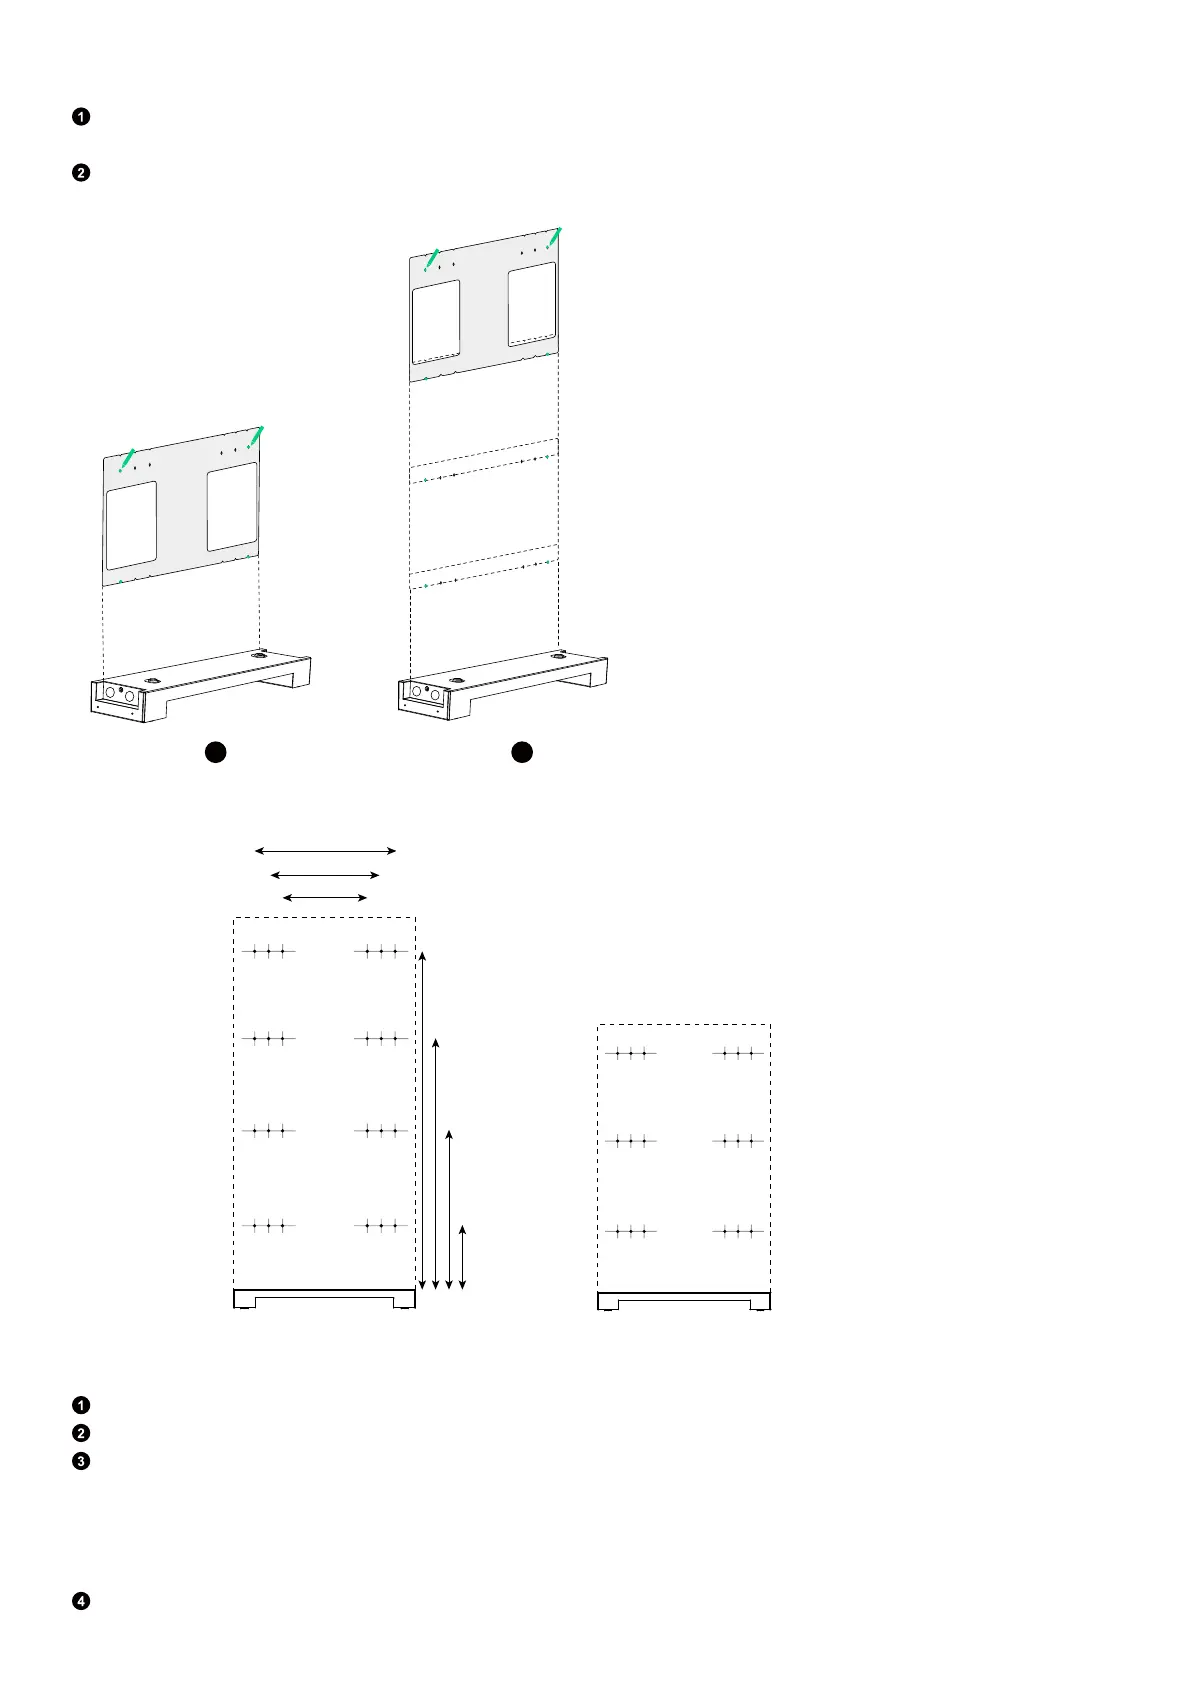
Step 2: Mark pilot holes for the remaining modules.
Unfold the positioning card and align the bottom row of holes with the marked holes. Choose and mark a hole on each side
at the top for the second module.
Repeat the previous step to mark any remaining pilot holes as necessary.
Figure: Mark pilot holes for the remaining modules.
2
1
A
B
C
C
B
A
Top
Bottom
Top
Bottom
Figure: Dimensions of pilot holes.
Battery
Module 6
Battery
Module 5
Battery
Module 4
304 mm
406 mm
508 mm
Power Module
Battery Module 3
Battery Module 2
Battery Module 1
Φ5 mm
243 mm
603 mm
963 mm
1,323 mm
Step 3: Attach mount brackets to the wall.
Drill the marked pilot holes in the wall. Make sure the drill bit is aligned with the center of the holes.
Insert the plastic anchors (M6×50 mm, included) into the pilot holes. Make sure the anchors are flush with the wall.
Check the baseboard and position the mount bracket properly against the wall. Tighten the self-tapping screws (M6×50
mm, included with the anchors) to secure the mount bracket.
·
If there is no baseboard or the baseboard is no more than 15 mm thick, position the wide bar of the mount bracket against
the wall.
·
If the baseboard is between 16 and 70 mm thick, position the narrow bar of the mount bracket against the wall.
Repeat steps 1 to 3 to install all of the mount brackets onto the wall.