13
·
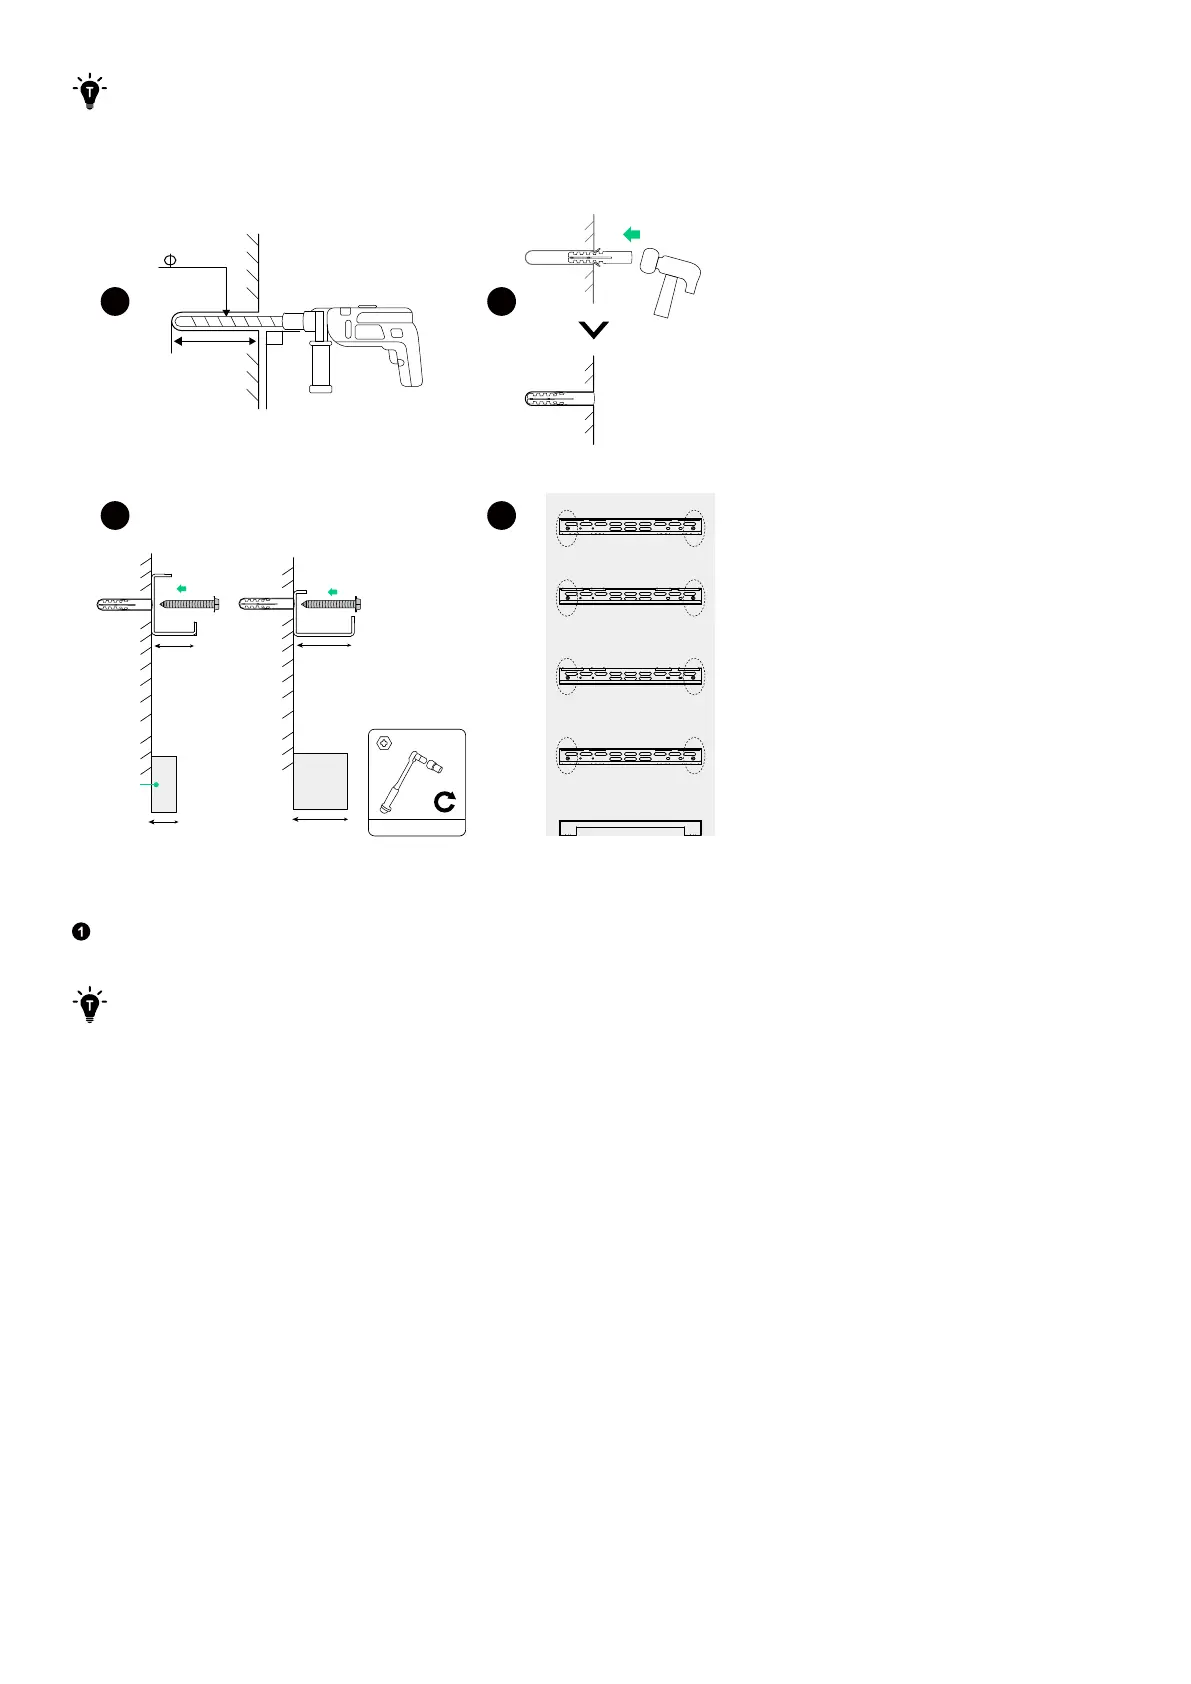
After drilling, clean up any shavings that have accumulated inside or outside the equipment.
·
In the case of a wall with studs, use the self-tapping screws (M6×50 mm) in lieu of the plastic anchors and
screws (M6×50 mm).
Figure: Install mount brackets.
1
2
3 4
10 mm
90︒
>60 mm
30 mm
0-15 mm
Baseboard
70 mm
16-70 mm
5 N·m
M6 x 50 mm
Step 4: Mount modules onto the brackets.
To ensure proper alignment, fasten the floor mounting base to the first battery module before hanging them onto the
mount bracket.
·
When securing the module interlockers, make sure that the inner edges of the floor mounting base and all the
modules are aligned within a tolerance of 1 mm.
·
Ensure that the first battery module and floor mounting base are level within a tolerance of +/– 0.5° horizontally.
Use the included shims to fill in any gaps if necessary.