EasyManuals Logo

Apollo HD Series User Manual

Default Icon
126 pages
To Next Page IconTo Next Page
To Previous Page IconTo Previous Page
Page #63 background imageLoading...
Page #63 background image
63
63
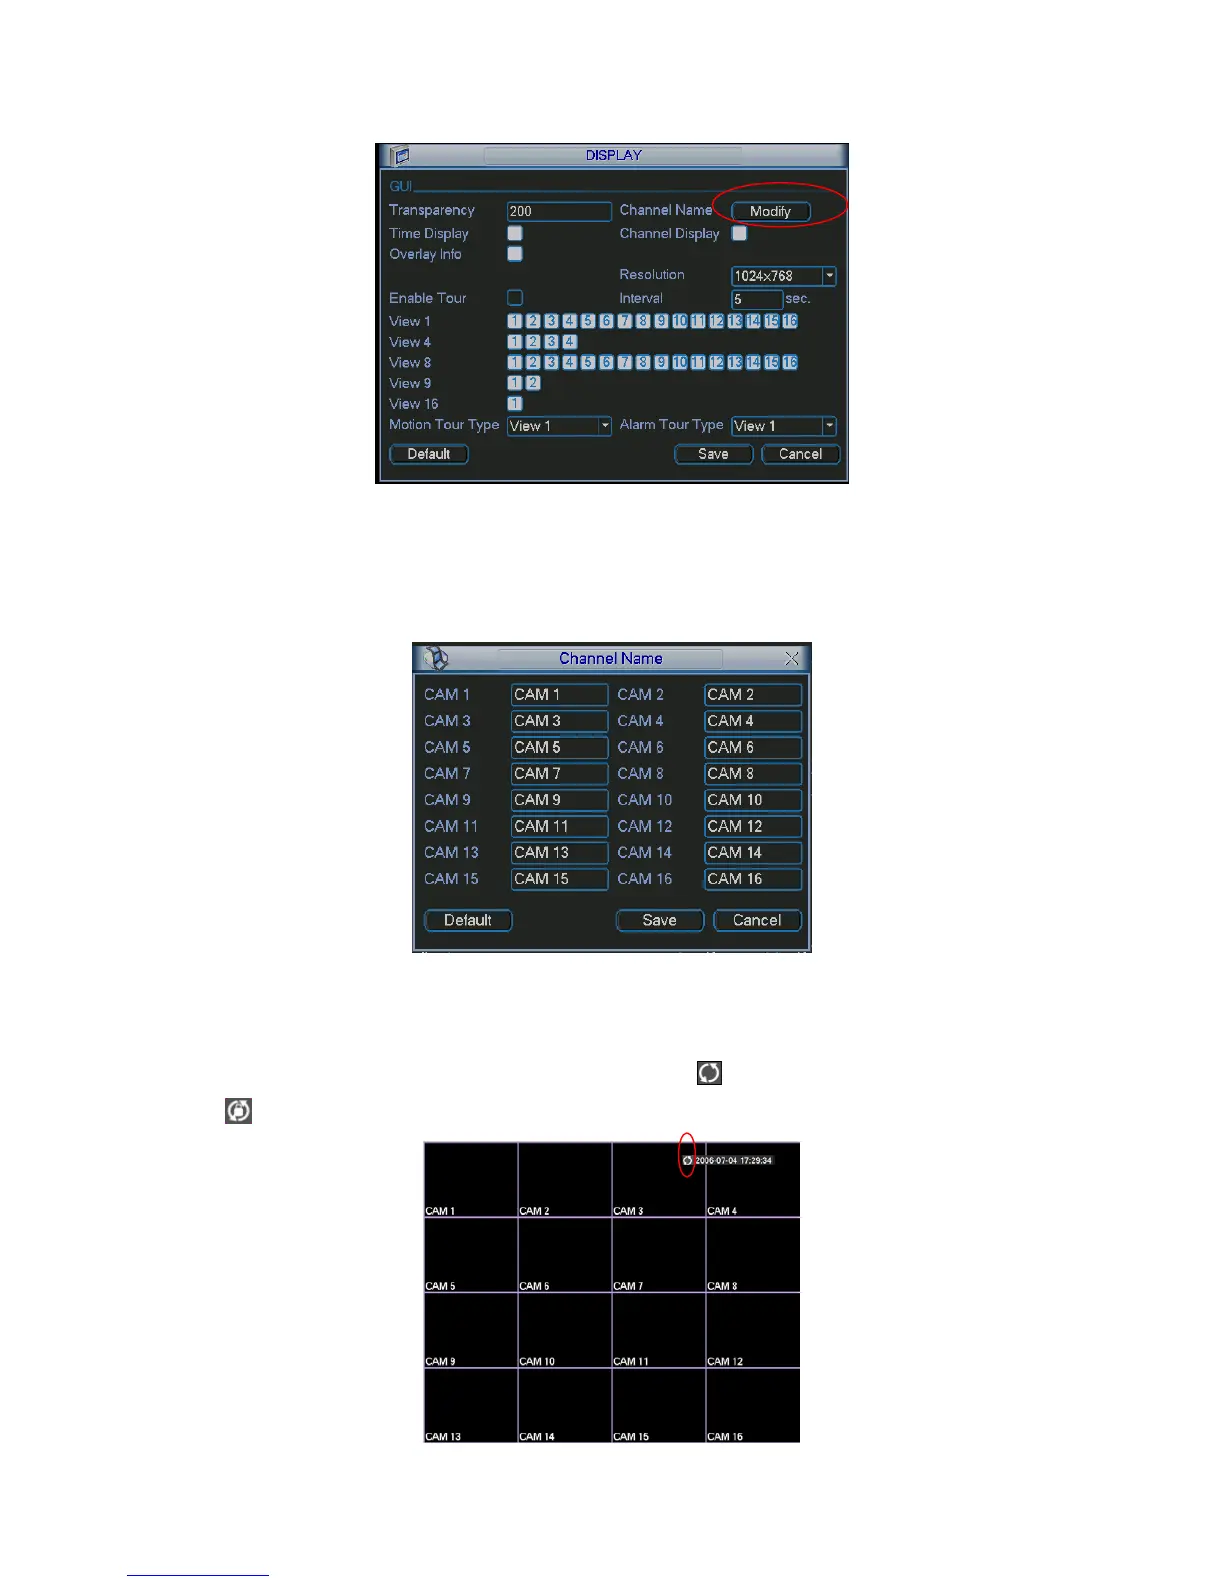
After completing all the setups please click save button, system goes back to the previous menu.
Figure 5-22
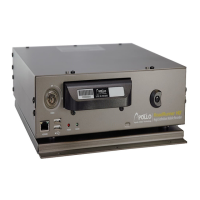
In Figure 5-22, click modify button after channel. You can see an interface is shown as in Figure
5-23. Please note all your modification here applies to local end only. You need to refresh web or
client-end to get the latest channel name. System max support 25-digital character.
Figure 5-23
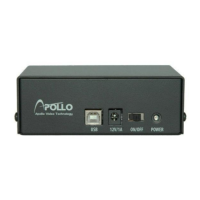
In tour mode, you can see the following interface. On the right corner, right click mouse or click
shift button, you can control the tour. There are two icons:
stands for enabling window switch
and
stands for enabling window function. See Figure 5-24.

Table of Contents

Other manuals for Apollo HD Series

Questions and Answers:

Question and Answer IconNeed help?

Do you have a question about the Apollo HD Series and is the answer not in the manual?

Apollo HD Series Specifications

General IconGeneral
CategoryDVR
Video CompressionH.264
Hard Drive CapacityUp to 6TB
Remote ViewingYes
Operating SystemEmbedded Linux
Video Input4/8/16 channels
Recording Resolution1080p/720p
Mobile SupportiOS, Android

Related product manuals