Parameter Function
Setup
In Figure 7-29, click set button, you can go to the corresponding
setup interface.
Please set schedule period and then select corresponding record
or snapshot type: schedule/snapshot, motion detection/snapshot,
and alarm/snapshot.
Please select date (Current setup applies to current day by default.
You can draw a circle before the week to apply the setup to the
whole week.)
After complete setup, please go back to Figure 7-29 and then click
save to save current time period setup.
Copy It is a shortcut menu button. You can copy current channel setup to
one or more (all) channels. The interface is shown as in Figure
7-28.
Save You can click save button after you complete setup for one channel,
or you can complete the whole setups and then click save button.
Refresh Click this button to get device latest configuration information.
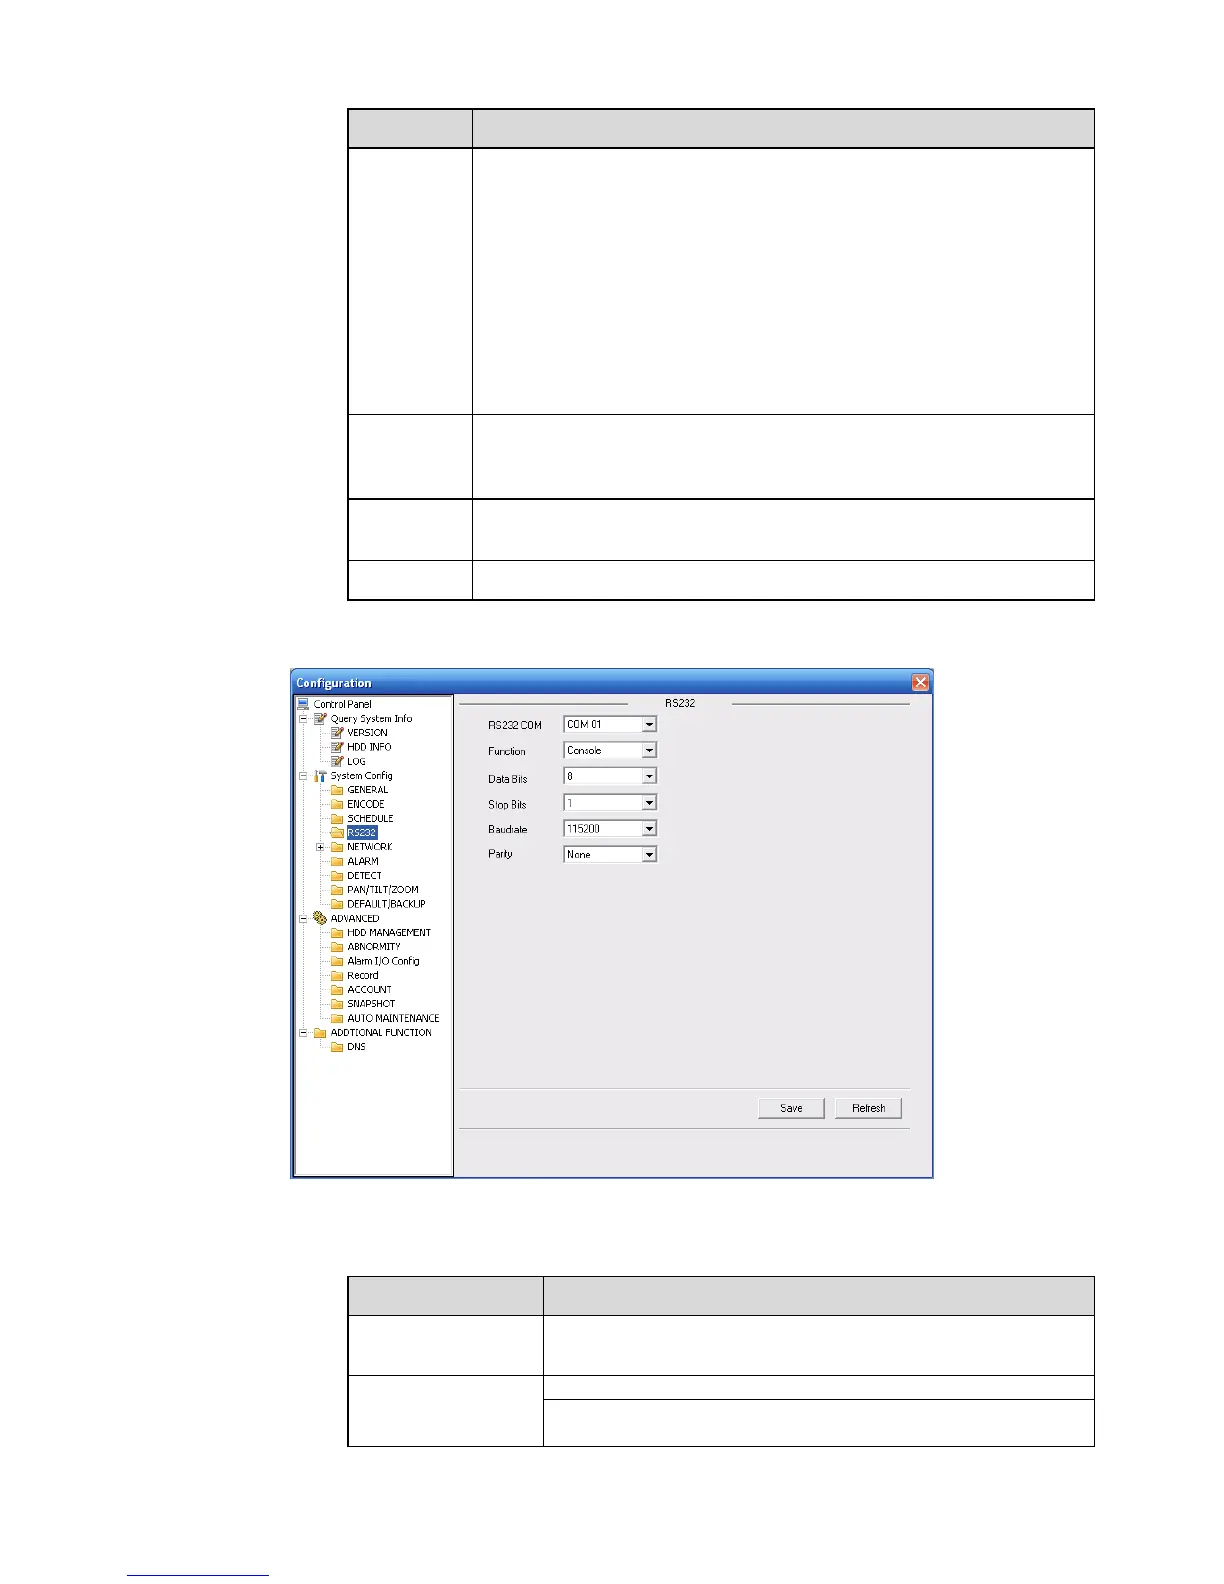
7.3.2.4 RS232
The RS232 interface is shown as in Figure 7-31.
Figure 7-31
Please refer to the following sheet for detailed information.
Parameter Function
RS232 There are two options: COM 01 and keyboard.
Function