30
4. Place the transmission in N (neutral).
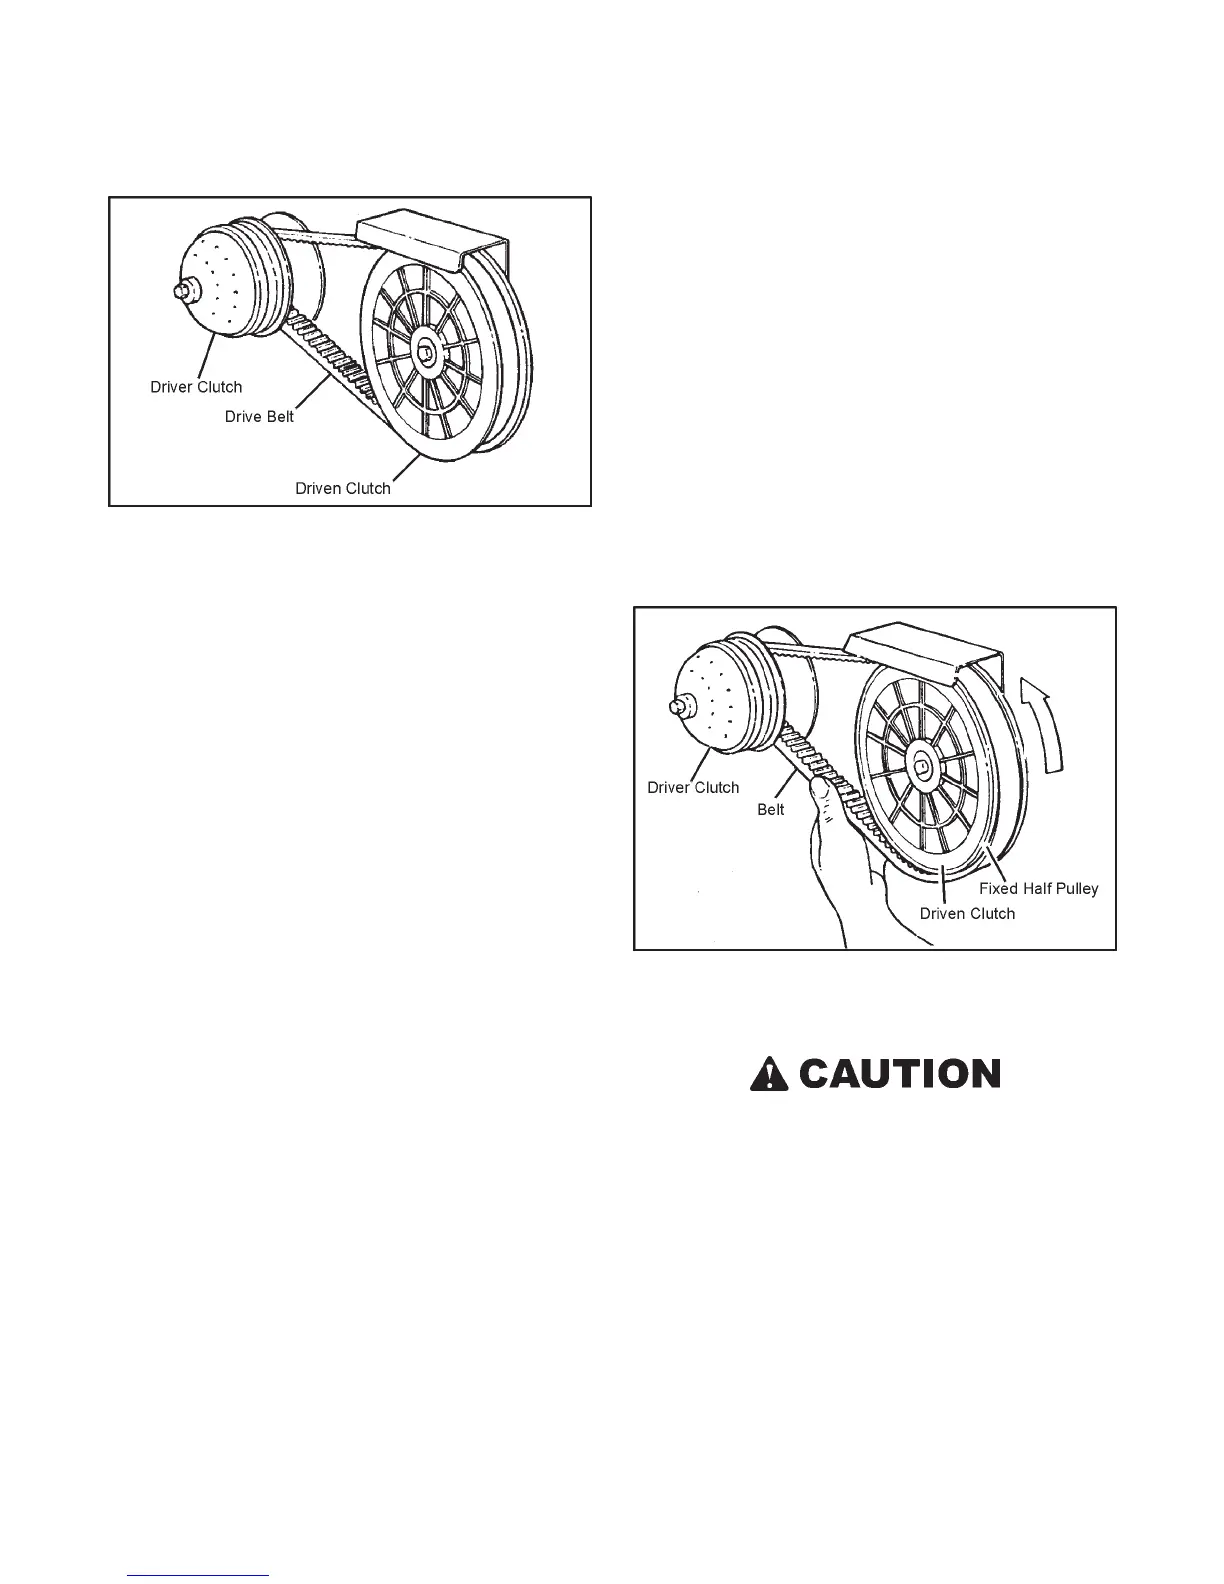
5. Grasping the fixed face of the driven clutch, turn the inside
moveable face clockwise forcing the belt down between
the 2 sheaves and causing the driven clutch to open. When
open far enough to slacken the belt, hold in the spread
apart position with one hand while easing the belt over the
bottom of the fixed half pulley of the driven clutch and
turning the clutch counterclockwise until the belt is off.
6. Remove the belt from the driver clutch.
Alternative Method:
It may be easier to remove both driven and driver clutch from
engine and transmission, sliding each off at the same time
along with the drive belt.
Figure 7-3. Removing the drive belt.
To install the Drive Belt:
If this procedure is not carried out as described, the
edge of the fixed face may cut or damage the drive belt.
1. Position the belt around the driver clutch first.
2. Ease the belt over the edge of the fixed face on the driven
clutch and at the same time, turn the inside, movable face
clockwise.
Drive Belt alignment and tension are pre-set at the factory and
are not adjustable. They are critical for proper operation of
the drive system. Return the vehicle to an ARGO dealer if
rapid belt wear occurs.
SECTION 7
MAINTENANCE INFORMATION
Figure 7-2. Location of drive clutches and drive belt.
Check the drive belt after every 25 hours of operation, or
whenever there is a noticeable reduction in clutch perform-
ance. Replace the belt when:
• the top width of the belt has worn to 1-5/16" (33mm) (All
C, R, B, N, S and A models) ; or on Avenger and Frontier
models
• the top width of the belt has worn to 1.41" (29mm)
• cracks, fraying or shredding is apparent
• it becomes contaminated with oil or some other fluid
Refer to the ARGO Parts Manual for correct drive belt part
number.
To Remove the Drive Belt (All C, R, B, N, S and A models)
1. Make sure ignition is turned off.
2. Remove the engine access hood.
3. Remove the firewall.
4. Place the transmission in N (neutral).
5. Ease the belt over the fixed half pulley of the driven clutch
starting from the bottom of the clutch, while turning the
clutch counterclockwise until the belt is off. (Figure 7-3).
6. Remove the belt from the driver clutch.
To Remove the Drive Belt (Avenger and Frontier Models)
1. Make sure ignition is turned off.
2. Remove the engine access hood.
3. Remove the firewall.
 Loading...