52
SECTION 11
ACCESSORY INFORMATION
ARGO Track Installation
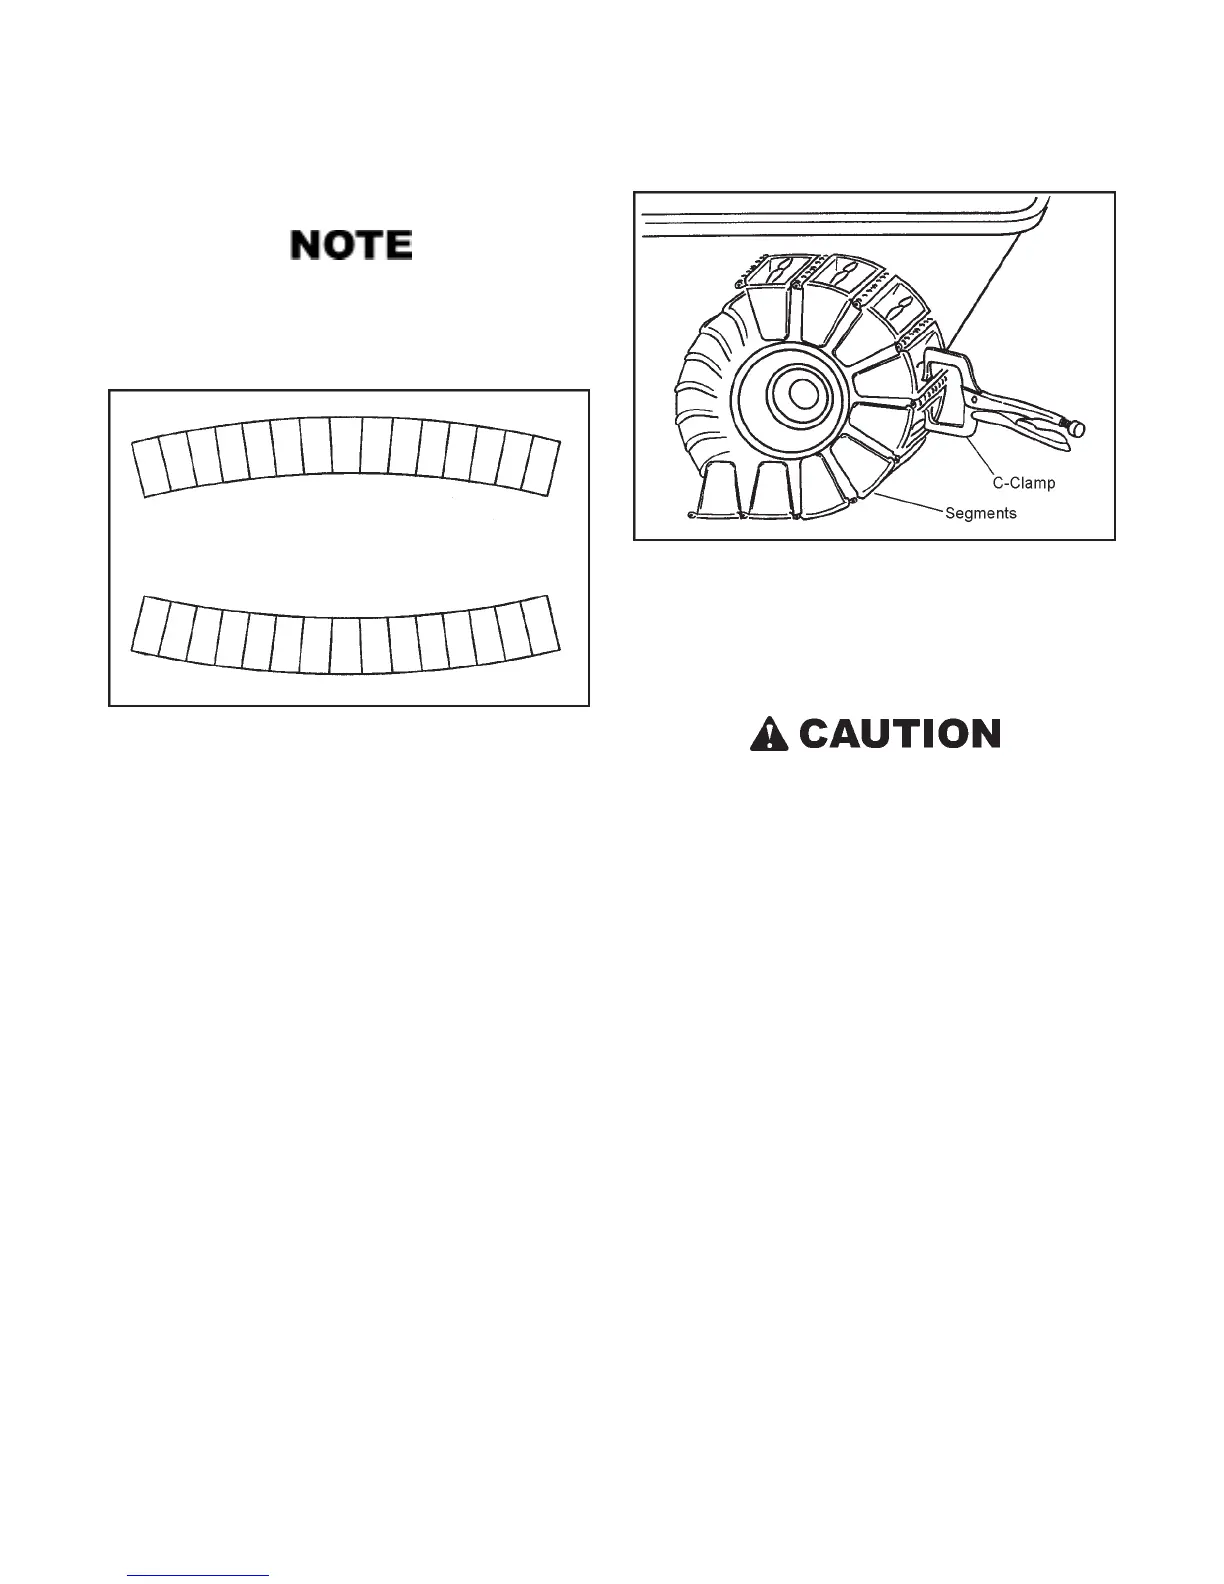
If the tracks, when laid on the ground, appear to curve
to one side, then turn one set so that they curve in oppo-
site directions, as shown in Fig. 11-5. If this is NOT
done, the vehicle may pull to the left or right during
straight line operation.
Figure 11-5 Track Assembly
8. Lay the two assembled tracks on the ground. Drive the
vehicle forward onto the tracks until only two segments
are in front of the tires.
9. Pull the remaining track around the rear tire and forward to
the front of the vehicle.
10. Deflate the front and rear tires for easier installation of the
final track pin. The gap between the adjoining segments
should be between 2" to 2-1/2". Adjust the quantity of
track segments to meet this requirement.
11. Join the two ends of the track and secure them in place
with C-clamps as shown in Fig. 11-6, so that the 1/4" holes
are lined up.
12. Install the final track pin as in instruction No.1 & 2. Re-
move the C-clamps.
13. Inflate all tires to 3.0 psi (0.17kg/cm2).
14. Allow the tires to reach temperature of operating condi-
tions. Recheck the tire inflation at operating condition be-
fore operation.
Figure 11-6. Track Assembly
Temperature changes will cause the segments to expand or
contract and will also change the tire pressure. In order to
maintain suitable tension on the track system, observe the
following precautions:
DO NOT over inflate tires. Lower body damage could
result from track segments rubbing against the
polyethylene body material. Pay special attention to
the tracks during the first few “run-in” hours of use.
If the tracks become slack, start hitting the lower body,
or the tires begin to slip inside the tracks, DO NOT
INCREASE TIRE PRESSURE OVER 3.0 psi. RE-
MOVE THE HALF SEGMENT FROM EACH
TRACK, OR REMOVE A FULL SEGMENT AND ADD
THE HALF SEGMENT.
Over inflation of the tires will cause excessive and pre-
mature wear of the tires and ARGO track system, and
may cause axle and/or axle bearing damage. Under
inflation of the tires may allow them to slip in the track
or may cause the tire to pop off the wheel rim. Under
certain conditions, the tires may climb out of the track
system during a turn or side hill operation. Check that
all tires are correctly inflated, and avoid sharp high
speed turns when the Argo is heavily loaded.
11.3.3 Removal of Argo Tracks
1. Use C-clamp to take tension off of track pin, as in Fig.11-6.
2. Loosen the set screw in the lock bushing of the track pin.
Store set screw in a safe place.
3. Using a 1/4" pin punch and hammer, start the removal of
the track pin from the vehicle side of the track. Once started,
pull the pin out of the segment with Vise Grip.
 Loading...