EasyManua.ls Logo

Argo R410A - Page 53

Argo R410A
130 pages
Print Icon
To Next Page IconTo Next Page
To Previous Page IconTo Previous Page
Loading...
ACS
53
Fig. 3-88a
Slide
Hinge
Air-intake grille
Pull out the
air-intake grille
pushing claws
of the hinges
Screw
Latch
Fig. 3-88b
Slide toward
front side
Side panel
Fig. 3-89a
Unit
Suspension bolt
(field supply)
Ceiling surface
Washer (supplied)
Double nut
(field supply)
Fixture
Fig. 3-89b
Unit
Suspension bolt
(field supply)
Washer (supplied)
Washer (field supply)
Double nut
(field supply)
Fig. 3-89c
Ceiling
surface
Approx.
25 mm
Suspension bolt
Washer
(supplied)
Nut
(field supply)
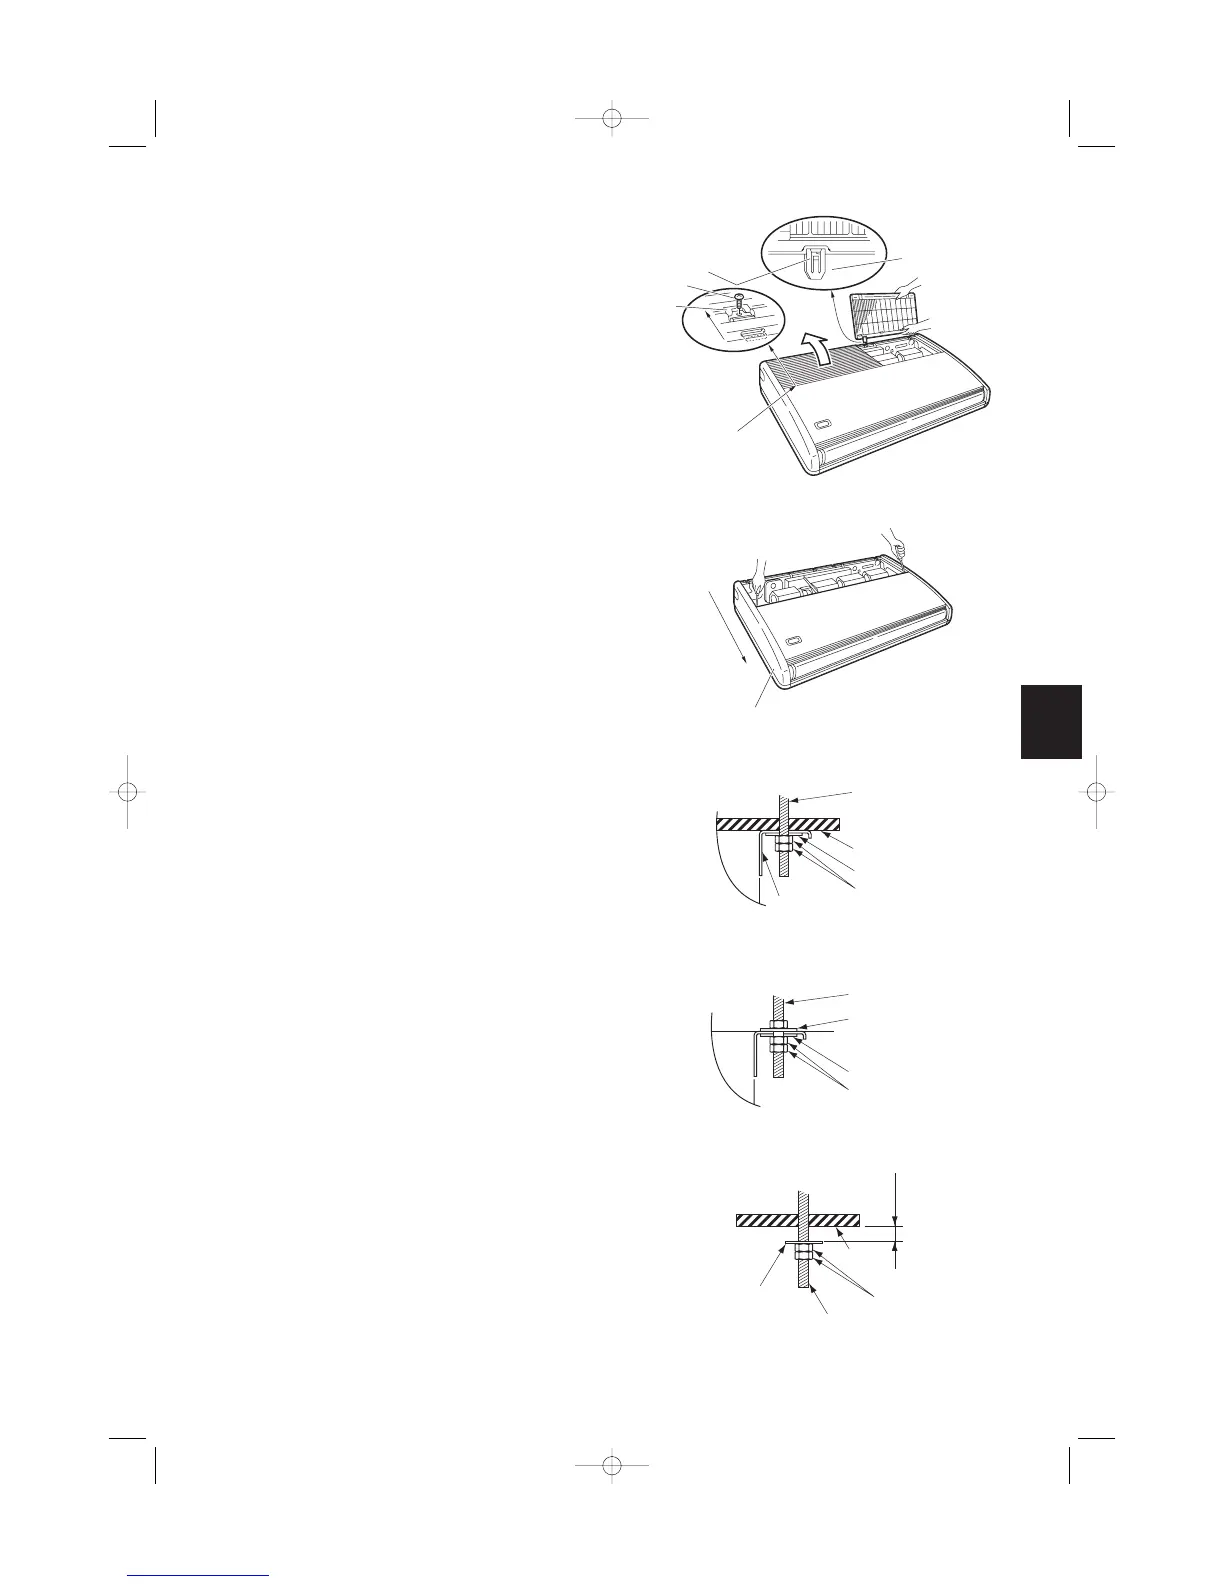
(5) Before suspending the indoor unit, remove the 2
or 3 screws on the latch of the air-intake grilles,
open the grilles, and remove them by pushing the
claws of the hinges as shown in Fig. 3-88a. Then
remove both side panels sliding them along the
unit toward the front after removing the 2 attach-
ment screws. (Fig. 3-88b)
(6) Carry out the preparation for suspending the
indoor unit. The suspension method varies
depending on whether there is a suspended ceil-
ing or not. (Figs. 3-89a and 3-89b)
(7) Suspend the indoor unit as follows:
a) Mount 1 washer and 2 hexagonal nuts on each
suspension bolt as shown in Fig. 3-89c.
06-065 Mini ECO-i II for ARGO 2/8/06 4:37 PM Page 53

Table of Contents

Related product manuals