EasyManuals Logo

Argo R410A User Manual

Argo R410A
130 pages
To Next Page IconTo Next Page
To Previous Page IconTo Previous Page
Page #90 background imageLoading...
Page #90 background image
ASBS
90
1-Way Air Discharge Semi-Concealed Slim Type
(ASBS Type)
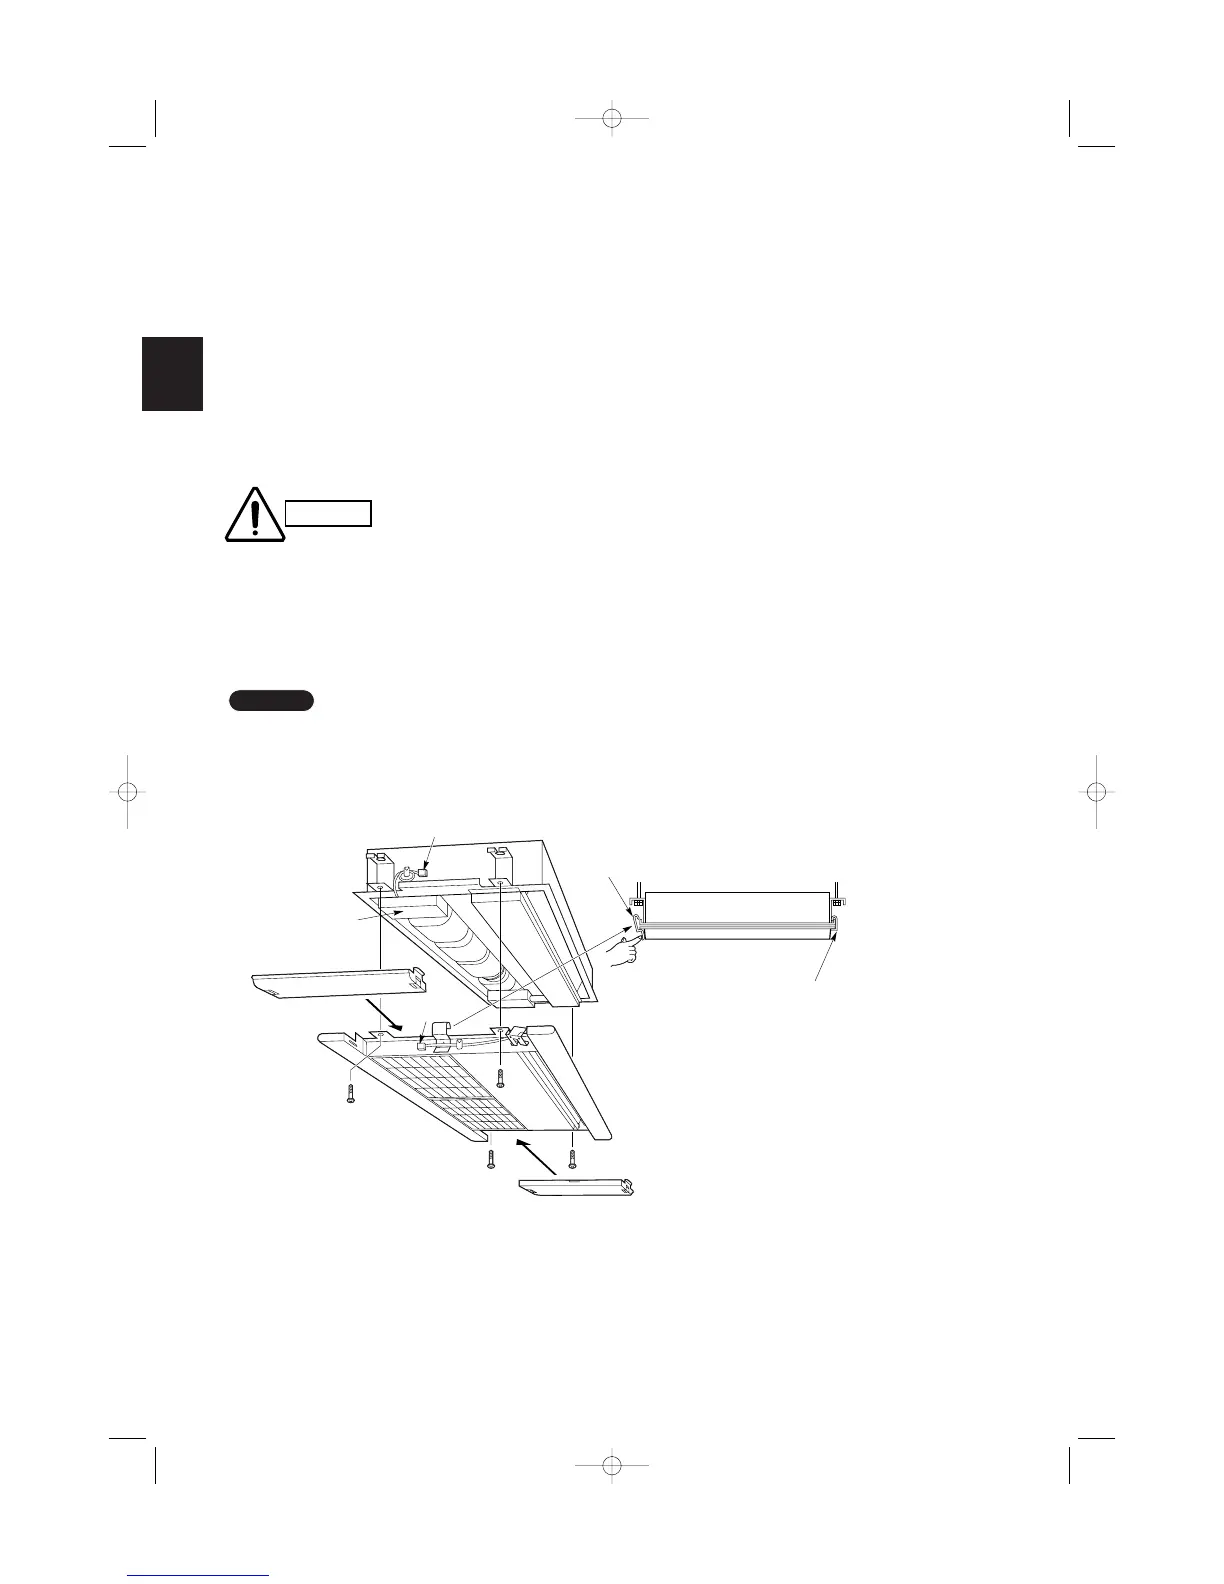
9-3. Installing the Ceiling Panel
(1) Hook the 2 panel catches of the ceiling panel to
the tubing side (stationary side) of the indoor unit.
Then, press up on the opposite side to engage the
level catch to install by opening the level catch
(pressed with fingers.) (Fig. 9-2)
Make sure the ceiling panel is mounted correctly.
(2) Fasten the M6 screws (supplied) into 4 points as
shown in Fig. 9-3.
(3) Install the wiring con-
nector from the ceiling panel to the connector from
the indoor unit.
If the connector is not connected, a misoperation sig-
nal (“P9” on the remote control display) will be dis-
played when the unit is turned on.
NOTE
Never attempt to move the
louver by hand.
Since the louver has an
automatic air-sweeping
mechanism, it may be
damaged.
CAUTION
Panel catch
(level catch side)
Panel catch
(stationary side)
Side panel
Connector
(panel side)
Connector
(unit side)
Electrical
component
box
Side panel
Fig. 9-2
Fig. 9-3
06-065 Mini ECO-i II for ARGO 2/8/06 4:37 PM Page 90

Table of Contents

Questions and Answers:

Question and Answer IconNeed help?

Do you have a question about the Argo R410A and is the answer not in the manual?

Argo R410A Specifications

General IconGeneral
BrandArgo
ModelR410A
CategoryAir Conditioner
LanguageEnglish

Related product manuals