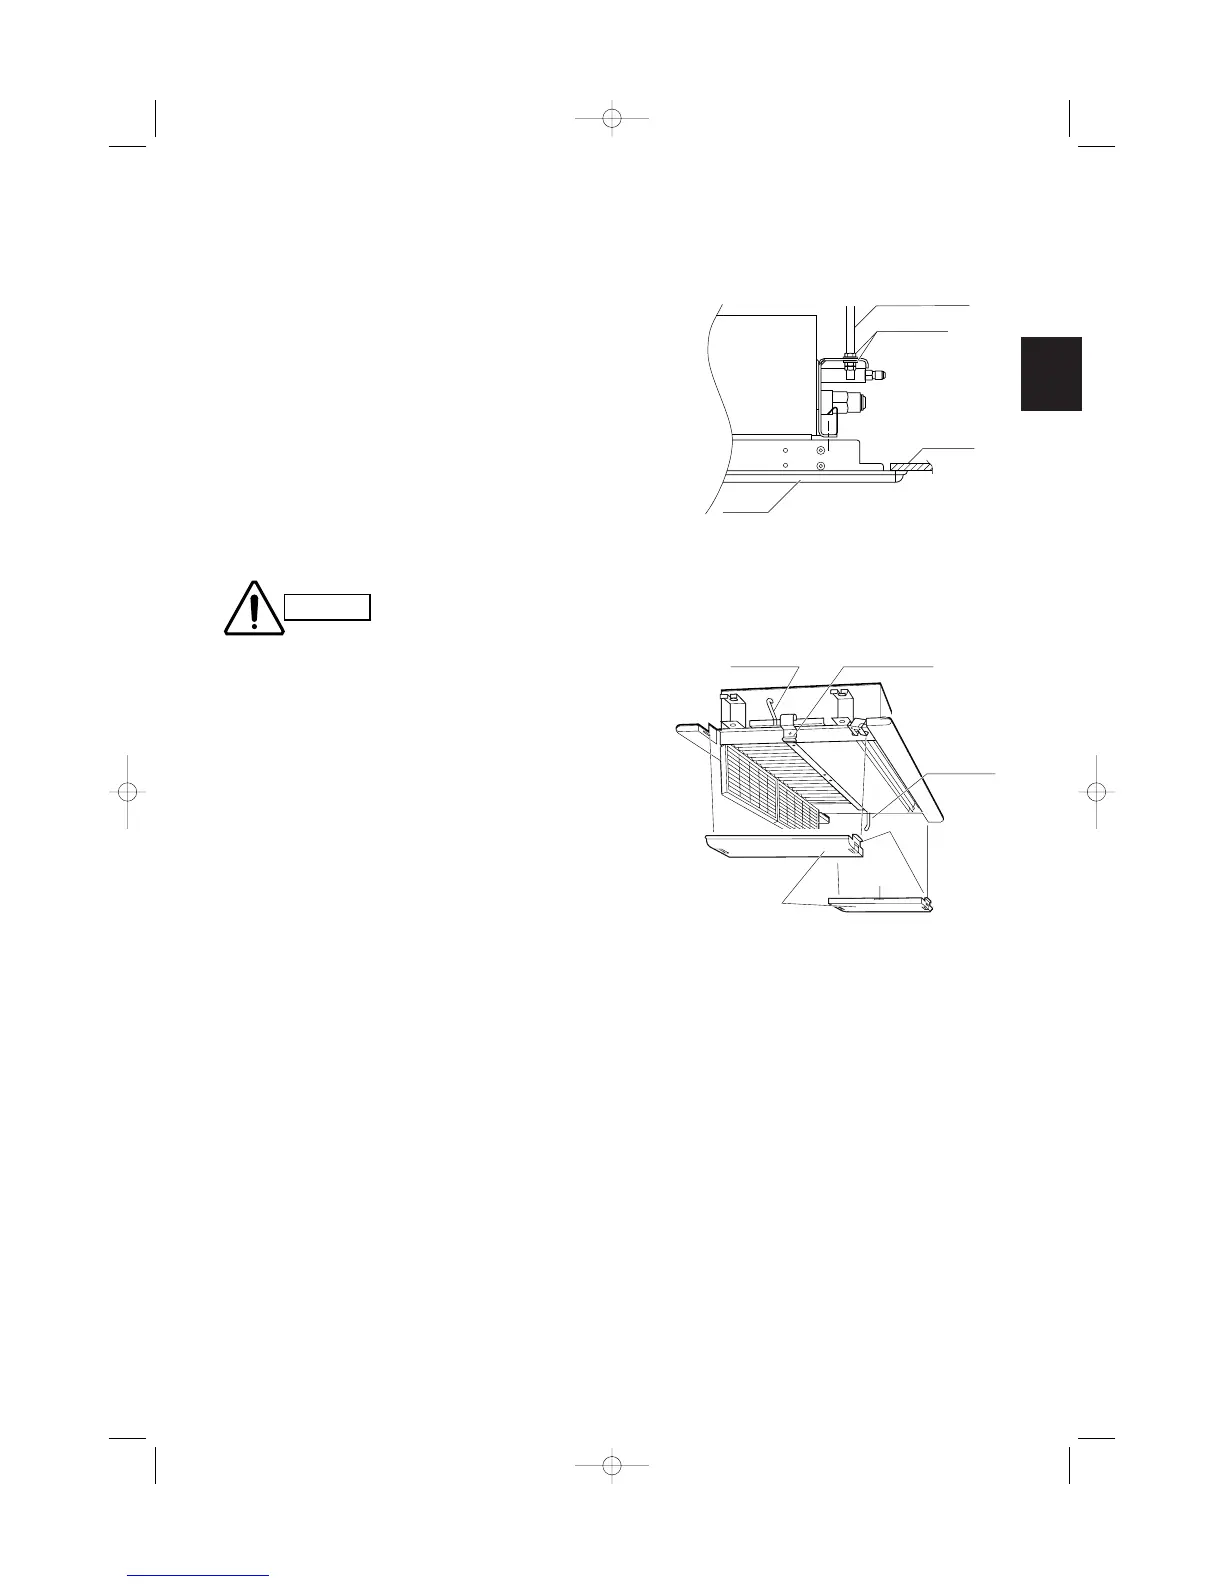
(4) Check to see that the ceiling panel is properly
aligned with the seamline of the ceiling. If not,
readjust the indoor unit by adjusting the nuts to the
proper suspension point. (Fig. 9-4)
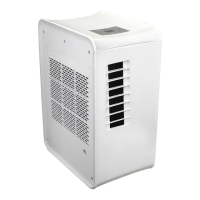
(5) For attaching and removing the side panels, see
Fig. 9-5.
Attaching the side panels
Put the center claw of the side panel into the center
recess of the indoor unit.
Pressing 2 claws of the both sides of the side panel
toward the inside, press the side panel onto the
indoor unit.
Removing the side panels
Remove the side panel by pressing the 2 claws at
both ends of the panel, disengage the claws and
slide the panel horizontally.
When attaching the side
panels, be sure to hook
the safety cords in the
holes of the side panels.