ASBS
37
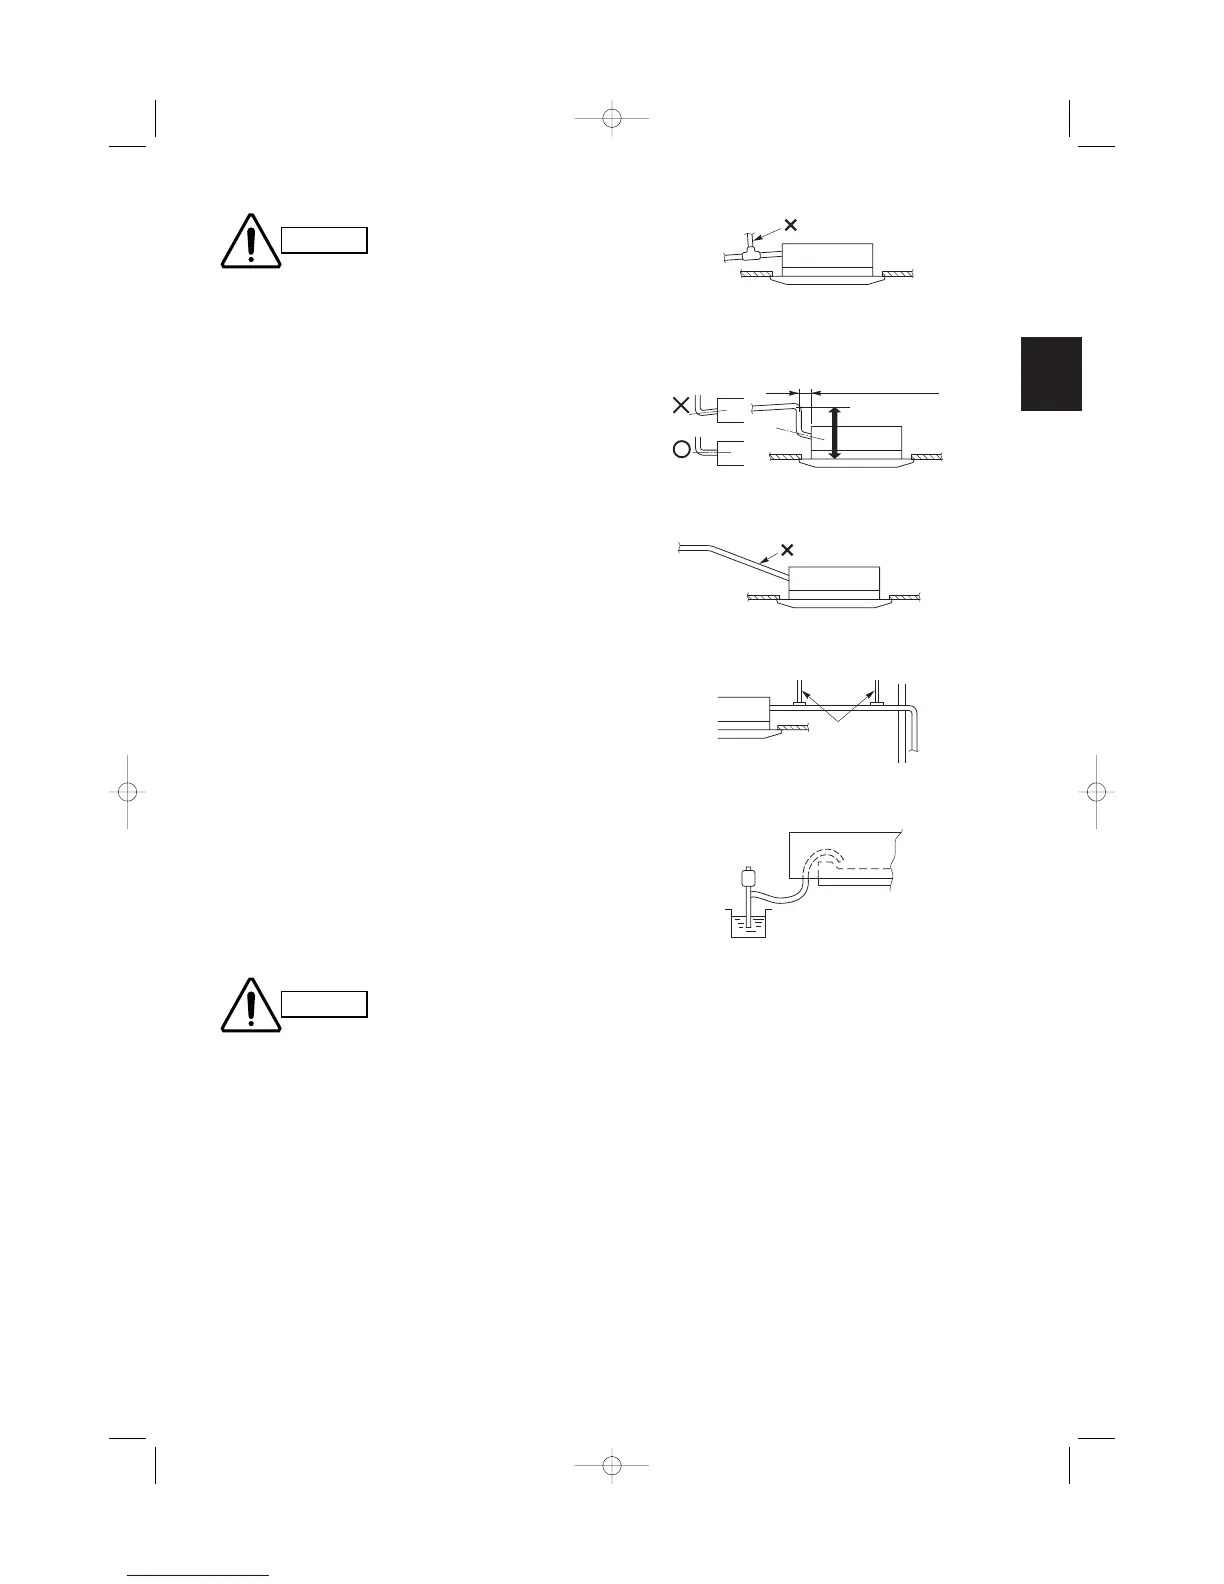
Do not install an air bleeder as this may cause
water to spray from the drain pipe outlet.
(Fig. 3-27)
If it is necessary to increase the height of the drain
pipe, the pipe can be raised a maximum of 59 cm
from the bottom of the ceiling. Do not raise it any
higher than 59 cm, as this could result in water
leaks. (Fig. 3-28)
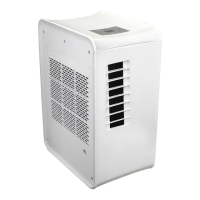
Do not install the pipe with an upward gradient from
the connection port. This will cause the drain water
to flow backward and leak when the unit is not
operating. (Fig. 3-29)
Do not apply force to the piping on the unit side
when connecting the drain pipe. The pipe should
not be allowed to hang unsupported from its con-
nection to the unit. Fasten the pipe to a wall, frame,
or other support as close to the unit as possible.
(Fig. 3-30)
Provide insulation for any pipes that are run
indoors.
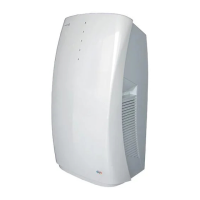
3-8. Checking the Drainage
After wiring and drain piping are completed, use the
following procedure to check that the water will drain
smoothly. For this, prepare a bucket and wiping cloth
to catch and wipe up spilled water.
(1) Connect power to the power terminal board (R, S
terminals) inside the electrical component box.
(2) Short the check pin (CHK) on the indoor control
board and operate the drain pump.
(3) Pour water into the drain pan using a siphon pump
through the air outlet grille. (Fig. 3-31) Check the
water flow through the transparent drain pipe and
see if there is any leakage.