16
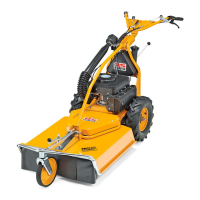
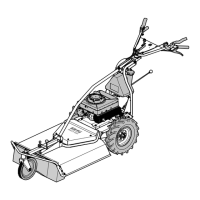
Control elements
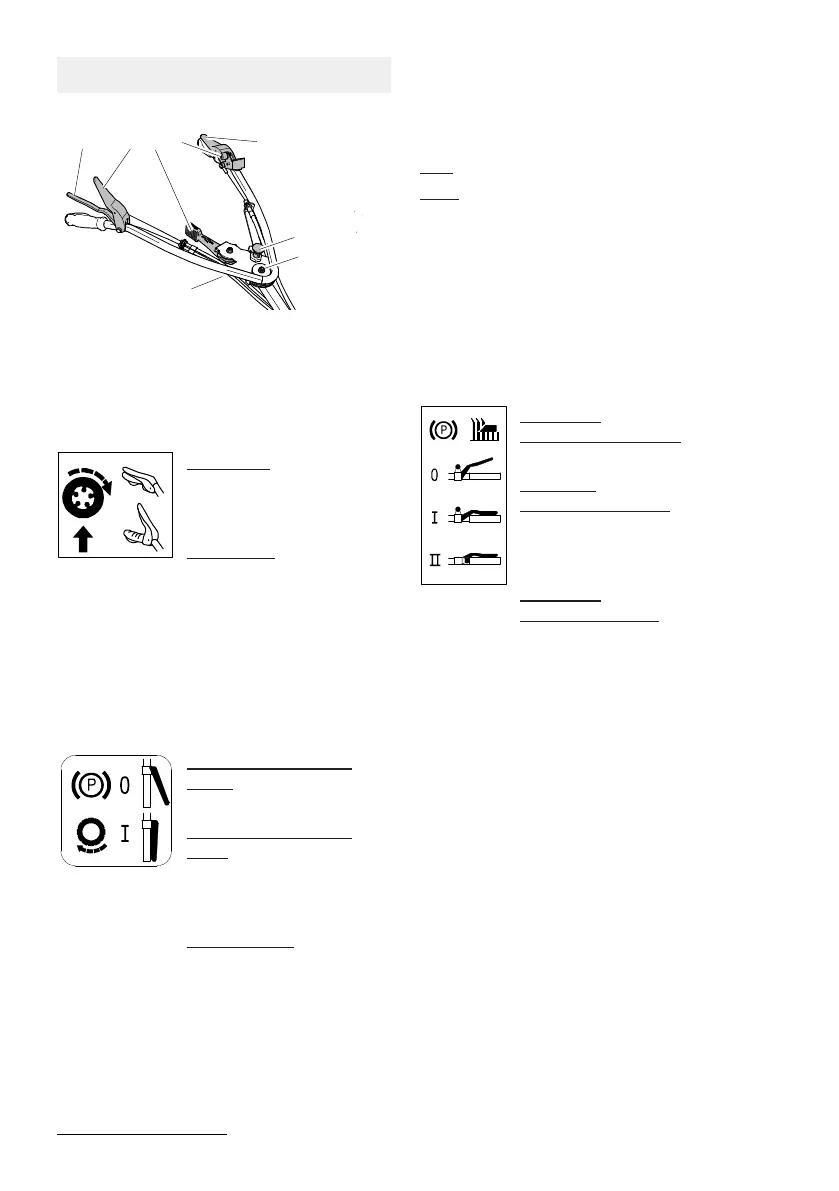
Handlebar with controls(1)
Fig.4:
Drive lever (A)
AS 62 E-Allmäher
With the drive lever, you switch the drive on
and off.
Drive on (I):
Press the lever towards
the handlebar and con-
tinue to hold.
Drive off (0):
Release the lever.
Drive lever(A) and brake (B)
AS 63 E-Allmäher
With the drive lever, you switch the drive and
the parking brake on and off.
Drive off/ parking brake
on(0):
Release the lever (A).
Drive on/ parking brake
off(I):
Press the lever (A) towards
the handlebar and con-
tinue to hold. A
Release brake:
Press brake lever(B) to-
wards the handlebar. B
Vario lever(C)
With the vario lever, you can continuously ad-
just the speed of the device while the engine
is running.
MIN: slow
MAX: fast
Lever blade clutch/engine brake (D)
Use the engine blade clutch lever to switch the
engine and blade on and off.
The blade clutch lever/engine brake is a pro-
tective device. When you release the lever, the
blade comes to a stop within 7seconds. At the
same time the engine is switched off.
Engine off,
Disengaging blade (0):
Release the blade clutch lever.
Engine on,
blade disengaged (I):
Press the blade clutch lever
without latch knob(E) towards
the handlebar.
Engine on,
Engaging blade (II):
Lift the blade clutch lever, en-
gage the latch knob (E) and
press the blade clutch lever to-
wards the handlebar.
Lever for lateral adjustment of
handlebar(2/F)
The handlebar can be fixed in 3 positions.
1. Pull the stop bolt (F) out of the notch(H).
2. Beware: Do not squeeze the Bowden
cables when swivelling the handlebar.
Swivel the handlebar to the side to the de-
sired position. Let the stop bolt (F) engage
in one of the three notches(H) at the
guide bar.
Beware: A loose handlebar fastening can res-
ult in failure of the screwed connection.
Always firmly tighten the central handlebar
fastening (G).