Page 32
• ENABLE BOLTS: From the ‘Run Tool’ Screen:
o Tap the ‘Setup’ Button
o Make sure the task shown at the top is the one to be programmed.
o Tap the ‘Inputs’ Button
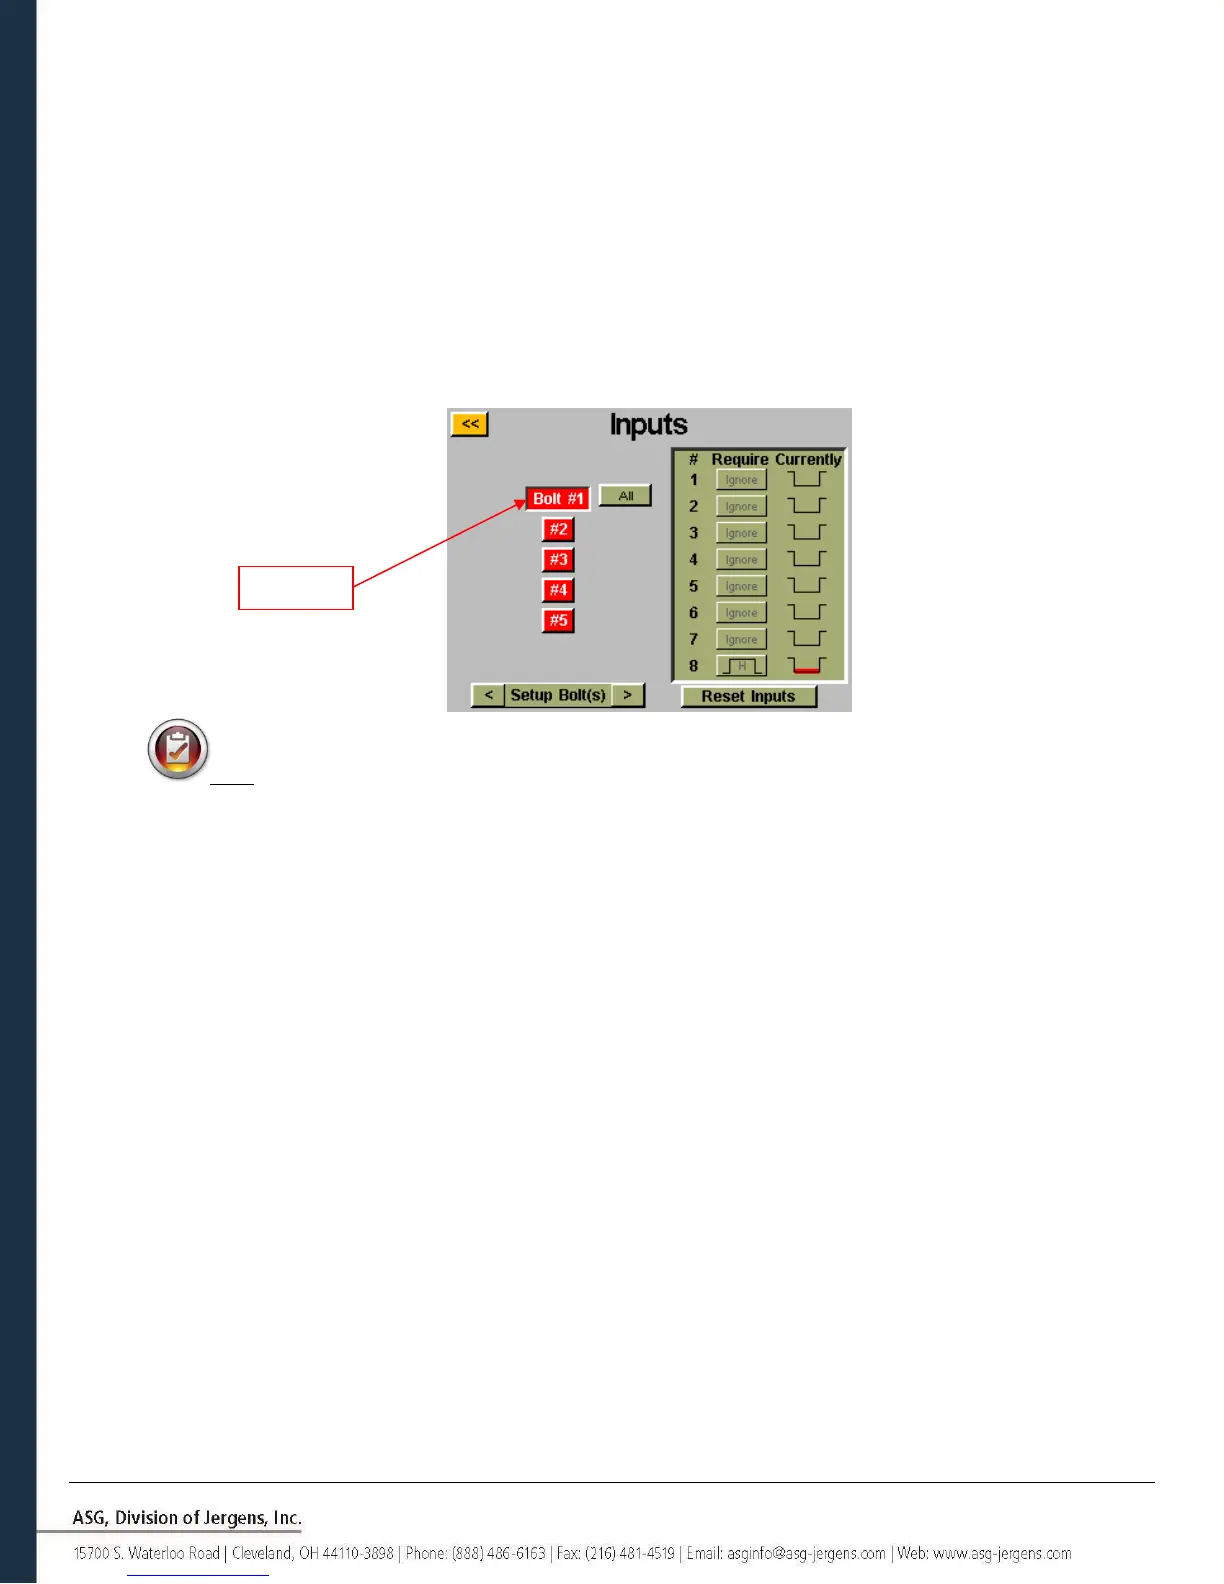
Assuming that there is only 1 bolt in your sequence, tap the button on the left that says ‘Bolt 1’. You should now
see a column of buttons appear in the chart next to each input number. You may now select which input you
want to use to enable the bolt by tapping the ‘Ignore’ button to the right of that input. This will toggle between
‘H’,’L’, and ‘Ignore’ with each tap. The picture to the right of this button shows what the controller is currently
seeing on that input. Press the yellow [<<] button at the top and save changes if desired.
Note: If you have multiple bolts in your application sequence, it is recommended that you set that up in
the ‘Setup’ and ‘Bolt Sequences’ screens prior to completing this step. You will then want to make sure you set
up each bolt you wish to be enabled with the input. For your convenience, with multiple bolts an ‘All’ button
will appear on the ‘Input’ screen to allow you to select all bolts and set them up simultaneously.