19
We recommend initial set up starts at the Input menu where the first parameter that needs to be set is Input
Type.
The remaining Input Menu parameters will change, depending upon whether a linear input type or a
temperature input type is selected. Other menu parameters related to the sensor range may also change.
Display Parameter Available Selections
tYPE
Input Type
J - Type J thermocouple
B - Type B thermocouple
C - Type C thermocouple
E - Type E thermocouple
CA - Type K thermocouple
n - Type N thermocouple
nn - Type NNM thermocouple
r - Type R thermocouple
S - Type S thermocouple
t - Type T thermocouple
PL2 - Platinel II thermocouple
rtd - 100 ohm platinum RTD
rt.d - digital RTD
0.20A - 0 - 20 mA
4.20A - 4 - 20 mA
0.10 - 0 - 10mV
0.50 - 0 - 50 mV
0.100 - 0 - 100 mV
10.50 - 10 - 50 mV
0-1 - 0 - 1 V
0-5 - 0 - 5 V
0-10 - 0 - 10 V
1-5 - 1 - 5 V
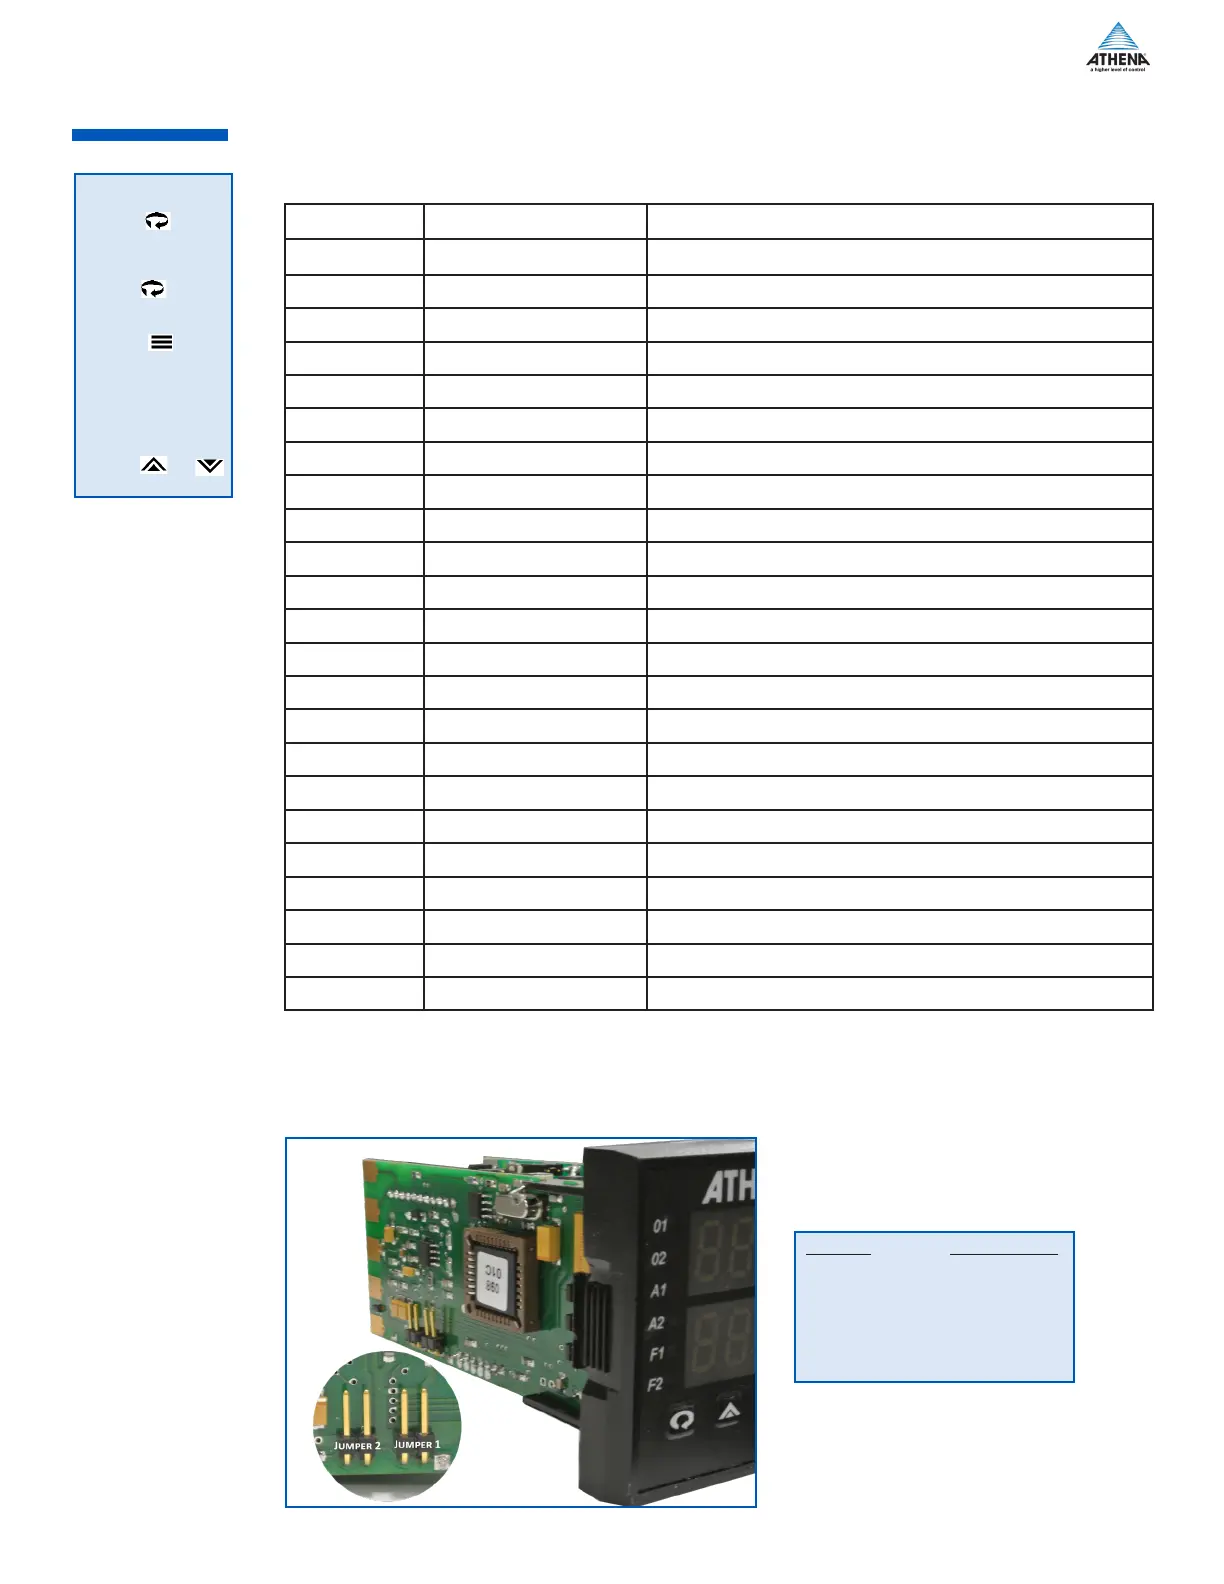
Input Type JMPØ1 JMPØ2
Thermocouple Out Out
RTD Out Out
Voltage <100 mV Out Out
Voltage >100 mV In Out
Current Process In In
Note: When you ordered your controller, an input type was specified and the controller was set up
accordingly and calibrated for that input type at the factory. If you decide to change input type from
thermocouple to RTD or vice-versa, you will need to recalibrate the controller unless you ordered the
“Calibrate All” option. If you are changing from a temperature input type to a linear input type, you MUST
recalibrate and change the jumper settings as indicated in the above table.
InP
tYPE
 Loading...