A
aaronbrownAug 25, 2025
What causes hysteresis in ATI Technologies Accessories?
- MMiranda DanielsAug 26, 2025
Hysteresis in ATI Technologies Accessories is caused by mechanical coupling or internal failure.
What causes hysteresis in ATI Technologies Accessories?
Hysteresis in ATI Technologies Accessories is caused by mechanical coupling or internal failure.
What to do if ATI Technologies Accessories sensor is not streaming measurement data?
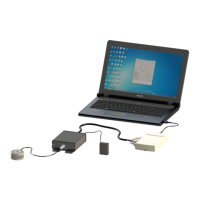
Verify the ATI Technologies Accessories sensor is correctly installed. Ensure the robot mounting and tool adapter plates are installed on the proper side of the sensor.
| Brand | ATI Technologies |
|---|---|
| Model | Axia80-M8 |
| Category | Accessories |
| Language | English |
Explains DANGER, WARNING, CAUTION, NOTICE symbols used in manual.
Advises verifying sensor rating against expected loads and awareness of dynamic forces.
Lists cautions for sensor modification, probing, overloading, IP64 seal contact, and impacts.
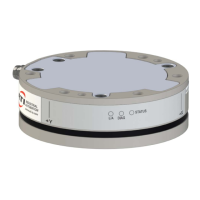
Summarizes Axia sensor models, part numbers, identifying grooves, and materials.
Discusses mounting requirements, interface plates, and correct installation of sensor and tooling.
Covers cable routing, bending radius considerations, and proper restraint for dynamic applications.
Provides steps and torque values for mounting the sensor to the robot arm and interface plate.
Details pin assignments for M8 and M12 connectors, including wire colors and signals.
Outlines the steps for performing an initial and annual accuracy check on the sensor.
Advises on protecting the sensor from moisture and extreme electromagnetic fields.
Explains the meanings of the Link/Activity, Diagnostic, and Status LEDs on the sensor.
Details available sample rates and the relationship between sample rate and data rate.
Describes the low-pass filter settings and provides attenuation curves for different sample rates.
Explains how to use the bias function to eliminate effects of gravity or other acting forces.
Details how to measure forces/torques at a reference point other than the sensor's origin.
Lists status codes as a bitmap, explaining bit meanings and error indications.
Covers system health indicators and status messages monitored during operation.
Describes methods for setting the sensor's IP address, static or via DHCP.
Provides step-by-step instructions for connecting to the sensor's web pages via a Windows computer.
Explains how to use the discovery tool to locate the sensor's IP and MAC addresses on the network.
Provides an overview of the sensor's main functions and system status.
Displays current sensor loading conditions, including force/torque data in user units and counts.
Allows selection of calibration, ADC sampling frequency, filter cutoff, and software bias values.
Allows selection of active calibration, tool transformation settings, and viewing sensor details.
Lets the user view and edit Ethernet networking options like IP address and DHCP settings.
Provides a summary of the sensor's current state and hardware diagnostics for troubleshooting.
Guides on downloading and launching the Java demo application for viewing F/T data.
Details the steps for collecting and saving F/T data from the demo application.
Instructions for establishing a console connection using Telnet/PuTTY to the sensor.
Lists and describes console commands for viewing status, parameters, and adjusting settings.
Defines the syntax for constructing URLs to send commands and variables to the sensor.
Details variables for global settings like ADC rate, filter selection, and bias.
Explains variables for setting calibration and tool transformation parameters.
Lists command codes used for TCP interface communication with the sensor.
Details the command for writing tool transformation parameters to the sensor.
Explains how to retrieve system setup and active configuration via XML.
Describes how to retrieve specific calibration information using XML.
Explains the Raw Data Transfer (RDT) protocol for fast data collection via UDP.
Explains how to convert RDT count values to real force/torque values.
Guidelines for routine inspection of the sensor and its cabling.
Requirements for periodic sensor calibration to maintain traceability to national standards.
Lists symptoms and causes for powering up errors, focusing on LED status.
Addresses common communication issues, including IP address assignment and network discovery.
Lists symptoms and resolutions for errors encountered when using the Java demo application.
Covers common issues affecting force/torque readings like noise, drift, and hysteresis.
Discusses methods to reduce noise, including mechanical vibration and electrical interference.
Specifies the operating and storage temperature and humidity ranges for the sensor.
Details the power supply requirements and consumption for the sensor.
Lists the force and torque calibration ranges available for different Axia models.