Conguring Client Settings
Conguring Service Access Settings
62
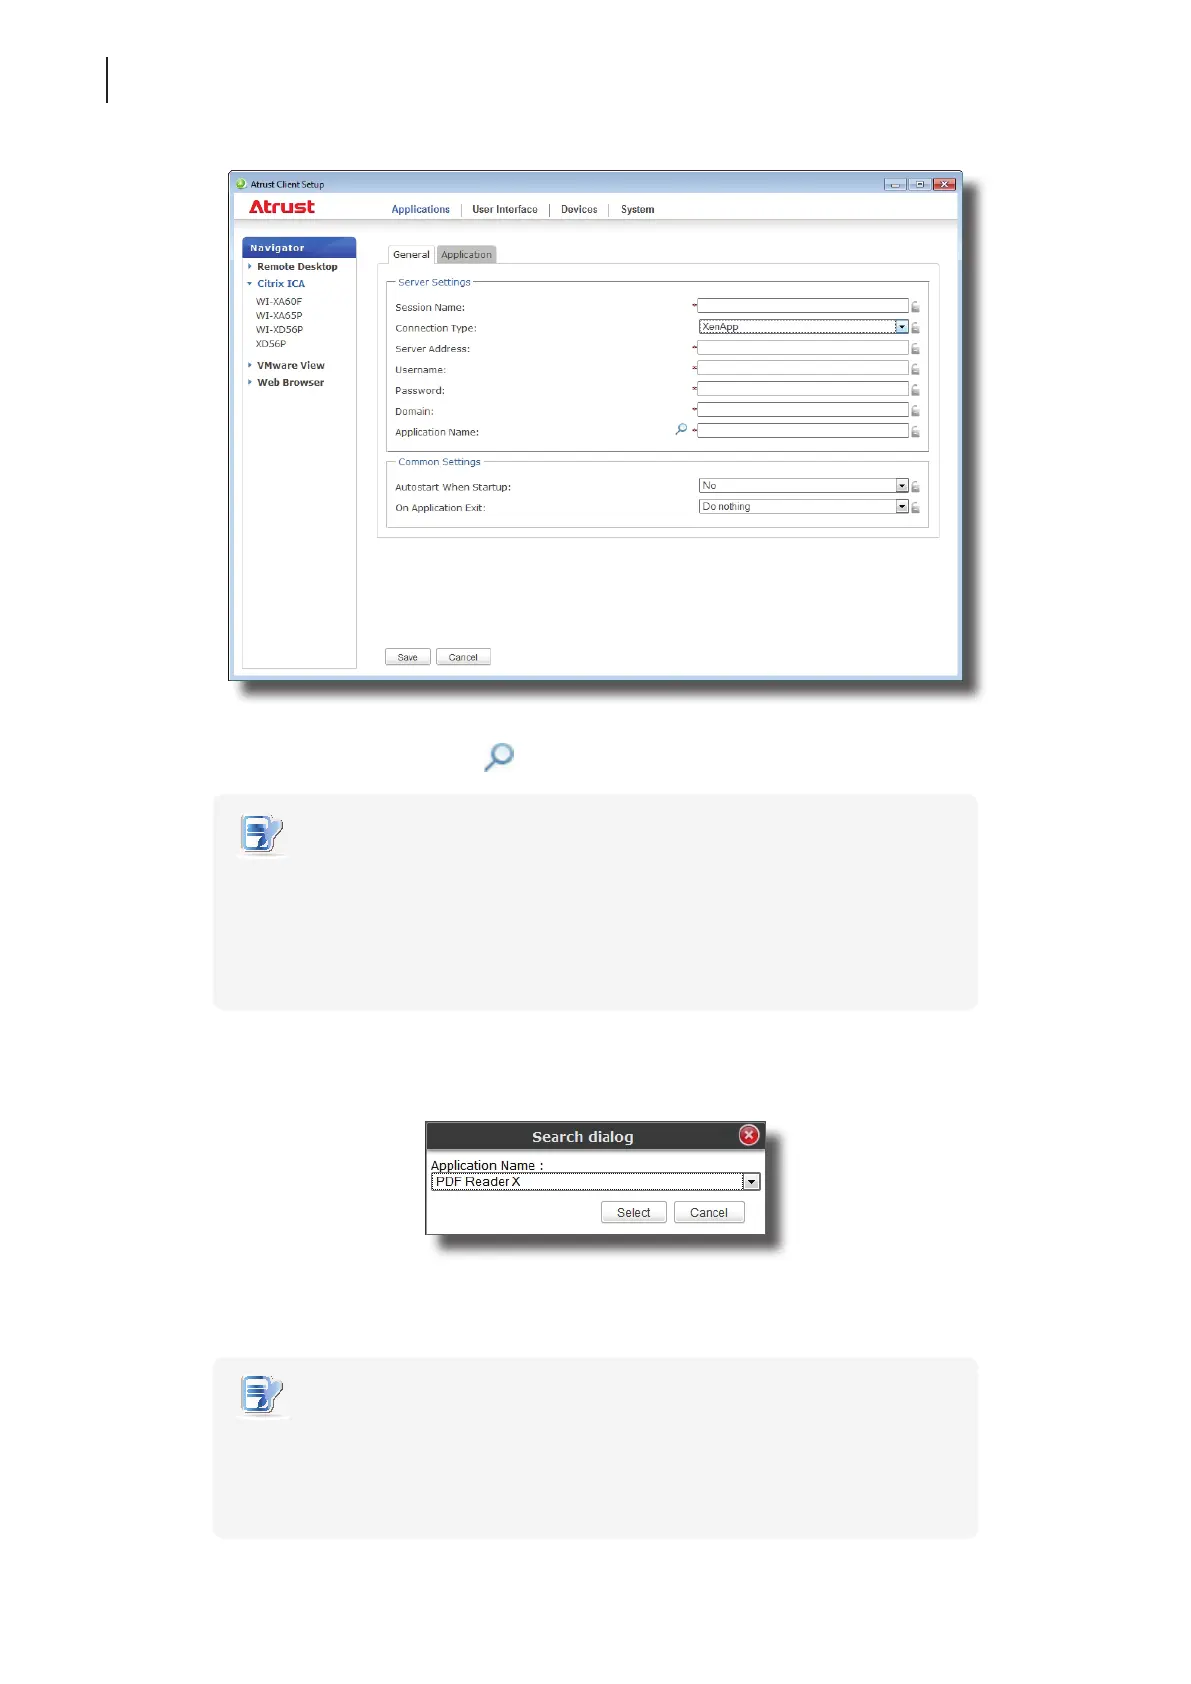
5. Type the session name, the IP address / FQDN of the XenApp server, user credentials, the domain of the
server, and then click the Search icon
to discover available applications.
NOTE
• The applicable or best suitable information type of the server side may vary with
your Citrix environment. Consult your IT administrator for more information.
• The Search icon works only when required data (elds marked with a red asterisk)
have been provided. If your XenApp server doesn’t belong to any domain, just type
its computer name in the Domain eld.
6. Upon completion, the Search Dialog window appears for you to select the application. Click the drop-down
menu to select the desired application, and then click Select to conrm.
7. The selected application name automatically appears in the Application Name eld.
8. Click Save to conrm. The customized access shortcut is automatically created on the desktop.
NOTE
• Depending on your plan of service delivery and the conguration of your server(s),
you may need to congure other advanced ICA connection settings for service
access. For more information on other available settings, please refer to section
“4.5.8 Conguring Advanced ICA Connection Settings” on page 70.