18
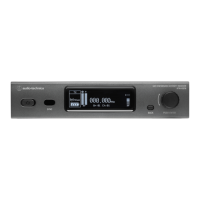
Setting the ATW-DR3120/ATW-DR3120DAN
Setting the security-related functions
Setting the PIN code
Set the 4-digit code used when communicating with the transmitter. It
is only possible to communicate between a receiver and transmitter on
which the same PIN code has been set.
1. From the menu screen, turn the control dial, select [SECURITY],
and then press the control dial.
2. Turn the control dial, select [PIN], and then press the control dial.
3. Turn the control dial, select the first number, and then press the
control dial.
4. Repeat the operation in Step 3 to enter all the numbers.
5. After entering the fourth number, press the control dial.
6. Turn the control dial, select [Sync Now] or [Later], and then
press the control dial.
• If you select [Sync Now], the screen changes to the IR SYNC standby
screen after the setting is complete. Refer to “Using IR SYNC” (p. 14)
for subsequent steps.
• If you select [Later], the setting will be completed, but you will have to
perform IR SYNC separately or manually set the PIN code on the
transmitter.
Setting AES-256 encryption
Set security with a higher level of confidentiality.
1. From the menu screen, turn the control dial, select [SECURITY],
and then press the control dial.
2. Turn the control dial, select [AES256], and then press the control
dial.
3. Turn the control dial, select [ON] or [OFF], and then press the
control dial.
• If you select [Sync Now], the screen changes to the IR SYNC standby
screen after the setting is complete. Refer to “Using IR SYNC” (p. 14)
for subsequent steps.
• If you select [Cancel], the setting is canceled.
Setting the system-related functions
Setting RF mode
• The default setting is [Normal].
1. From the menu screen, turn the control dial, select [UTILITIES],
and then press the control dial.
2. Turn the control dial, select [RF MODE], and then press the
control dial.
3. Turn the control dial, select [Normal] or [HD Mode], and then
press the control dial.
• By selecting [HD Mode] and lowering the transmission rate of the audio
to narrow the occupied bandwidth of the radio wave, you can perform
simultaneous operation with more channels than when [Normal] is
selected.
• If you select [Sync Now], the screen changes to the IR SYNC standby
screen after the setting is complete. Refer to “Using IR SYNC” (p. 14)
for subsequent steps.
• If you select [Later], the setting will be completed, but you will have to
perform IR SYNC separately or manually set the PIN code on the
transmitter.
Setting the lock
Set this function to prevent the receiver settings from being changed.
• The default setting is [Unlock].
1. From the menu screen, turn the control dial, select [UTILITIES],
and then press the control dial.
2. Turn the control dial, select [LOCK], and then press the control
dial.
3. Turn the control dial, select [Lock] or [Unlock], and then press
the control dial.
• The setting is complete.
Setting the antenna power
Set whether to turn power to the antenna input jacks on or off.
• The default setting is [Off].
• If set to [On], power is supplied to both antenna A and antenna B.
1. From the menu screen, turn the control dial, select [UTILITIES],
and then press the control dial.
2. Turn the control dial, select [ANT PWR], and then press the
control dial.
3. Turn the control dial, select [On] or [Off], and then press the
control dial.
• The setting is complete.
 Loading...