19
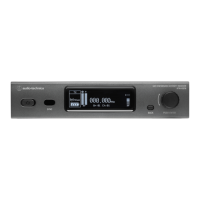
Setting the ATW-DR3120/ATW-DR3120DAN
Setting group/channel editing
Editing the group/channel
The channels that compose the editable user groups (U1 and U2) can
be edited.
• All channels are vacant in the initial state.
1. From the menu screen, turn the control dial, select [UTILITIES],
and then press the control dial.
2. Turn the control dial, select [Gr/Ch EDIT], and then press the
control dial.
3. Turn the control dial, select [EDIT], and then press the control
dial.
4. Turn the control dial, select a group, and then press the control
dial.
5. Turn the control dial, select a channel, and then press the
control dial.
6. Turn the control dial, select [SET] or [RESET], and then press the
control dial.
• By selecting [SET], you can set the frequency of the selected channel.
• If you select [RESET], the frequency of the selected channel becomes
blank.
7. After setting all channels, turn the control dial, select [Sync] or
[Save], and then press the control dial.
• If you select [Save], the setting is completed.
• If you select [Sync], the screen changes to the IR SYNC standby screen.
Refer to “Using IR SYNC” (p. 14) for subsequent steps.
Syncing the group/channel
The groups/channels that have been set with [EDIT] can be set on the
transmitter in groups with IR SYNC.
1. From the menu screen, turn the control dial, select [UTILITIES],
and then press the control dial.
2. Turn the control dial, select [Gr/Ch EDIT], and then press the
control dial.
3. Turn the control dial, select [Gr/Ch SYNC], and then press the
control dial.
4. Turn the control dial, select a group, and then press the control
dial.
• The screen changes to the IR SYNC standby screen. Refer to “Using IR
SYNC” (p. 14) for subsequent steps.
Setting the backup frequency mode
If you set the backup frequency in advance, you can switch the
frequency of the transmitter and receiver with the transmitter. It is
convenient to set this function when you want to switch the frequency
easily.
• The default setting is [Off].
1. From the menu screen, turn the control dial, select [UTILITIES],
and then press the control dial.
2. Turn the control dial, select [BACKUP FREQ], and then press the
control dial.
3. Turn the control dial, select [On], and then press the control dial.
4. Turn the control dial, select [Manual] or [Gr/Ch], and then press
the control dial.
• If you select [Manual], you can set the frequency.
• If you select [Gr/Ch], you can set the group/channel.
5. After setting each item, turn the control dial, select [Set] or
[Sync], and then press the control dial.
• If you select [Set], the setting will be completed, but you will have to
perform IR SYNC separately or manually set the frequency backup mode
on the transmitter.
• If you select [Sync], the screen changes to the IR SYNC standby screen.
Refer to “Using IR SYNC” (p. 14) for subsequent steps.
 Loading...