Adding and Modifying Scopia
®
Streaming and Recording
servers in Scopia
®
Management
About this task
This section explains how to configure Avaya Scopia
®
Streaming and Recording server settings in
Scopia
®
Management. For example, you can configure the URL of the Avaya Scopia
®
Desktop
server that users connect to in order to see broadcasts.
Important:
If you are using the Avaya Scopia
®
Content Center Recording server or the Avaya Scopia
®
Content
Center Streaming server , you need to configure and manage the servers using the Avaya Scopia
®
Desktop server. For more information, see the Administrator Guide for Avaya Scopia
®
Desktop
server.
Important:
Once you configure a Scopia
®
Streaming and Recording server you cannot revert back to the
Scopia
®
Content Center Streaming server or the Scopia
®
Content Center Recording server .
Procedure
1. Access the Scopia
®
Management administrator portal.
2. In the Devices tab, select Streaming & Recording Server.
3. If you are modifying the Scopia
®
Streaming and Recording server select the link in the Name
column , or select Add to create the Scopia
®
Streaming and Recording server profile. The
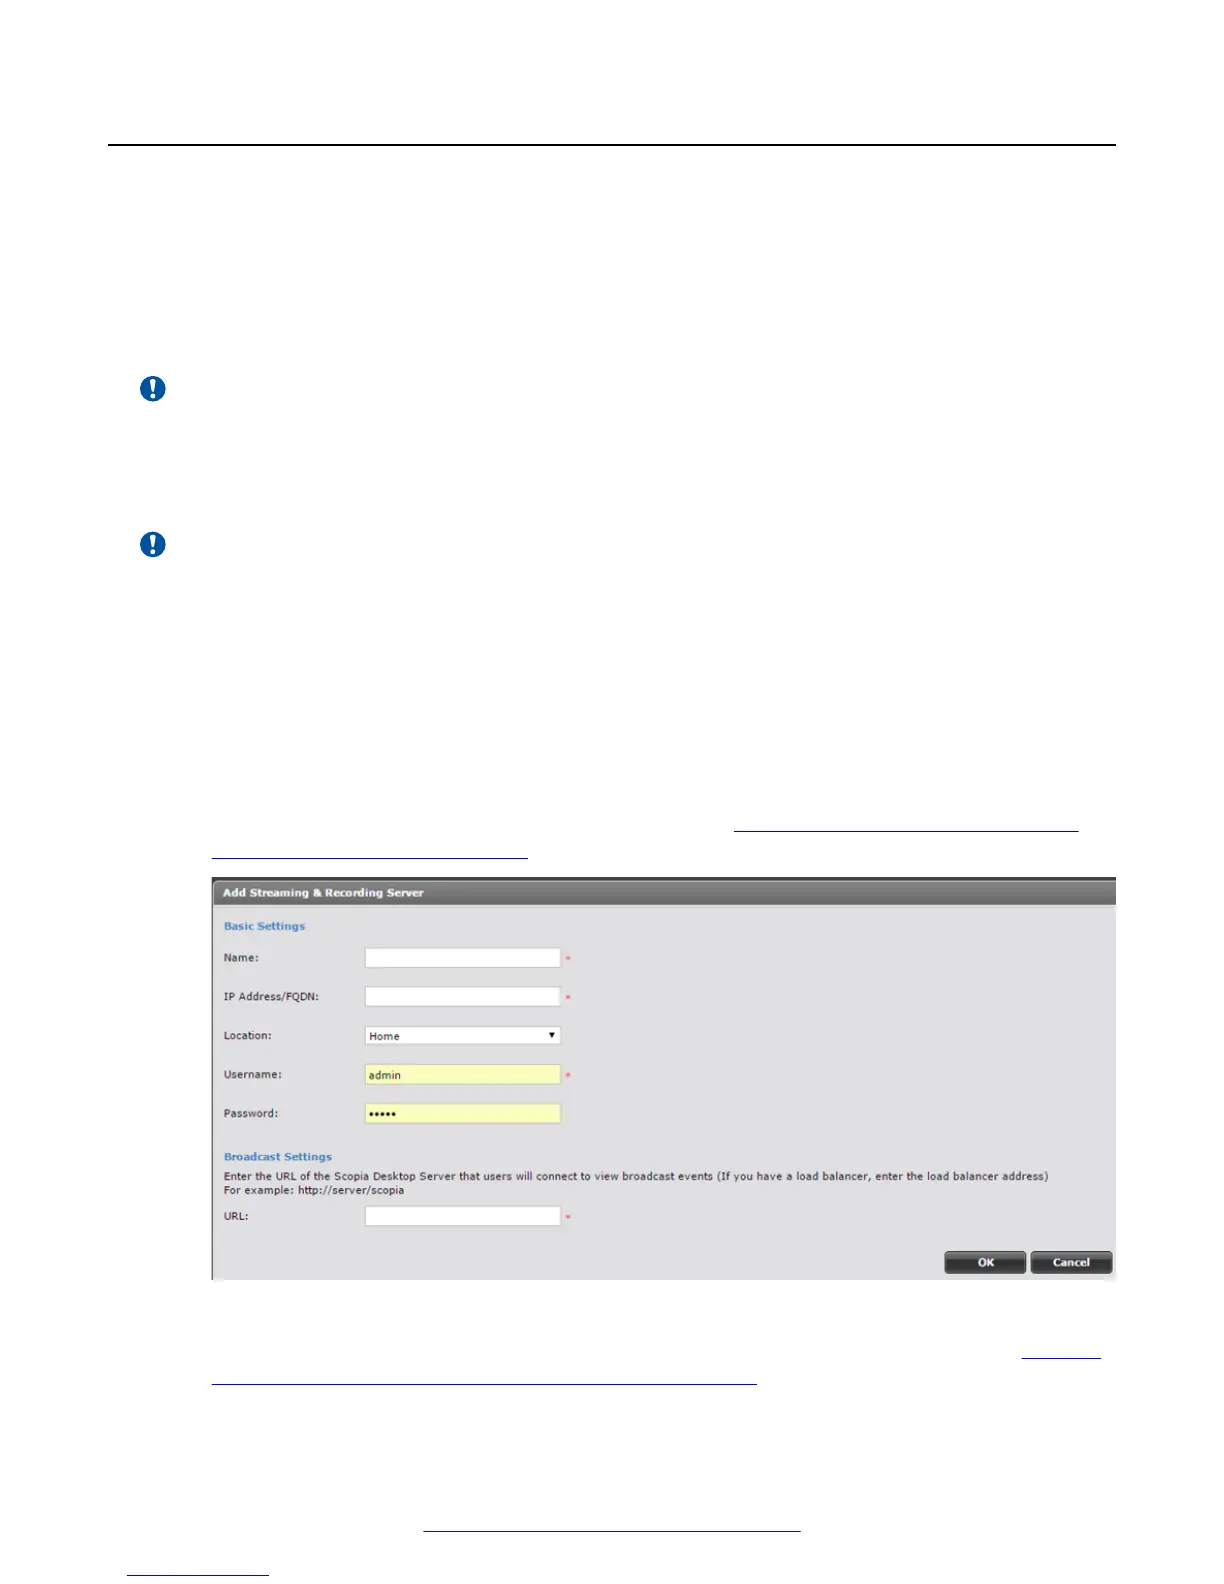
Add Streaming & Recording Server page appears (Figure 21: Adding an Avaya Scopia
Streaming and Recording server on page 42).
Figure 21: Adding an Avaya Scopia
®
Streaming and Recording server
4. Configure the Scopia
®
Streaming and Recording server’s settings, as described in (Table 9:
Configuring the Avaya Scopia Streaming and Recording on page 43).
Configuring components
42 Installing the Avaya Scopia
®
Streaming and Recording Server June 2015
Comments on this document? infodev@avaya.com