29
3BEFORE OPERATION
2.4 INSERTING LABEL MATERIAL
ALS
104
GB
2.4.2 Inserting a label roll
WARNING!
Risk of injury due to moving and rapidly
rotating parts!
£ Before inserting the label roll, ensure that
the device is turned off at the main
switch.
£ Do not under any circumstances turn the
device on before the label strip is
threaded in completely.
Removing spent backing paper
Assuming backing paper has gathered on the rewinder
[28A] :
£ Press the release button [28C].
– The tensioning mechanism of the rewinder is
slackened.
£ Remove the rewound backing paper.
Removing glue residue
£ If necessary, clean the following components:
– Dispensing plate
– Deflection rollers
– Drive rollers
– Pressure roller
£ Follow the directions provided in section
“Maintenance and cleaning” on page 42.
Inserting a new label roll
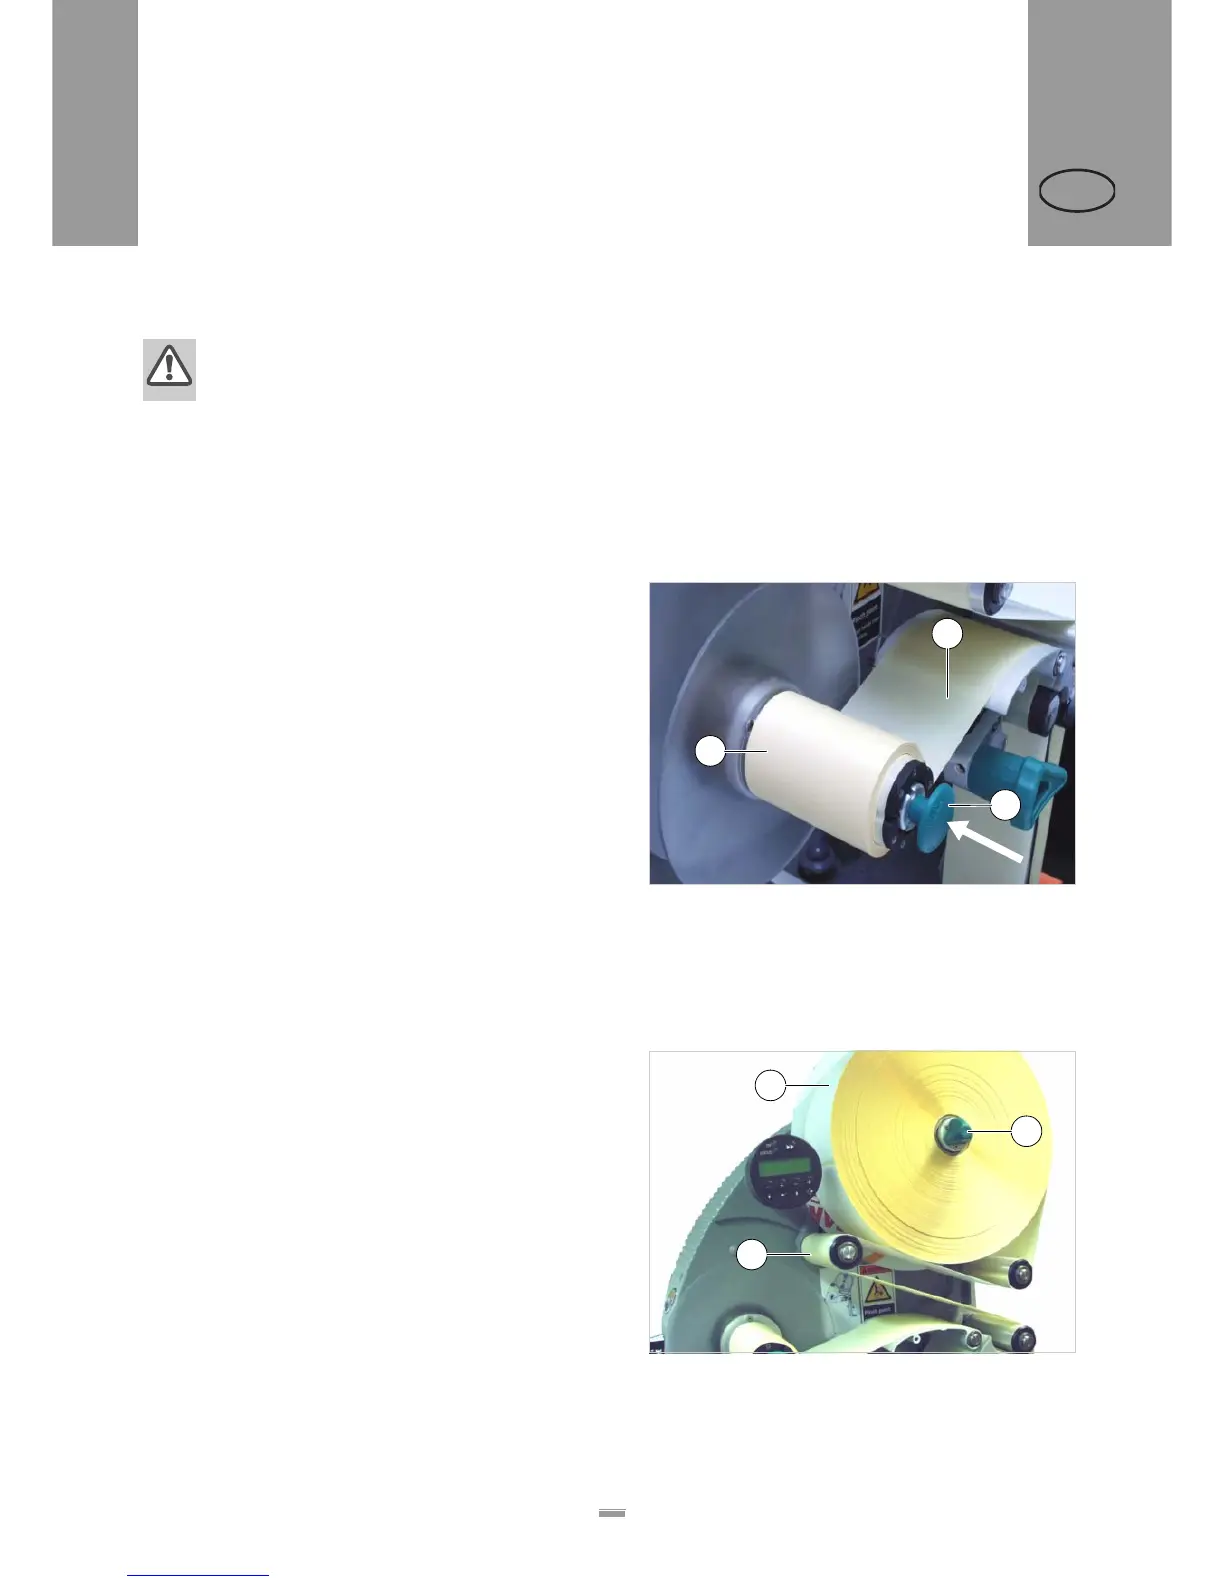
£ Push the material roll [29A] onto the unwinder as far
as it will go.
£ Rotate the rotary knob [29B] in a clockwise direction
until the label roll sits tightly.
£ Run the label strip around the dancer arm as shown
in the figure [29C].
– The material strip must run in a slightly different
route when using label rolls with a ‘labels facing
inwards’ winding direction. Insert the roll in such a
way that it unwinds in an anticlockwise direction
(see “Threading guide” on page 30).
[28] A Rewound backing paper
B Backing paper path
C Release button
B
C
A
[29] Fasten the label roll to the dispenser (the winding direction
of the roll should be with the labels facing outwards).
A
C
B


 To Next Page