36
3BEFORE OPERATION
3.2 MECHANICAL SETTINGS
ALS
104
GB
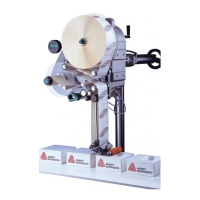
3.2.3 Calibrating the label sensor
Positioning the sensor:
£ Release the thumb screw.
£ Position the sensor along the axle in such a way as
to allow it to register the spaces between the labels.
Configuring the sensor:
– The settings required for the sensor depend on the
employed materials. The standard settings are
suitable for many types of label materials.
£ Check whether the LED is lit [44A] when the sensor
is above a space between labels.
– If this is not the case, the sensor must be
configured.
£ You should refer to a qualified technician to help
configure the sensor.
– Configuration instructions: See the service
manual.
3.2.4 Setting the dancer arm
restoring force
The unwinder dancer arm is preset in a way, that a wide
range of label materials can be processed whithout ha-
ving to change the dancer arms restoring force.
Even so, very narrow label material can under certain
circumstances tear off or expand in a way which results
in poor labelling precision. In those cases, the restoring
force must be decreased.
Tool:
2.5mm hex socket screwdriver
£ Turn the adjusting screw [45A] on the dancer arm
left to increase restoring force.
£ Turn the adjusting screw [45A] on the dancer arm
right to decrease restoring force.
A service technician can restore the factory set-
ting, see service manual chap. 6.2.3 section
„Adjusting restoring force of dancer arm“.
If the problem still occurs, although the restoring force
is already set to a minimum, there is the option of buil-
ding in some weaker springs.
The springs must be built in by a qualified ser-
vice technician. Instructions can be found in the
service manual, chap. 6.2.3 section „Narrow la-
bel kit“.
[44] Label sensor from Wenglor, model OPT242-P800
B
A
[45] Setting screw (A) at the unwinder dancer arm.
A