25
4. Secure the bracket rail to the front and rear mounting rails using either the screws that come with the rack
mount kit of your rack screws (five screws in the front and the rear).
n
Leave the top holes on the front of the rail empty so you can use those holes to secure the Engine to keep it from
sliding forward once racked.
5. Tighten the four slide adjustment screws.
6. Repeat steps 1 through 5 to install the other bracket rail on the opposite side of the rack.
7. Make sure that the media drives are not installed in the Engine.
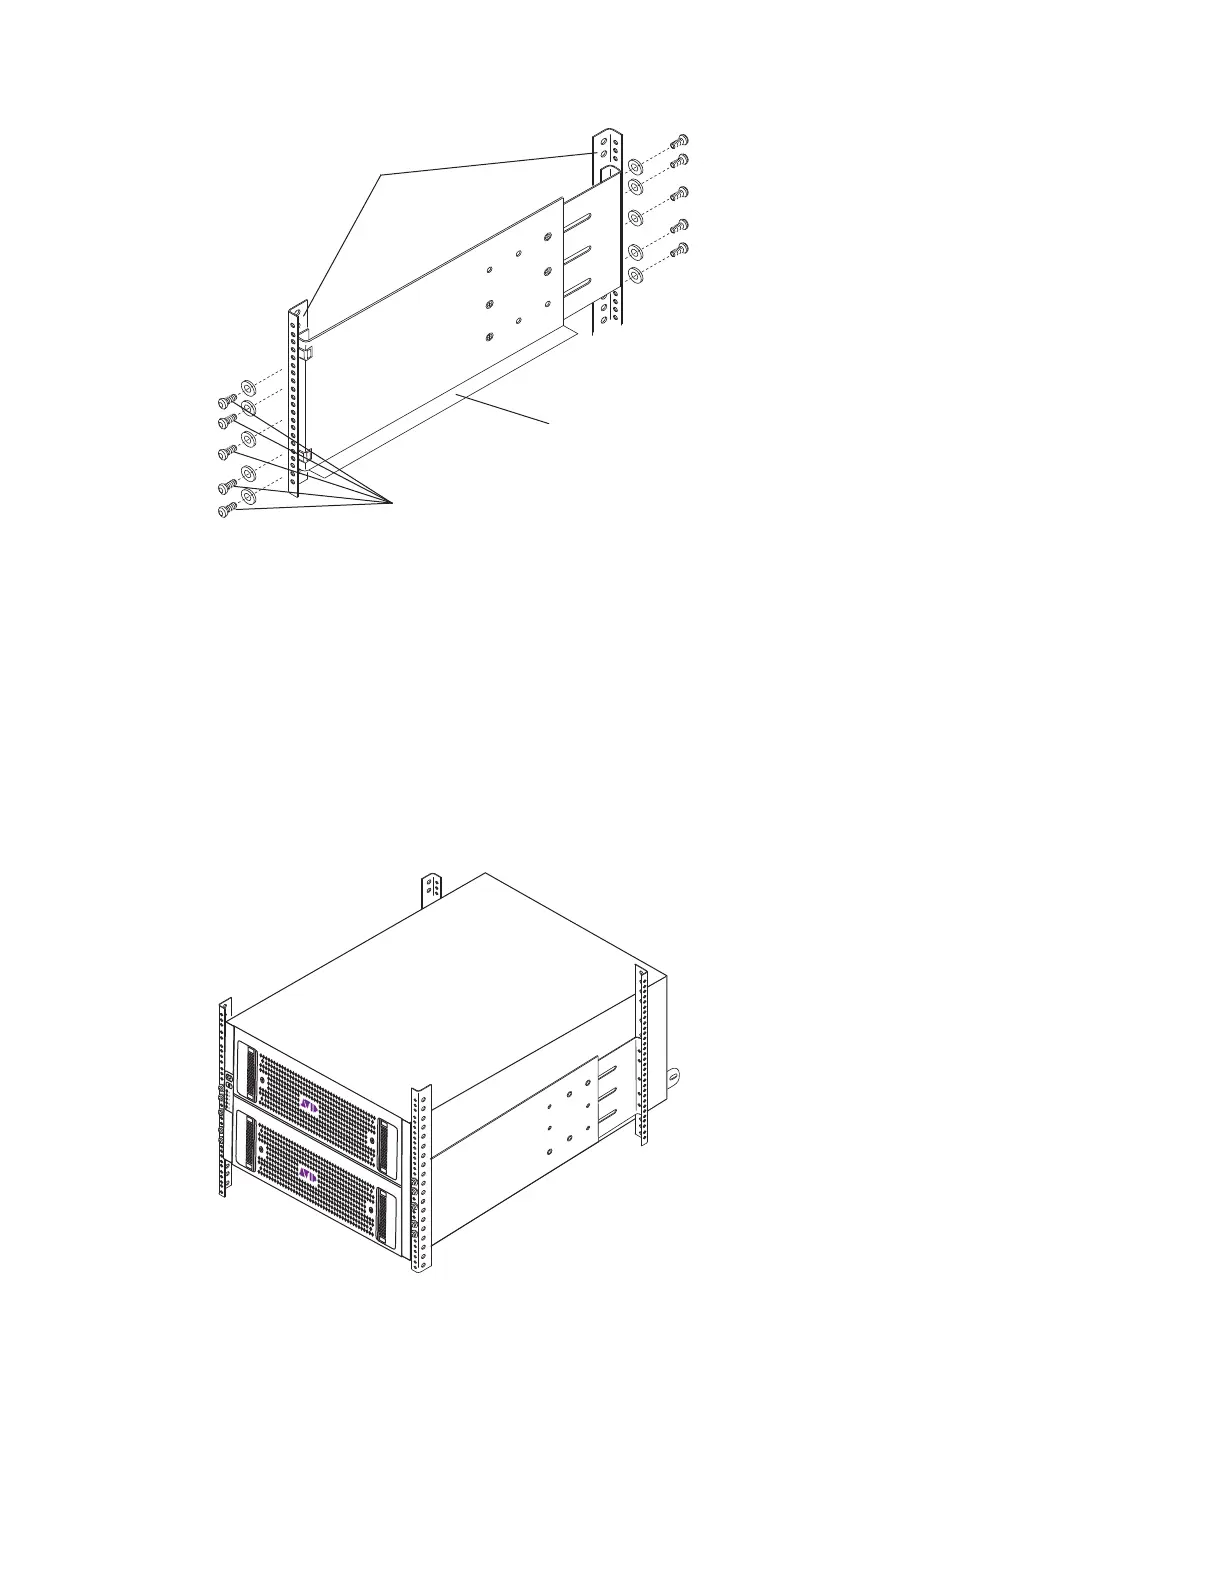
8. With an assistant, lift the Engine and place the rear of the Engine onto the brackets as shown in the following
figure.
9. Position the bracket extender on the outside of the rear mounting rail so that the sliding nut in the bracket
extender inserts into the rack mounting tab on the Engine. Using the short screws included in the rack mount
kit, secure the bracket extender to the rack mounting tab on the Engine as shown in the following figure.
The rack mount kit provides two sets of bracket extenders: a long pair and short pair. Use the pair of bracket
extenders that are most appropriate for your rack. For shallower racks use the longer bracket extenders.
Rack mount screws
Bracket rail
Rack enclosure
Mounting rails